Liquid UI - Documentation - 7.17 statusmessage()

7.17 statusmessage()


Purpose

With statusmessage(), you can display the messages related to the status of the SAP process while executing the WS script. Generally executing this command in a function displays the following types of messages on the listbox.

  • Display a status message listbox
  • Display custom messages
  • Display system messages
  • Display IDs for system messages

All messages appear in an onscreen message box.


Syntax

statusmessage({"title":"Title","size":[rows,cols],"position":[startRow,startCol]});


Available Options

You can use the following options with the statusmessage:

"addstring":".."

{"addstring":variable_name} or {"addstring":"string"} - Adds a custom message within the dialog box (listbox).

"position":".."

{"position":[startRow,startCol]} - Specifies the onscreen position of the messagebox.

"remove":".."

{"remove":true} - Removes the listbox from the screen.

"size":".."

{"size":[rows,cols]} - Specifies the size of the onscreen listbox in rows and columns.

"title":".."

{"title":variable_name} or {"title":"title_string"} - Creates the title to the onscreen listbox.


Options Detail

addstring

  1. This option adds a custom message within the dialog box.

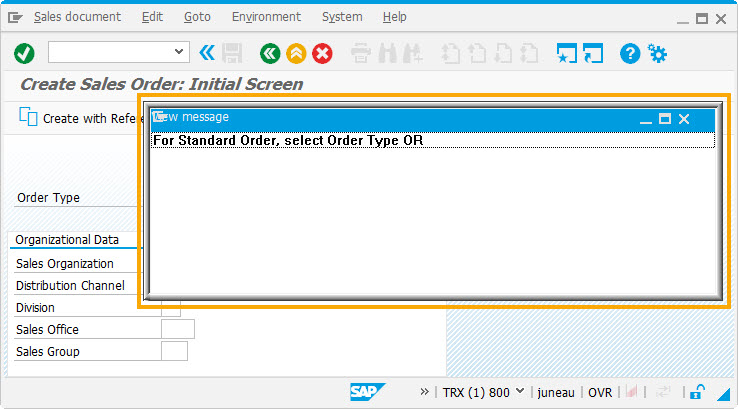
  2. statusmessage({"title":"View message","addstring":"For Standard Order, select Order Type OR"});
  3. As per the code, a listbox appears with a status message specified in the addstring. The user can also read the message from a variable by adding it to the addstring option.

position

  1. This option specifies the onscreen position of the messagebox.

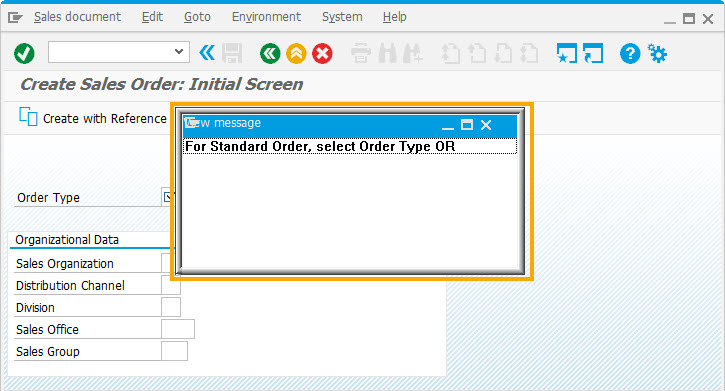
  2. statusmessage({"title":"View message","position":[10,10],"addstring":"For Standard Order, select Order Type OR"});
  3. As per the code, the status message appears at 10th row and 10th column of the SAP screen.

remove

  1. The remove option removes the listbox from the screen. Do not use this option in the initial statusmessage() command because the listbox will disappear even as it is called.

  2. statusmessage({"remove":true});
  3. The remove option removes the status message from the screen.

size

  1. The size option specifies the size of the onscreen listbox in rows and columns.

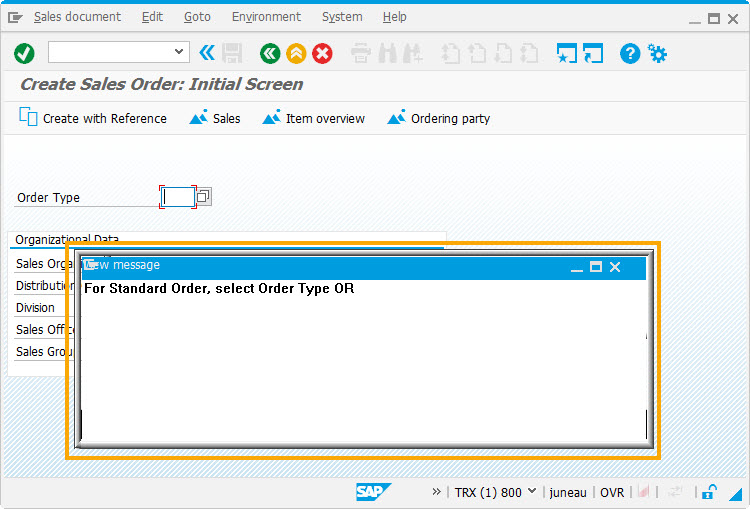
  2. statusmessage({"title":"View message","size":[8,50],"addstring":"For Standard Order, select Order Type OR"});
  3. As per the code, the status message is displayed in 8 rows and 50 columns.

title

  1. The title option creates the title to the onscreen listbox. As in the case of the addstring option, variables can be used to pass content to the status message.

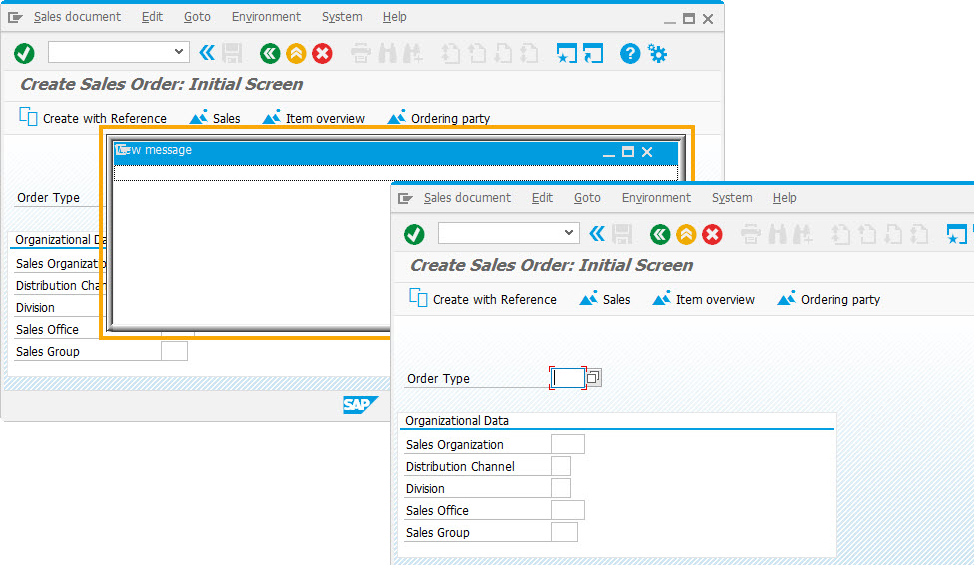
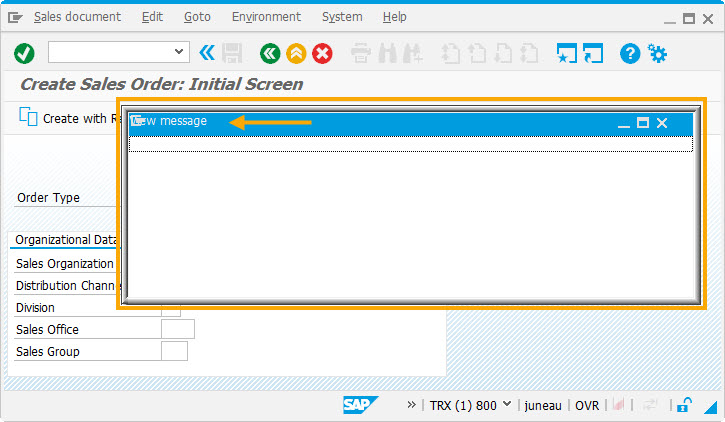
  2. statusmessage({"title":"View message"});
  3. As per the code, the listbox is displayed with a title on the header section.


Example


Script

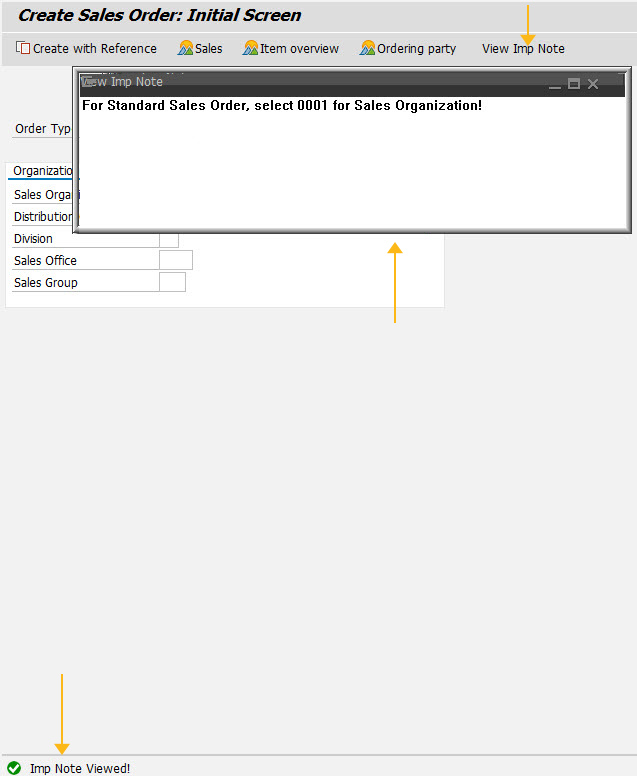
var z_title = "View Imp Note";
var z_strng = "For Standard Sales Order, select 0001 for Sales Organization!";
pushbutton([TOOLBAR],"View Imp Note", {"process":z_statmsg});
function z_statmsg() {
 //statusmessage({"remove":true});
 statusmessage({"title":z_title,"size":[8,80],"position":[5,10],"addstring":z_strng});
 message("S: Imp Note Viewed!");
   }


Usage Details


Can't find the answers you're looking for?