

This section will discuss the system requirements for installing GuiXT and the process to install it on a single system. The following topics are covered:
Before GuiXT can be installed on an individual system, it is necessary to ensure that the target system can support the installation of SAPGUI. Once that is done, the following requirements must be met:
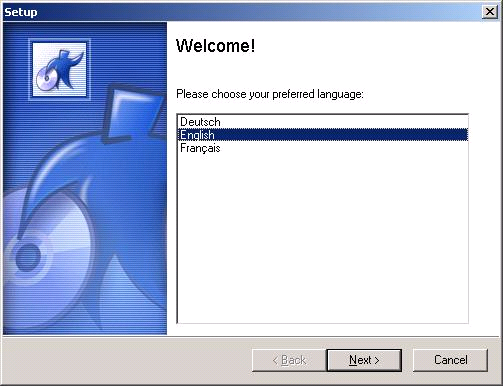
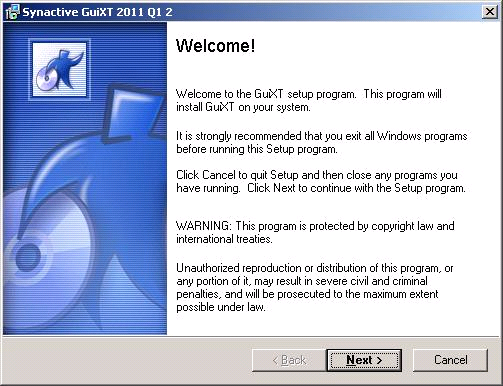
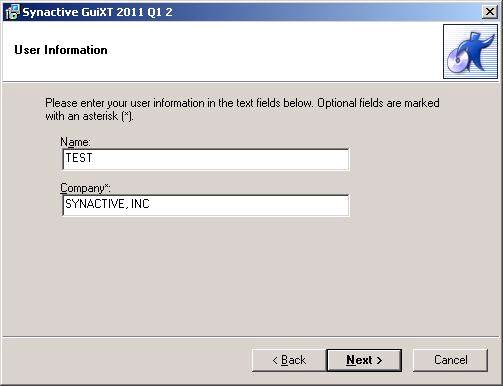
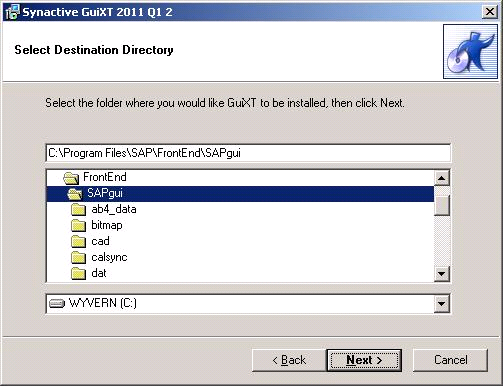
As previously discussed, there are two methods of deploying GuiXT depending on whether or not GuiXT Server is to be used. We will cover only the individual installation in this document - Server is covered in the GuiXT Server documentation. To install GuiXT, please do the following:


The InstallShield Wizard will install the following files into the C:\Program Files\SAP\FrontEnd\SAPgui directory:
To activate GuiXT, please do the following:
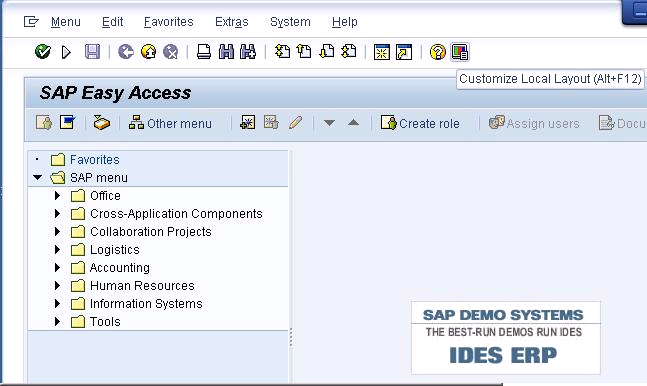

It is sometimes necessary to hide the option to activate GuiXT. To hide this option it will be necessary to make changes to the system Registry.
Editing the registry is a highly dangerous process and should only be performed by an advanced user. Altering the registry can cause your computer to stop working correctly and could cause damage to your files.
To edit the Registry in order to hide the GuiXT option, please do the following:
It is important to deploy GuiXT in the most optimal manner possible and there are several different possible deployment possible. Depending on the deployment desired, it might be necessary to change the parameters in the configuration file. These parameters will be covered in the Configuration section later in this document. In this section, we will cover the following topics:
As was previously mentioned, GuiXT is bundled with SAP, so deploying it on a single desktop merely involves activating it as described in the previous section. However, it is important to have the latest versions of the GuiXT files. The process to upgrade GuiXT is as follows:
It is also possible to centralize the GuiXT implementation by adding an option to the GuiXT.ini file to allow GuiXT Server to provide all configurations for the individual systems. To enable this, please do the following:
It is possible to deploy GuiXT in conjunction with a Citrix environment. However, if this deployment is chosen, scripts must be stored on the individual local systems. Network script repositories are not recommended. To deploy GuiXT on Citrix, please follow the steps listed in the Desktop Deployment section above.
There are four possible methods for deploying scripts with GuiXT. Each of these methods has strengths and weaknesses. These methods are as follows:
Storing scripts on the userís local drive is normally used by developers and by very small testing teams. This method is very easy to set up and use and also has the advantage of allowing developers to have complete control of the scripts they create. Modification and deletion are both very easy when scripts are stored on the local drive.
However, this method has a few negatives as well. Chief among these are the difficulty of maintenance Ė any changes much be made individually to each userís script. This makes local drive storage an inefficient option for large groups of users. In addition, users have complete control, so it is easy to make unintended modifications or even accidentally delete a script.
Example of a local directory in the GuiXT.ini file:
Directory1 C:\guixt\scripts
Storing scripts on a network file share is used by developers, testing teams and end-users. This method allows for the easy set up and use of scripts while at the same time enabling centralized management. Access to the scripts can be managed by using network policies and the network traffic can be reduced by using GuiXTís File Replication option.
However, using a network file share also has potential problems. The main one is that using a network fiel share introduces another dependency into the GuiXT environment. Additional replication must also be set up if different servers are being used across the WAN. And all users must have the requisite privileges set up for them to access the scripts.
Example of a network file share in the GuiXT.ini file:
Directory1 \\Demoserver\\GuiXT\\scripts
Another option is to create a repository for the scripts on a Web or FTP server. It offers many of the same benefits as the network file share, although it also introduces some of the same potential for problems. The advantages of using a Web or FTP server to host the scripts are the ability to access the scripts across the entire network, the centralized management of the scripts and the use of the File Replication option in GuiXT.
The downside of Web or FTP file sharing is that it creates an additional dependency on the Web or FTP server. Network file sharing also can introduce uncertainties into the download time for the scripts, since they are dependent on the server response time. And all users must have Web/FTP access configured.
Example of a FTP or Web share in the GuiXT.ini file:
Directory1 http://www.userserver.com//GuiXT//scripts
Housing the GuiXT scripts in the SAP Web Repository allows for centralized script administration by utilizing SAPís built-in transport and correction mechanism. In addition, automatic caching reduces script downloads and there are no external dependencies. Finally, change access can be controlled using SAPís own authorization mechanism. Web Repository also offers users the advantage of storing scripts, images and HTML templates in a single location.
However, using SAP also means additional RFC overhead since the scripts will be retrieved from SAP using remote function calls (RFCs). The other major issue is that once the scripts are uploaded, changes are difficult to apply, making it less amenable to change.
Example of a Web Repostory script folder in GuiXT.ini file:
Directory1 SAPWR:ZGuiXT.DEMO
Please note that RFC is executed in Client 000 unless explicitly specified in the GuiXT Profile. In addition, the RFC username and password must be present for GuiXT using the default RFC user SAPCIPC and the password 'admin'. Finally, the RFC user must have the proper authorization for GuiXT. The functional groups are SHD0 and SURL.
To use SAP Web Repository, add a string beginning with 'sapwr' to the GuiXT.ini. If you are using Profile tool, add the string in the 'Script1' field. Since customer-specific objects begin with the letter Z in Web Repository, the name the user chooses should also start with Z (eg. sapwr:z_guixtobjects).
In a script, if an image or other script without specifying the path, it will automatically be searched for in the same location where the calling script resides. In this case, that would be the Web Repository. It is better to specify a location, so the user would add the path to the image (eg. "SAPWR:Z.IMages.logo.gif"). The same notation can be used in local scripts.
It is also possible to specify a different SAP system. For example, let us suppose that we are storing scripts or images in a different SAP system. We can use the option 'dest=xxx' to specify the system in question. See the example below:
sapwr, dest=S46:z.guixtobjects
If this method is used, the access must be specified in the saprfc.ini, which is usually found in the SAp work directory. Please see SAP's documentation for more detail. This method is particularly uiseful when users want to use production system scripts on a test environment.
In order to transport objects between multiple systems, it is necessary to create a development class. This can be done with the transaction 'SE80'. Once the development class has been created, users can utilize the transaction 'SMWO' to create images, scripts, or other objects. The notation is shown in the following examples:
In the SMWO transaction, it is necessary to select 'binary data' in the initial screen. The binary type cannot be modified during the download of files. It is also recommended to use meaningful file names - this will save times during later searches. To create the new objects, please do the following:
In this section we will cover some of the most frequently asked questions regarding the deployment of GuiXT. Topics covered include:
As explained above, scripts can be stored in four different places. These places are as follows:
For additional information, please see the Script Deployment section above
It is possible to push GuiXT to the client machines from a central server. Synactive offers the option of using a script-based installer that will run when a user logs on to the network. Administrators can add this to the logon script. The script has zero footprint and does not need to be installed on the target machine. The install program the script will trigger is completely configurable and can be modified to fit the customerís environmental requirements. The install program will perform the following actions:
Once GuiXT is installed on the target system, the install log can be copied to the server for monitoring and maintenance purposes.
The following files are modified or replaced during an upgrade:
Scripts are developed using the GuiXT Designer. The functional department will be responsible for the content development and Synactive conducts training classes on script development. When SAP makes changes, there is a possibility that any scripts developed for earlier versions may be affected. Contact Synactive Professional Services or Support for specific questions about your environment.
Network traffic is that of opening a file across a network. However, it is possible to configure GuiXT to cache the script files. The cached files will be stored on the local machine until the remote shared file is changed. At that time, any files that have changed will be re-copied.