Mobile Configuration
Once GuiXT Mobile is installed on he target mobile device, there are a number of configurations that can be performed. In this section, we will explain each of these configurations. Topics covered are as follows:
Smart Attributes
Smart Attributes are special settings that the script editor attaches to a given edit field. There are four available smart attributes, as follows:
There are several keys that can be used for the various Smart Attributes. These keys and their associated values are as follows:
- rf_pattern: A string containing '?' and/or '*'. Can also contain literals.
- rf_validate: A string containing transaction codes.
- rf_autotab: An integer specifying number of seconds to delay before proceeding to next field.
- rf_page_autosend: A string containing a transaction code to execute.
These keys are used as shown in the following examples:
To specify that an inputfields will contain a pattern of '??' with an Auto-Submit tcode of 'MM01' and a auto-tab delay of 3 seconds, we would use the following code:
inputfield (1,14) size=6 rf_pattern=?? rf_page_autosend=/nmm01 rf_autotab=3
To specify an inputfield with a pattern of '1080-* and an autotab delay of 2 seconds, we would write the following:
inputfield (2,14) size=16 rf_pattern=1080-* rf_autotab=2
To create an inputfield with a pattern of '????-01-????????' and an auto-tab delay of one second, we write the following:
inputfield (3,14) size=16 rf_pattern=????-01-???????? rf_autotab=1
To create an inputfield with a pattern of ??? and an autotab delay of one second, we write the following:
inputfield (4,14) size=16 rf_pattern=??? rf_autotab=1
To create an inputfield with a pattern of *bin and an autotab delay of three seconds, we write the following:
inputfield (5,14) size=16 rf_pattern=*bin rf_autotab=3
To create an inputfield without any pattern matching and an autotab delay of three seconds, we write the following:
inputfield (6,14) size=16 rf_autotab=3
To create an inputfield without any pattern matching or auto-tab, but with a validation tcode of 'MMBE', we write the following:
inputfield (7,14) size=16 rf_validate=/nmmbe
Pattern-Matching
Pattern-matching is used to match input received from either a user or from scans performed by a barcode reader to a specific field on a page. This is useful because in normal usage, users would have to manually ensure that they are on the correct field. If the field is not correct, the user will have to manually tab or click to the field in question. On a handheld, where there is often no Tab key, this is inconvenient at best.
However, pattern-matching enables a script to mark a field as containing a specific pattern of alphanumeric characters. GuiXT Mobile can then check the input against the patterns for each field and place the correct input in the desired field automatically. The way this works is that once a user enters input, the Mobile application will search each field for a match to the patterns contained in the user entry. Once a match is found, Mobile will enter the data matching the field pattern into the field in question, replacing any existing data. If no fields with matching patterns are discovered, the application will return an error in the Status bar at the bottom of the screen.
The user typically will execute a 'done entering text' action to signify that he or she is finished entering data. This action can take a number of forms. Some common examples are pressing the Tab or Enter key or moving the cursor into another field. Actions that change an attribute but do not cause any action to occur, such as selecting a radiobutton or checking a checkbox also are actions that will send the 'done entering text' signal to Smart Attributes. In addition to the actions that send the 'done entering text' signal, there are also some user actions that will override the Smart Attributes instead of performing them. These actions are typically those that are intended to cause an action to occur and therefore should not be interrupted by the Smart Attributes. Examples of these are as follows:
- Selecting a menu item
- Choosing a pushbutton
- Choosing an F-key
- Pressing Enter/Return key
The variables used to define a particular pattern for a field are as follows:
- '?': Matches any alphanumberic single character. So three '???' would equal '100', 'cat', 'C1d', etc.
- '*': Matches beginning or end of any string of characters. So 'cat*' could be the equivalent of 'catastrophe', 'cat15marin59x', 'cat1', etc. Similarly, '*bin' could be the equivalent of 'Fizzbin', 'etcbin', 'stickbin' etc.
See the following example:
Example: A page contains three fields with the following patterns:
- Field1: Pattern attribute is 'rf_pattern'; string is '???'
- Field2: Pattern attribute is 'rf_pattern'; string is 'bin*'.
- Field3: Pattern attribute is 'rf_pattern'; string is 'am2-?00'.
The user will enter the following input, separated by a tab:
Result: GuiXT will automatically input the following based on the patterns associated with each field:
- Field1 = '100'
- Field2 = 'bin34789897'
- Field3 = 'am2-400'
Validation
The Validation Smart Attribute determines whether or not the input entered by a user is valid. This determination is performed by matching the user input to the application's criteria for determining valid and invalid input. For example, if the valid input for a given field is restricted to numeric characters and the user enters alphabetic characters, the validation will fail for that particular field and return a message so informing the user.
When SAPGUI is used, the validation process is normally performed when a page is submitted to the SAP application server. However, individual fields can be validated prior to this step by marking them for validation. Marking a field for validation informs the application that the field should be validated immediately following any pattern-matching. The validation process is usually triggered by a 'done entering text' signal, as defined in the preceding Pattern-Matching section. If a single field is to be validated, the application displays a 'post-validation' screen. This can be either the previous screen with the user input or an entirely different screen. When an entire page is displayed, the post-validation screen does not appear- instead the ensuing screen in the process will display instead.
Any screens that already contain text are assumed by Mobile to be already validated. However, if any input is altered or modified by a user, then the field will be re-validated when the page is submitted for validation.
The validation process is mostly transparent to the user. When the 'done entering text' signal is transmitted, the screen will clear and the validation will be performed by the script. The author of the script can specify a number of variable actions, such as the following:
Screen to display when validation is complete
Field to have focus in post-validation screen
In addition, script authors can specify transaction codes, function codes (Fcodes) and internal Fcodes. In the case of Fcodes or internal Fcodes, the script author can identify the Fcodes and perform validation on the input.
Auto-Tab
The Auto-Tab smart attribute is designed to eliminate the necessity for users to manually tab after entering data into a field. While it can be used for situations where users are manually entering text, the most common usage is with bar-code readers where field entry is performed by doing a scan.
In either case, the value embedded in the Auto-Tab smart attribute specifies a delay time in seconds. The counter begins and resets when any character is entered into a field marked with this attribute. The way it works is that once a character is entered, Mobile will automatically tab to the next field when the delay time is passed. For example, if the Auto-Tab has a delay time of five seconds, then five seconds after the first character is entered, Mobile will automatically tab to the next field. Mobile automatically dete4cts whether a barcode is or is not being performed. If a barcode scan is performed, Mobile will auto-tab to the next field one second after the scan is completed regardless of the value specified for the Auto-Tab attribute. If there is a significant pause in the data entry (currently set at five seconds), Mobile will assume the user is done entering text on that field, but will not tab to the next field.
Since Auto-Tab is treated the same as a 'done entering text' signal, pattern-matching and validation can also be performed on the fields after an Auto-Tab occurs.
Auto-Submit
The Auto-Submit smart attribute is designed to execute a transaction code or function code after entering all data into all the fields on a specified page. It can be used for manual typing, but it is most commonly used in situations where barcode readings are being scanned. If any field on a given page is marked with the Auto-Submit attribute, then Mobile will automatically execute the transaction or function codes assigned to the attribute as long as all fields on the page contain valid input.
Because Auto-Submit takes place only when all fields on a given page contain valid entries, it can only occur after both pattern-matching and validation are performed. It is also mostly transparent to the user. Once pattern-matching and validation are performed on the screen in question, the script will clear the current screen, catch the instructions contained in the Auto-Submit attribute and then a new screen which can be either the same screen or a different screen will appear. The script author can specify what actually will occur when Auto-Submit is performed.
Creating Connections to SAP Application Servers
In order to connect to SAP, it is necessary to create a connection on the Mobile device. To create a connection to a SAP application server, please do the following:
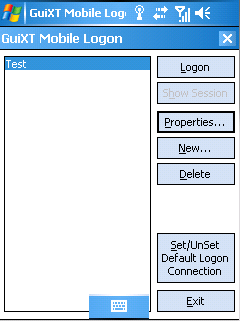
- Double-click on GuiXT Mobile icon to launch the application as shown below:
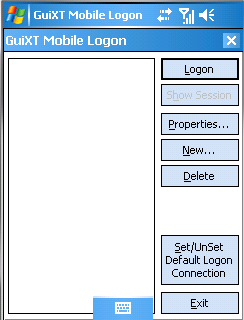
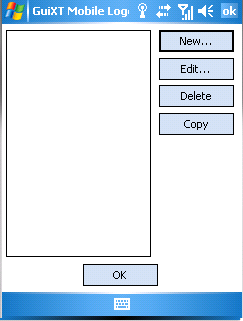
- Click New to create a new connection to a SAP application server:
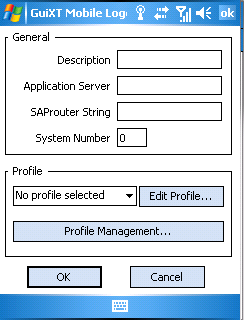
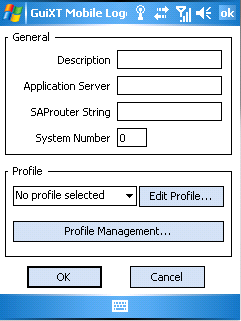
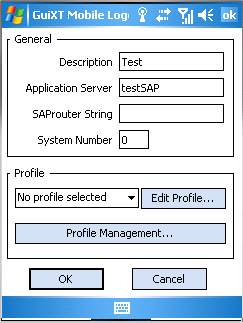
A new window displays. In the Description field, enter a description of the SAP system. In the Application Server field, enter the name of either the GuiXT Server or the SAP application server. Please note that in order to perform printing functions, GuiXT Mobile must connect to SAP through a GuiXT Server.
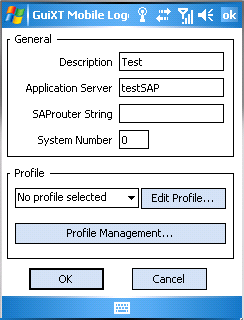
- On the same screen, verify that the SAP Routing String is left blank. This enables the device to connect via a SAP router in future. Finally, enter the system number of the SAP system in the System Number field:
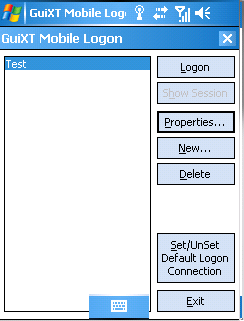
- Click OK. A new entry will be added as shown below:
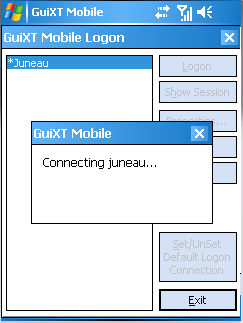
- Double-click on the connection and click the Logon button to initiate a connection with the SAP application server. A logon screen is displayed as shown below:
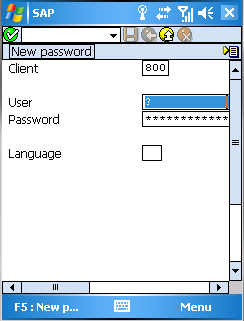
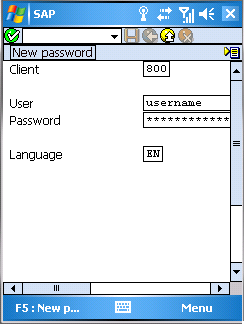
- Enter the client ID, user name, password and language ID into the appropriate fields as shown below and then click Enter:
- The SAP Navigation Menu is displayed as shown below:
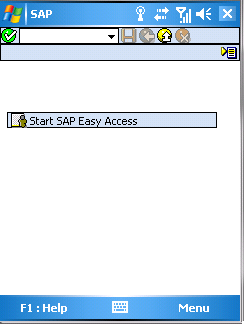
- The connection from the Mobile device to SAP has been successfully established.
- To close the connection, choose View > Close connection from the menu as shown below. Closing a connection disconnects GuiXT Mobile from the SAP application server and closes all sessions.
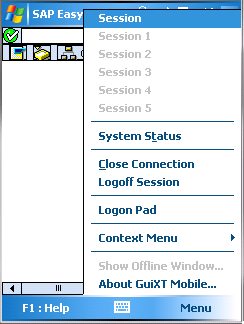
- To close a single session, choose 'View > Logoff Session'' from the menu shown above. This will close a single session but will not disconnect the device from the SAP application server if additional sessions are open.
Executing Transactions In GuiXT Mobile
- In the SAP Navigation screen, type a transaction into the command box. In our example we will use the tcode 'VA01'
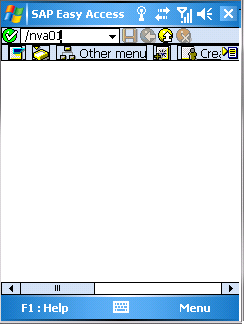
- The VA01 screen displays as shown below:
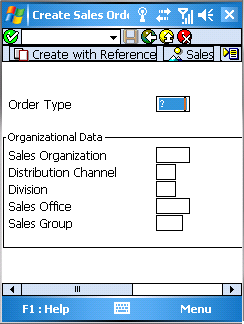
- Enter some appropriate values into the VA01 screen and press Enter. We entered the order type 'OR' only. The following screen displays
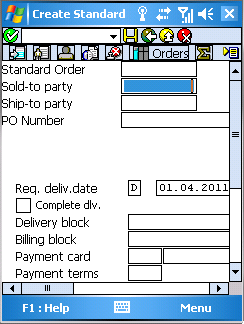
- Click OK.
- Enter appropriate line item values and use the arrow buttons to tab between fields.
- When finished entering data, choose the Save icon in the menu bar (shown below):

Creating Profiles for GuiXT Mobile
It is convenient to have user profiles in order to utilize GuiXT Mobile. Profiles enable users to perform auto-logon as well as specify different SAP ERP systems. To create a new profile in GuiXT Mobile, please do the following:
- Choose a connection for which a profile will be created and click the Properties button:
- In the Properties window, click the Profile Management button shown below to create a new profile:
- The following screen will display. Choose the New button.
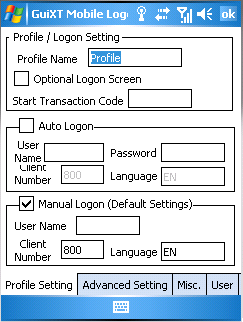
- The Profile Setting window will appear as shown below. For a complete list of all applicable Profile Settings, please see the Basic Profile Settings list in the Help section.
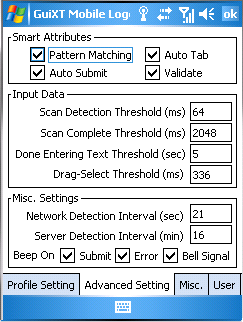
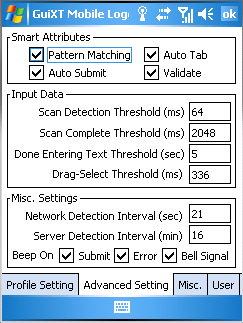
- Specify the Advanced Settings. For a complete list of all applicable settings, please see the Advanced Profile Settings list in the Help section.
- Specify the Miscellaneous Settings. For a complete list of all applicable settings, please see the Miscellaneous Profile Settings list in the Help section.
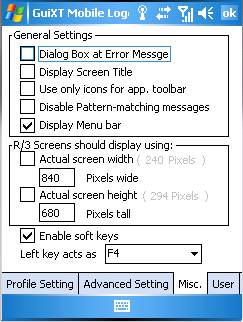
- Specify the User Settings. For a compete list of all applicable user settings, please see the User Profile Settings list in the Help section.

- Click the OK button in the top left corner to create the profile. The new profile will display in the Profile Management screen as shown below:
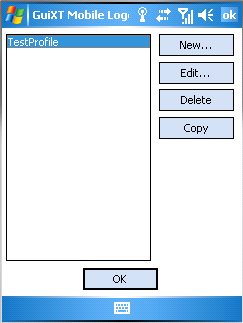
- Click OK to save the new profile.
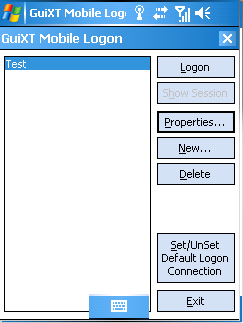
- To connect using the new profile, first select the connection entry as shown below and then click the Logon button:
- To make the selected connection and profile the default for future connections, select the desired default connection and click 'Set/Unset Default Logon Connection'. The connection will be marked as shown below:
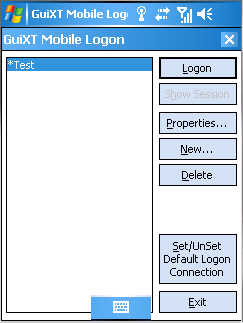
- The profile is now created and set as the default for connecting to SAP.
Configuring SAPLOGONPAD LOCKDOWN
There may be times when it is necessary to lock down the SAPLOGONPAD. To lock down the logon pad, first ensure that a default connection is set and that the GuiXTMobile.sy3 file attribute is set to 'read-only. Once these two actions are complete, please do the following:
- Copy the existing GuiXTMobile.sy3 file from the device to the desktop.
- Right-click and choose Properties. If the 'Read-only' attribute is checked, uncheck it to enable editing.
- Copy the GuiXTMobile.sy3 file back to the Mobile device.
- Launch the GuiXTMobile application and select a system.
- Select the 'Set/Unset Default Connection' button set the default connection.
- In the default connection, click Properties > Profile Management.
- Choose the profile to be modified and click Edit Profile.

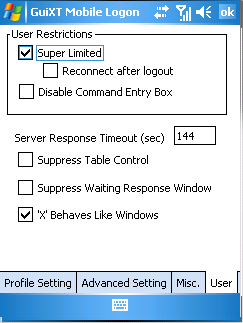
- To further restrict the settings, it is possible to choose the Super Limited profile in the User Tab as shown below:
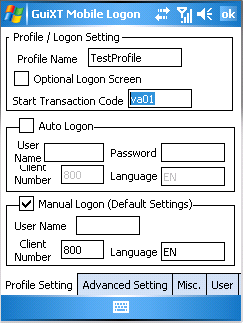
- It is also possible to click the Profile setting tab and specify the Start Transaction Code as shown below:
- Click OK to save the profile and exit the logon pad.
- Copy the GuiXTMobile.sy3 file from the device to the desktop and change the file attribute back to 'Read-only'. This must be done in order to lock down the logon pad. Once the Read-only box is checked, copy the GuiXTMobile.sy3 file back to the device.
- Start the GuiXT Mobile application. The Logon button should appear as being inactive and grayed out.
- If the Logged on Session is still available, click Show Session to show the current SAP session. Click Exit to exit the logon pad.
Suppressing Idle Time Auto-logout
It is possible to configure GuiXT Mobile so that the idle-time auto-logout is suppressed and the device will always stay connected to the SAP ERP application server. Based on the Server Detection Timeout setting defined in the Help section, constant network traffic to the SAP will be generated, resetting SAP's auto logout timer and ensuring the device remains connected.
In order to suppress the idle time auto-logout, users must have a profile for the specified connection to the SAP application server. Creating a profile is explained in detail in the Creating Profiles section of this document.
Once a profile is configured for the connection in question, please do the following in order to suppress the idle time auto-logout.
- In the Advanced Setting tab of the Profile, configure the 'Server Detection Interval' parameter as shown below. Please note that the 'Server Detection Interval' parameter must be set to less than the SAP ERP application server's auto logout threshold. The transaction for this is RZ11 and the parameter is 'RDICP/GUI_AUTO_LOGOUT'.
- In the User Settings tab of the Profile, check the 'Suppress Idletime Logout' option as shown below:

- The device should now stay constantly connected to the SAP ERP application server until the connection is manually terminated by the user.