Server Configuration
This section covers the configuration of a GuiXT Server. There are three sections, as follows:
The client computer is configured by way of a SAP Router string. This string is entered in the server properties box in SAPGUI itself. The system properties box looks as shown below:

The system properties box contains the following information:
- Description: The description can be literally anything. Typically, this is the name of the SAP server the user will connect to. In our example, the description is ‘GuiXT Server’.
- Application Server: The application server is the name of the application server the user will connect to. In our example, the application server is ‘juneau’.
- System Number: The system number is the system number of the application server. In most real-world cases, this will be ‘00’ as in our example.
- System ID: The System ID is the SAP box to which the Server will be connecting. The System ID can be different depending on the corporate environment. Some examples might be ‘DEV’ for development, ‘QAS’ for regression testing or ‘PRD’ for production. Each of these can have specific data and restrictions associated. For example, development might be prohibited in PRD so as not to risk damaging the production system or data.
- SAP Router String: The SAP Router string contains the actual IP address of the application server. In our example, the address is ’10.0.0.42’.
GuiXT Server is configured by means of two main configuration files. These files are as follows:
GuiXT.ini
The GuiXT.ini configuration file is where many parameters are defined for the implementation of the GuiXT environment. it is located in the C:\Program Files\Synactive Inc\GuiXTServer\ folder. A sample Server guixt.ini file is shown below:

- IgnoreRegistry: Directs GuiXT to ignore the local GuiXT profile.
- Directory1 - Directory4: The location of the script files. Up to four directories can be specified to contain GuiXT scripts.
- Key: The license key. GuiXT itself does not need a license key, but Server and all other Synactive components do require a key. Customers receive keys from Synactive Sales or Support representatives.
- Component: This specifies how many Synactive components are installed. In our example, we have four components installed - GuiXT, Input Assistant, Viewer and Designer.
The other possible configuration settings in the file are not required for a successful implementation of GuiXT Server. However, they are defined as follows:
- StartMinimized: GuiXT will start with a minimized window.
- StartHidden: GuiXT will start with a hidden window.
- History: Refers to Input Assistant (IA) only. Specifies the directory for IA history.
- HistoryUpdate: Specifies if History update is active for IA.
- Domains: Specifies the directory for the local value help in IA.
- HistoryOnRightButton: Specifies if history is activated by the right mouse button.
- HistoryOnMiddleButton: Specifies if history is activated by the middle mouse button.
- Icon_tip_field: The ID for tooltip icons. Default is 'OL'.
- Icon_tip_box: ID for field group tips. Default is '35'.
- Option: User-defined options. Users can input their own options.
- Replication: Defines if file replication is active.
- Directory0: Specifies the file replication directory path.
- Testkey: If the customer has been issued a test license key, it goes here.
- Trace: Used for internal error tracing.
- Docu: Specifies the directory for the GuiXT documentation.
- Linksapurl: Specifies support for SAP URLs in normal HTML display mode.
- RFCUser: The username for RFC calls.
- RFCPassword: The password for RFC calls.
SAPProxy.ini
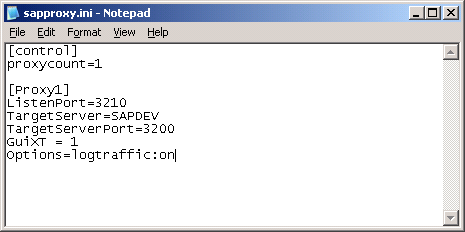
The SAPProxy.ini file is where the server configuration parameters are defined. It is housed in the same directory as the GuiXT.ini file. A typical SAPProxy.ini file will appear as shown in the following example:

The main parameters in the SAPProxy file are as follows:
Control
proxycount: Defines how many SAP ERP systems the GuiXT Server will connect to. IN our example, there is only a single SAP system involved. Client sites may have up to four proxies.
Proxy
Each proxy needs a separate entry in the configuration file. The entries contain the following information:
- ListenPort: This is the port that the GuiXT Server will listen to for information from SAP and the various clients.
- TargetServer: This is where the SAP ERP system is specified. Users can either use a name, as in the preceding example (eg. ‘juneau’) or a connection string. For more information about connection strings, please see the Connection Strings section.
- TargetServerPort: This is the system ID of the SAP ERP system to which the GuiXT Server will connect. The system ID is preceded by the number ‘32’. So if the SAP ERP system ID is ‘00’, the TargetServer number will be ‘3200’
- GuiXT: This is where users specify Classic or WS. If the implementation is Classic, the number will be ‘1’. If it is WS, the number will be ‘10’.
- Options=logtraffic: This is a Boolean that can be set to either 'on' or 'off'. Logtraffic will trace each and every network packet, writing the results as a log file. Logs will use the naming convention 'TL_*'. The 'logtraffic' option is added to the Sapproxy.ini under the keyword 'Options=logtraffic:on/off'.
To add trace options, please do the following:
- Open the Sapproxy.ini in a supported text editor. We usually use Notepad.
- Add the following keyword to the Sapproxy.ini file: Options=-logtraffic:on. This keyword will trace each and every network packet, writing the results as log files. The logs will use the naming convention: TL_*
- Once the log files are generated, send them to Synactive for review by a Supportspecialist.
Debugging
It is also possible to add trace options to the Sapproxy.ini file. Trace options assist in debugging GuiXT Server. They are shown in Sapproxy.ini as the following option:
Multiple SAP Instances
In the case of multiple SAP instances, the sapproxy.ini file must contain an entry for each instance. Each entry must contain the relevant information for that particular SAP instance. An example of a sapproxy.ini file where there are multiple SAP instances is shown below:

Note that the sapproxy.ini file now contains two entries - one for each SAP instance. Note that the port information and the server name information is unique. This is important - there cannot be two identically-named instances in the sapproxy.ini file. It is important to note that the proxy count in the [Control] section must equal the number of SAP instances as well. For multiple instances of SAP, it is necessary to create a unique connection for each in the SAP Logon Pad as well. Each connection instance will point to the same server, but will have a unique system number. IN the following screenshot, the server GUIXTSVR points to the local system, using the system number '32':

However, in the following example, the server is the same, but the system number has changed to '15'. This denotes a separate instance of the SAP server.

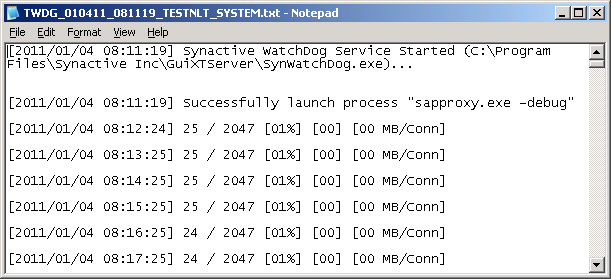
The SynWatchdog is a utility that will stop and restart GuiXT Server, regardless of what state the Server might be in. SynWatchdog can also record events and send warning emails to a system administrator. SynWatchdog is automatically installed by the InstallShield wizard. However, SynWatchdog is not set to start automatically - it must be manually started by a user.
Starting SynWatchdog
To start SynWatchdog, users double-click on the 'Synwatchdog-Service.bat' file located in the GuiXTServer folder. To set SynWatchdog to start automatically, please do the following:
- Go to Start > Run and enter 'services.msc'.
- The Services window will appear. Scroll down to the entry for 'Synactive Watchdog Service'.
- In the 'Startup Type' column, right-click and select 'Properties'.
- The Properties window will display. In the General tab, find the Startup drop-down menu and select 'Automatic' and then click OK.
- SynWatchdog will now start automatically when Windows starts.
Configuring SynWatchdog
SynWatchdog is configured through the SynWatchdog.ini file located in the GuiXTServer folder. A typical SynWatchdog configuration file looks like the following example. This example is based on the current release of SynWatchdog (v 2.2.2)

The SynWatchdog INI file contains a number of parameters, which are explained as follows:


