In addition to the the enter command's uses as defined above, it also can be used to trigger ActiveX menus such as SAP's Services For Object functionality. This is done by passing the codes directly through the enter command, instead of having you use the applyguiscript command to call an external VBScript, as was required in earlier versions of WS. This functionality enables you to attach files and perform other supported actions. Prevously, if you wanted to access the services for object, you would have to record the process in a VBScript and then cell it using the WS 'applyguiscript' command. This method had certain limitations, and so we have implemented a new way of scripting the Services For Object menu. This functionality was added in WS 1.2.213.0 and is available for all features of the Services For Object menu. The syntax is as follows:
enter({"control":"control_ID", "item":"item_code", "event":event_code});
Each of the parameters defines one aspect of the Services for Object menu. These are as follows.
- control
-
the 'control' parameter defines the actual ActiveX object. In our example below, we are referring to the Object For Services menu in the FBV2 transaction.
enter({"control":"GOSCONTAINERCTRL.Toolbar", "item":"item_code", "event":event_code}); - item
-
The item parameter refers to the sub-menu selection from the ActiveX menu. In our example, we will trigger the 'Create > Stopre business object' menu item.
enter({"control":"GOSCONTAINERCTRL.Toolbar", "item":"%GOSTOOLBOX;381;328", "event":event_code}); - event
-
Events are used to notify ActiveX containers that some action has been performed by a user. Some of the stock events that can be sent are clicks, key presses, double-clicks, and so forth. Each of these events has a code assigned so that we can easily specify which event will occur and we use the event parameter in our script to pass this event code to the the ActiveX control. In our example, we will send the event number '2', which is a click. The example code is shown below.
enter({"control":"GOSCONTAINERCTRL.Toolbar", "item":"item_code", "event":2});
Example: Object For Services
To demonstrate passing ActiveX parameters through the enter command, please do the following. In our example, we will trigger the Object For Services functionality.
-
Open the script file for the FV60 transaction. The script name is 'SAPMF05A.E1100.sjs'. Create this file if it does not already exist.
-
In the script file for the FV60 transaction, enter the following code:
load('performObjectForServices.sjs');

pushbutton([TOOLBAR], "Store Business Doc", {"process":objServicesExecute});
This code loads the file that contains the function that will actually trigger the Objhect For Services menu. It also creates a pushbutton on the screen and links it to the process that will execute the necessary actions.
-
Create a new script file and name it 'performObjectForServices.sjs'. This file will contain the actual function that executes our desired action on the Object For Services menu.
-
In the 'performObjectForServices.sjs' script file, enter the following code.
// Edit Parked Vendor Invoice 1900002694 1000 2006

function objServicesExecute() {

onscreen 'SAPMF05A.1100'
  enter({"control":"GOSCONTAINERCTRL.Toolbar", "item":"%GOS_TOOLBOX;381;328", "event":2});

// Edit Parked Vendor Invoice 1900002694 1000 2006
onscreen 'SAPMF05A.1100'
  enter({"control":"GOSCONTAINERCTRL.Toolbar", "item":"%GOS_ARL_LINK", "event":1});

}
This code performs several functions. in the first screen block, it calls the Object For Services menu. In the second screen block, it actually opens the 'Archives from Front End' popup window.
-
Save your changes and close the script files. Then launch and log into SAP GUI.
-
Go to the FBV2 transaction, and click the Document list (F5) button on the toolbar as shown below.
Note: note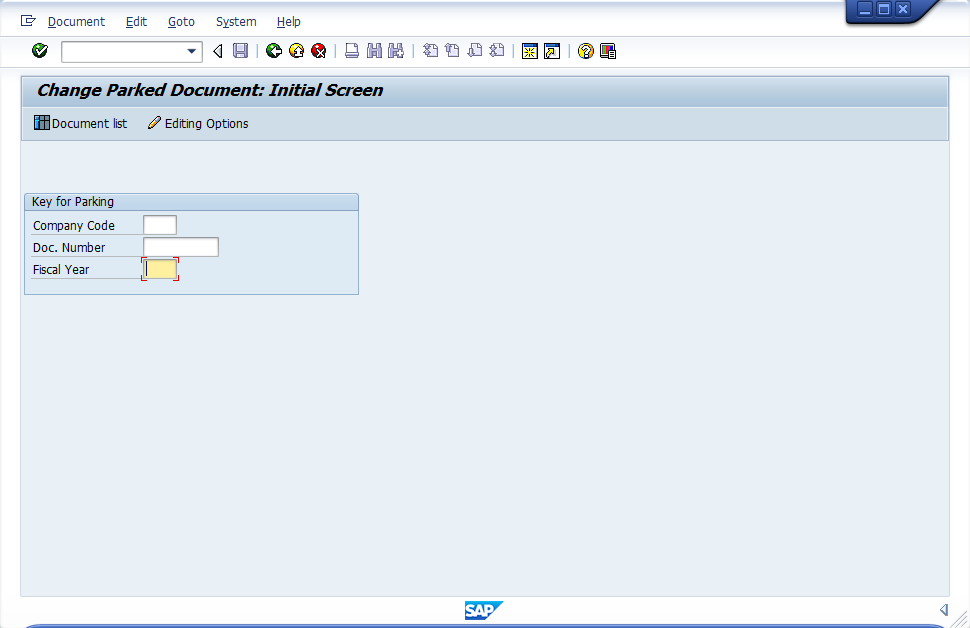
-
The search screen will display as shown below. Enter some values for an existing document to edit. In our example, we will use the values shown below.
Note: These values will probably not be the same on your environment. Use values for an actual document in order to see the results as shown in the example.- Company code: 1000
- Document number: 1900002694
- Fiscal year 2006

-
Once you have entered your values, click the Execute (F8) button shown below.
code sample
Note: note
-
Now click the toolbar Choose (F2) button. It is the first button on the grid screen as shown below.
code sample
Note: note
-
You are now in the FV60 transaction and the script you previously created will take effect. Click the GuiXT-created toolbar button Store Business Doc as shown below.

-
Clicking the Store business doc button will execute the WS script 'performServicesForObject' and will send parameters to the ActiveX Services For Object menu. In this example, we are triggering the action to store a business document, but you can use the same functionality to perform other actions on ActiveX controls as well. If the operation completes successfully, you will see the Archive from Frontend window appear as in the following example.
