Prerequisites
- Products: Liquid UI WS, Liquid UI Server or Local DLL, Client Software
- Commands: pushbutton(), onscreen(), enter()
Purpose
The article is a demonstration of how to use the enter() to launch ActiveX menus, including SAP's Services for Object functionality. It allows you to perform various actions such as accessing a user’s local file system. This is done by passing the codes directly through the enter command, instead of using the applyguiscript() to call an external VBScript, which was necessary for earlier versions of WS, focusing on the Park Vendor Invoice screen. Here, we’ll perform the following actions:
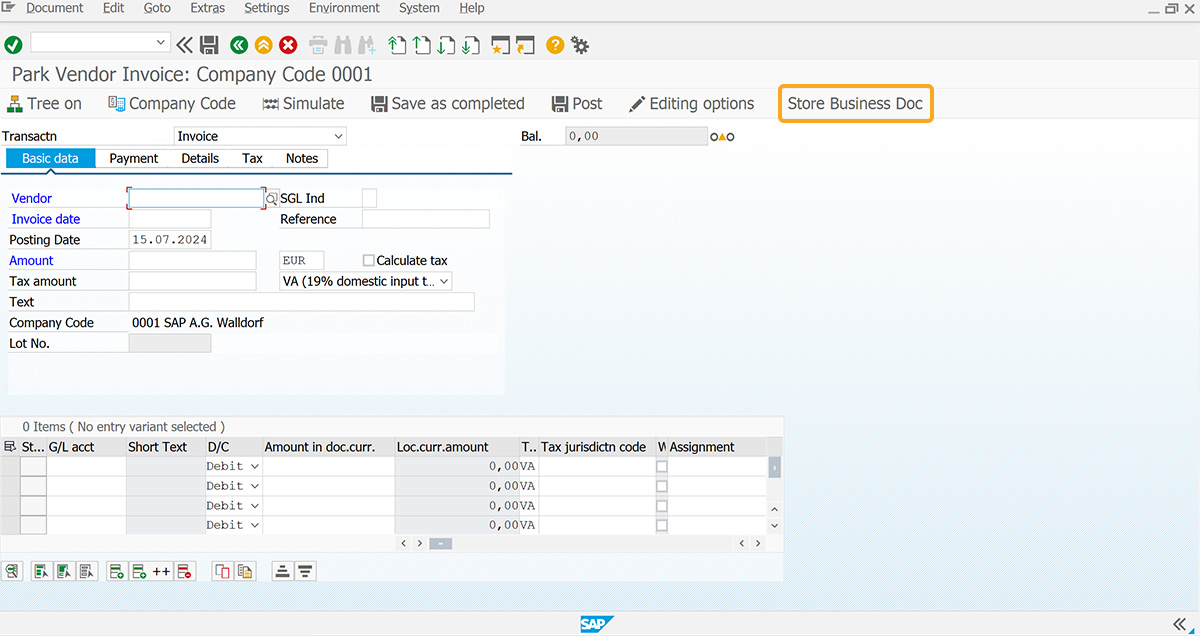
- Navigate to the FV60 transaction screen and add a push button to execute the process.
- Add a function to execute the specific functions on the SAP GUI environment.

Note: This functionality was added in WS 1.2.213.0 and is available for all features of the Services for Object menu.
Syntax
enter({"control":"control_ID", "item":"item_code", "event":event_code});
Parameters
Each of the parameters defines one aspect of the Services for Object menu.
control
The ‘control’ parameter defines the actual ActiveX object. In our example below, we are referring to the Services for Object menu in the FBV2 transaction.
enter({"control":"GOSCONTAINERCTRL.Toolbar", "item":"item_code", "event":event_code});
item
The ‘item’ parameter refers to the sub-menu selection from the ActiveX menu. In our example, we will trigger the 'Create > Store business object' menu item.
enter({"control":"GOSCONTAINERCTRL.Toolbar", "item":"%GOSTOOLBOX;381;328", "event":event_code});
event
Events are used to notify ActiveX containers that some action has been performed by a user. Some of the stock events that can be sent are clicks, key presses, double clicks, and so forth. Each of these events has a code assigned so that we can easily specify which event will occur and we use the event parameter in our script to pass this event code to the ActiveX control. In our example, we will send the event number '2', which is a click. The example code is shown below.
enter({"control":"GOSCONTAINERCTRL.Toolbar", "item":"item_code", "event":2});

Note: The control ID, the item code, and the event code can be obtained by recording the transaction in Liquid UI Designer, reading the generated script, and finding the appropriate codes.
User Interface
//Create the file SAPMF05A.E1100.sjs inside your scripts folder for customizing the Park Vendor Invoice: Company Code screen.
//Now, add the Liquid UI script to the above file and save it.
Customization
- Login to SAP, navigate to the FV60 transaction screen, and add a toolbar push button labeled Store Business Doc to execute the objServciesExecute process on click.
//Creates toolbar push button to execute the process
pushbutton([TOOLBAR], "Store Business Doc", {"process":objServicesExecute});

- Add the objServicesExecute function to execute specific functions in the SAP GUI environment.
//Function to execute specific functions in SAP GUI environment
function objServicesExecute()
{
onscreen 'SAPMF05A.1100'        enter({"control":"GOSCONTAINERCTRL.Toolbar",   "item":"%GOS_TOOLBOX;381;328", "event":2});
onscreen 'SAPMF05A.1100' enter({"control":"GOSCONTAINERCTRL.Toolbar", "item":"%GOS_ARL_LINK","event":1});
}
SAP Process
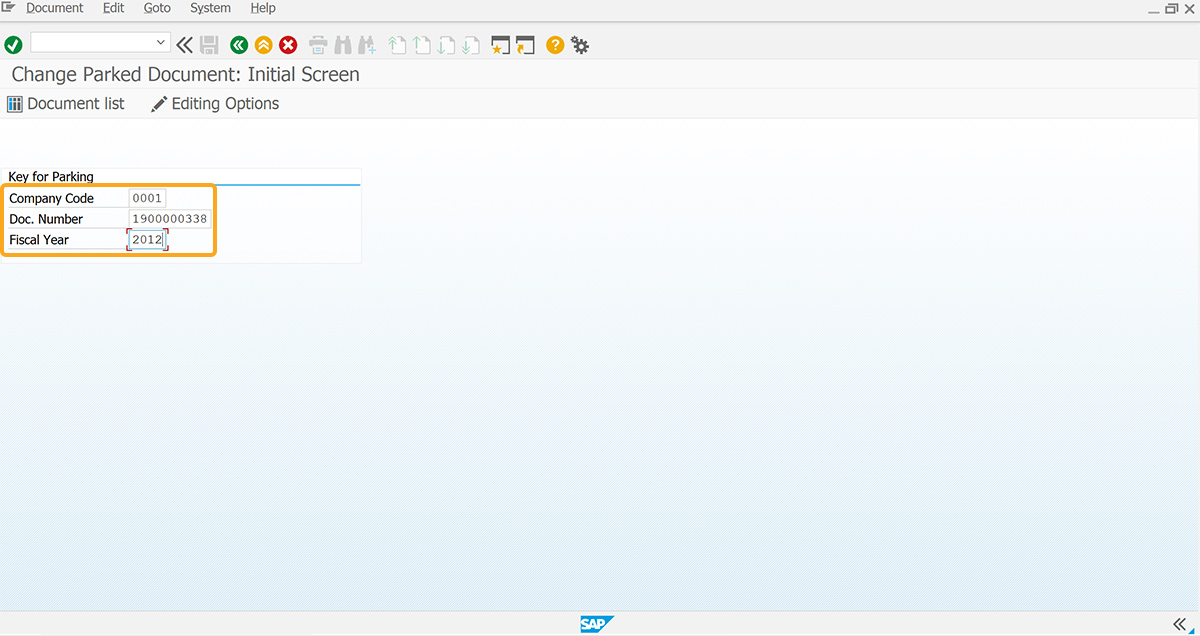
- Log in to SAP GUI, navigate to the FBV2 transaction screen, enter the values, as shown in the image below, and hit Enter.

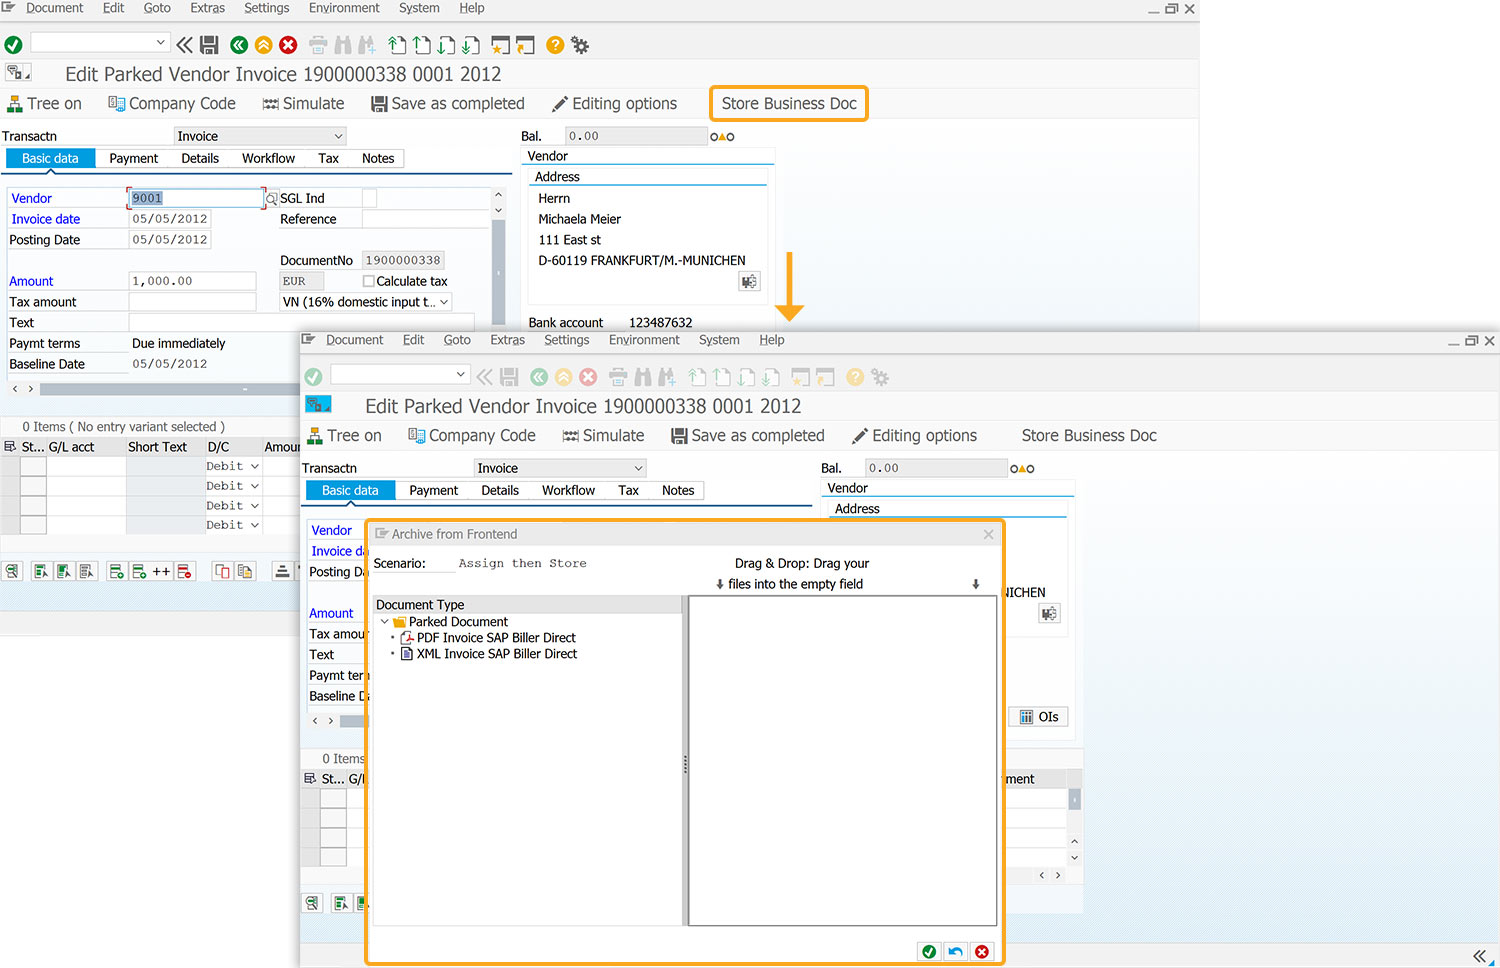
- Now, you will be navigated to the FV60 transaction screen, click on the Store Business Doc toolbar push button. Then, Archieve from Frontend window appears, where you can drag and drop the files.


Note: These values will probably not be the same in your environment. Use values for an actual document to see the results as shown in the example.


