Prerequisites
- Products: Liquid UI WS, Liquid UI Server or Local DLL, Client Software
- Commands: set(), enter(), onscreen(), pushbutton()
Purpose
The article details how to select and deselect the checkbox automatically on a list screen using the push buttons. Here, we are considering the SAP Easy Access screen to demonstrate the process and walk you through the following steps:
- Delete the image container on the SAP Easy Access screen.
- Add a toolbar push button to execute the process.
- Add a function to set values to input fields.
- Add a function to select the checkbox.
- Add a function to deselect the checkbox.

Note: This feature is available from WS Version 1.2.296.0 and Liquid UI Server Version 3.5.524.0 onwards!
User Interface
//Create the file SAPLSMTR_NAVIGATION.E0100.sjs inside your scripts folder for customizing the SAP Easy Access screen.
//Now, add the Liquid UI script to the above file and save it.
Customization
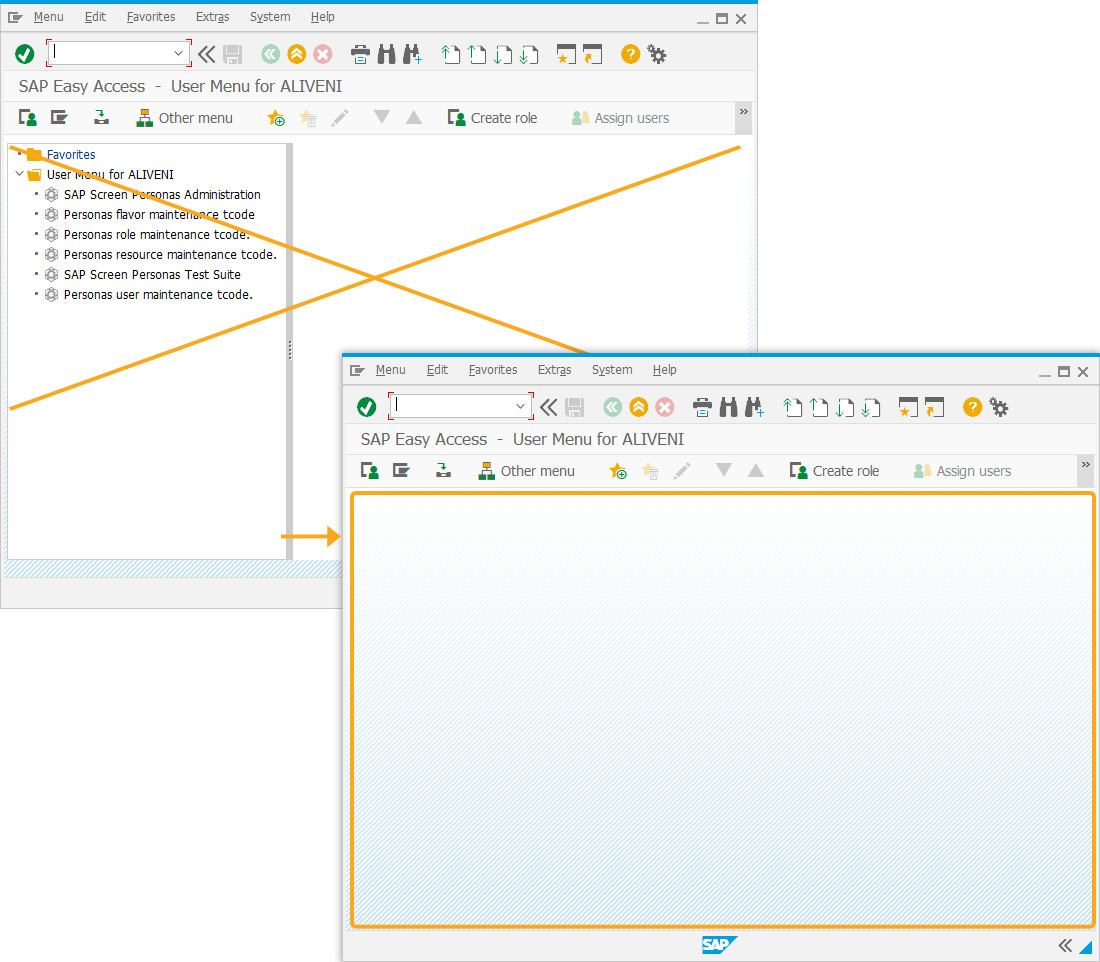
- Delete the image container on the SAP Easy Access screen using del().
//Deletes the image container on the SAP screen
del("X[IMAGE_CONTAINER]");
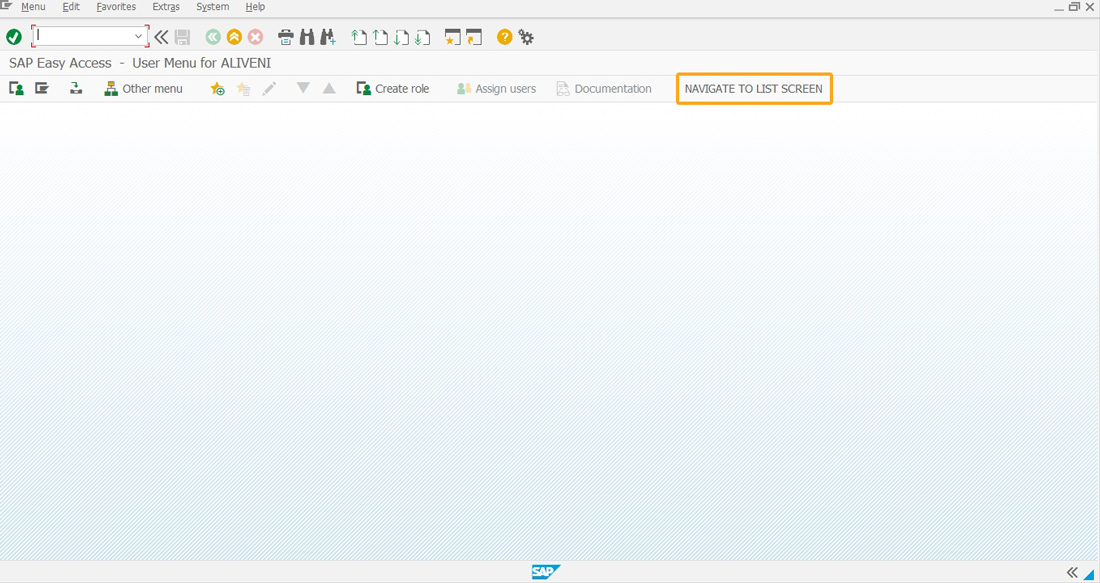
- Add a toolbar push button labeled NAVIGATE TO LIST SCREEN to execute the lb13navigate process on click.
//Creates a toolbar pushbutton to execute the process
pushbutton([TOOLBAR], "NAVIGATE TO LIST SCREEN", "/nLB13", {"process":lb13navigate});
- Add the lb13navigate function to set the values for the input fields.
//Function to set the values
function lb13navigate(){
    onscreen 'SAPML02B.0204'
        set('F[Warehouse Number]','001');
        set('F[Requirement Number]','F');
        set('C[Completed]','X');
        enter();
}
//Now, let's add the below Liquid UI script to the RLLB1300.E0120.sjs file and save it.
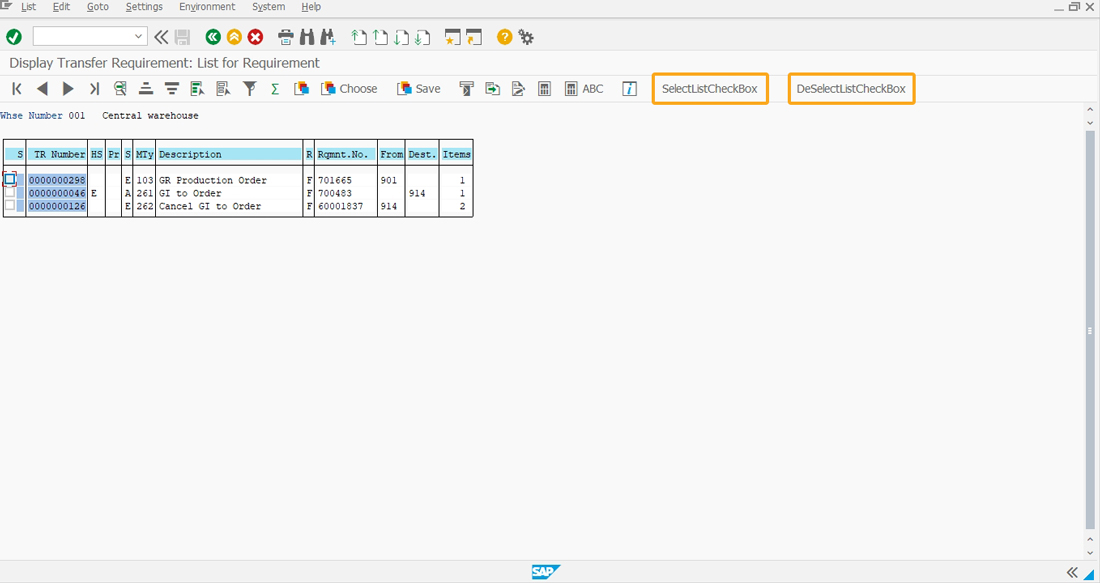
- Navigate to Display Transfer Requirement: List for Requirement screen and add two toolbar push buttons labeled SelectListCheckbox and DeselectListCheckbox to select and deselect the checkboxes.
//Creates toolbar push buttons to select and deselect the checkboxes.
pushbutton([TOOLBAR],"SelectListCheckBox",'?',{"process":selectListCheckBox});
pushbutton([TOOLBAR],"DeSelectListCheckBox",'?',{"process":deselectListCheckBox});
- Add the SelectListCheckBox function to select the check box.
// Function to check the list screen checkbox.
function selectListCheckBox()
{
    onscreen 'RLLB1300.0120'
set('#[4,1]','X');
        set('#[5,1]','X');
        enter('?');
}
- Add the deselectListCheckBox function to uncheck the list screen checkbox.
//Function to uncheck the list screen checkbox
function deselectListCheckBox(){
onscreen 'RLLB1300.0120'
set('#[4,1]',' ');
set('#[5,1]',' ');
enter('?');
}
SAP Process
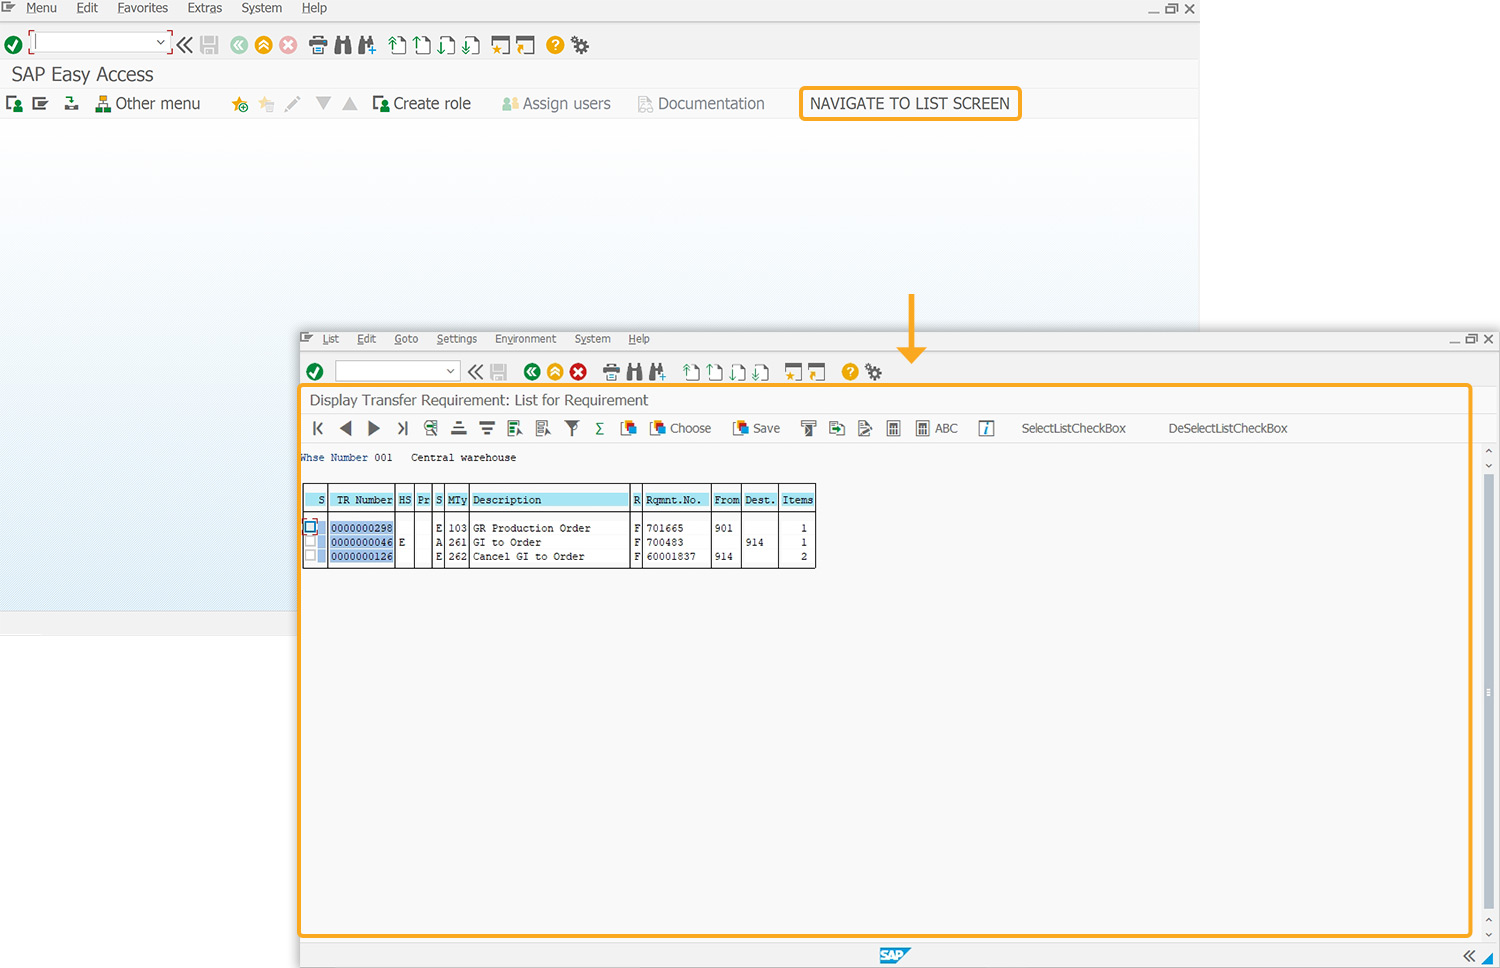
- Refresh the SAP screen, and click the NAVIGATE TO LIST SCREEN toolbar push button. Then, you will be navigated to the Display Transfer Requirement: List for Requirement screen, as shown in the image below.
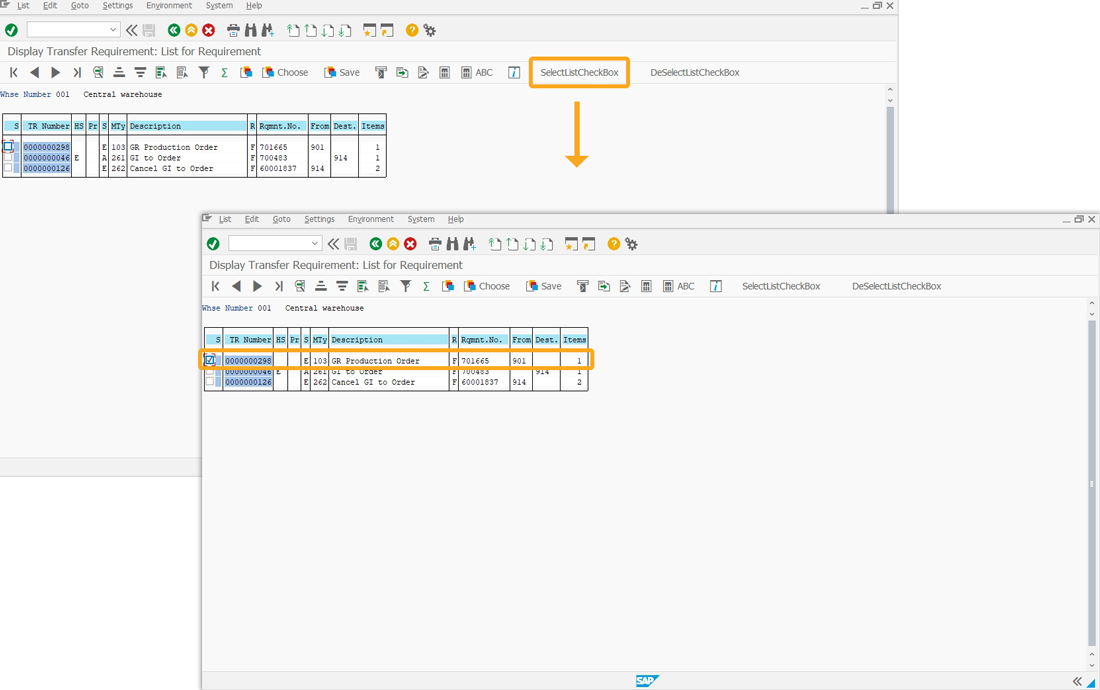
- Click the SelectListCheckBox to check the checkbox, as shown in the image below.
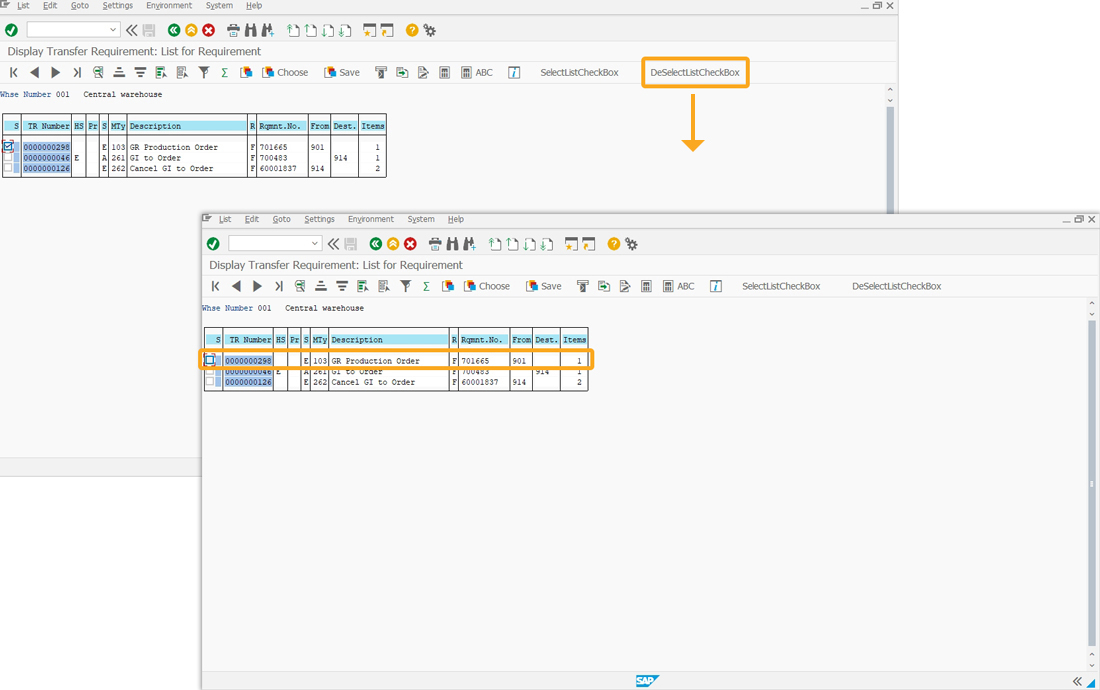
- Now, click the DeSelectListCheckBox button to uncheck the checkbox, as shown in the image below.
