In this article, we’ll demonstrate how to set up a task for creating a PM notification using the bot. The demonstration is conducted using the Create PM Notification screen (IW21) and involves the following steps.
- Only the enter command will be modified to invoke the necessary process within the previously created elogon.sjs file.
enter({"process":create_iw21}); - Open the script file for the Easy Access screen ('SAPLSMTR_NAVIGATION.E0100.sjs') and change the function in the enter command with a different name. Here, we use the name 'create_notification'.
enter({process:create_notification}); - Open the function.sjs file and add a function to create a notification.
function create_iw21() { onscreen 'SAPLSMTR_NAVIGATION.0100' enter('/niw21'); - Now enter the following code to populate the 'Notification Type' field.
onscreen 'SAPLIQS0.0100' set("F[Notification type]", "M1"); enter(); - Similarly, set the values for the 'Functional Location', 'Equipment', and 'Description' fields and then save the new notification.
 Note: The 'VIQMEL-QMTXT' field is the text field's name containing the description.
onscreen 'SAPLIQS0.7200' set('F[Functional loc.]', '1032-ADMI'); set('F[Equipment]', '10000957'); set('F[VIQMEL-QMTXT]', 'FTE Test'); enter('/11'); - Confirm notification creation by capturing and outputting the new notification number to the Console or a file. The code is as follows.
onscreen 'SAPLIQS0.0100' println('\n------MESSAGE='+_message); - We shall now exit from the transaction by sending the exit code '/i' and subsequently selecting 'Yes' on the ensuring exit confirmation screen. The script code is shown below.
enter('/i'); onscreen 'SAPLSPO1.0100' enter('=YES'); } - Save your changes to the 'functions.sjs' file and then run the bot either with Task Scheduler or with the command prompt as previously explained.
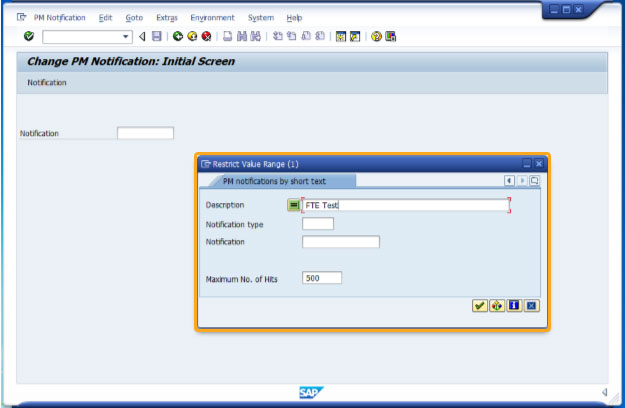
- A new notification has been created. To verify its creation, navigate to the IW22 screen and search by its number. If the task is automated with Task Scheduler, search the notification by date or description instead.
- Enter the description specified during the notification creation and click Continue to proceed.

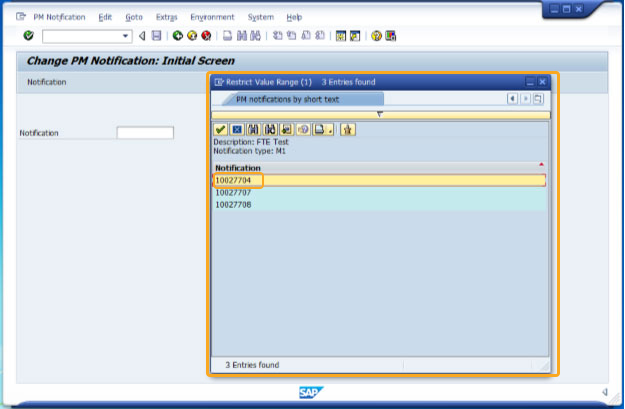
- This displays a list of notification numbers matching our search criteria, as shown below.

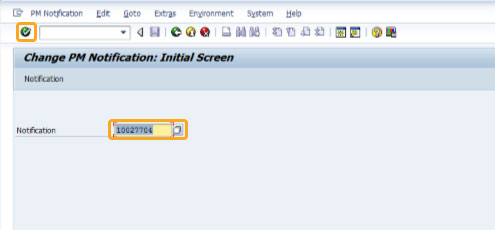
- Selecting the notification number that matches the one you just created gets populated into the Notification input field, as shown below.

- Upon clicking Enter, you'll be navigated to the Maintenance Request page, where you'll find input fields displaying the predefined values.


