Liquid UI Designer is a development tool that provides both a graphical editor and a script editor, enabling users to create simplified SAP screens and processes. You can change your layout without writing a single line of code using WYSIWYG editor and the related script will be generated automatically. You can edit the script at the code level using script editor. Designer incorporates support for Drag and Drop and can generate portable Liquid UI scripts in a very short time without necessitating any changes to the underlying ABAP code or business logic.
Launch Liquid UI Designer
Procedure
-
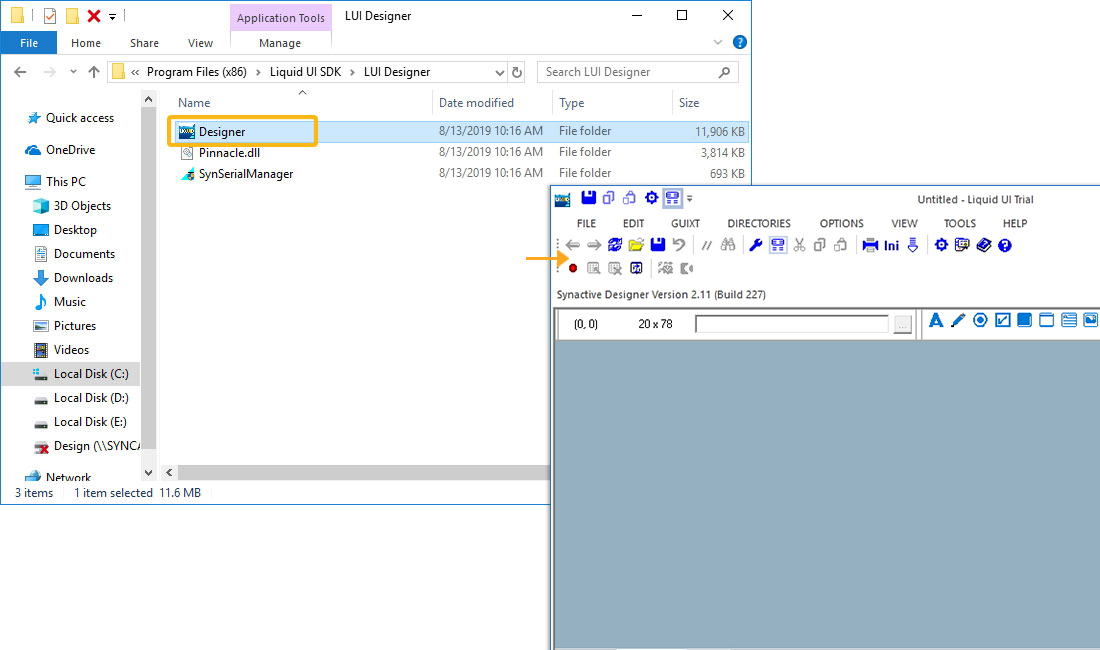
To launch the Liquid UI Designer in SDK, navigate to LUI Designer folder (C:\Program Files (x86)\Liquid UI SDK\LUI Designer) and click the Designer.
-
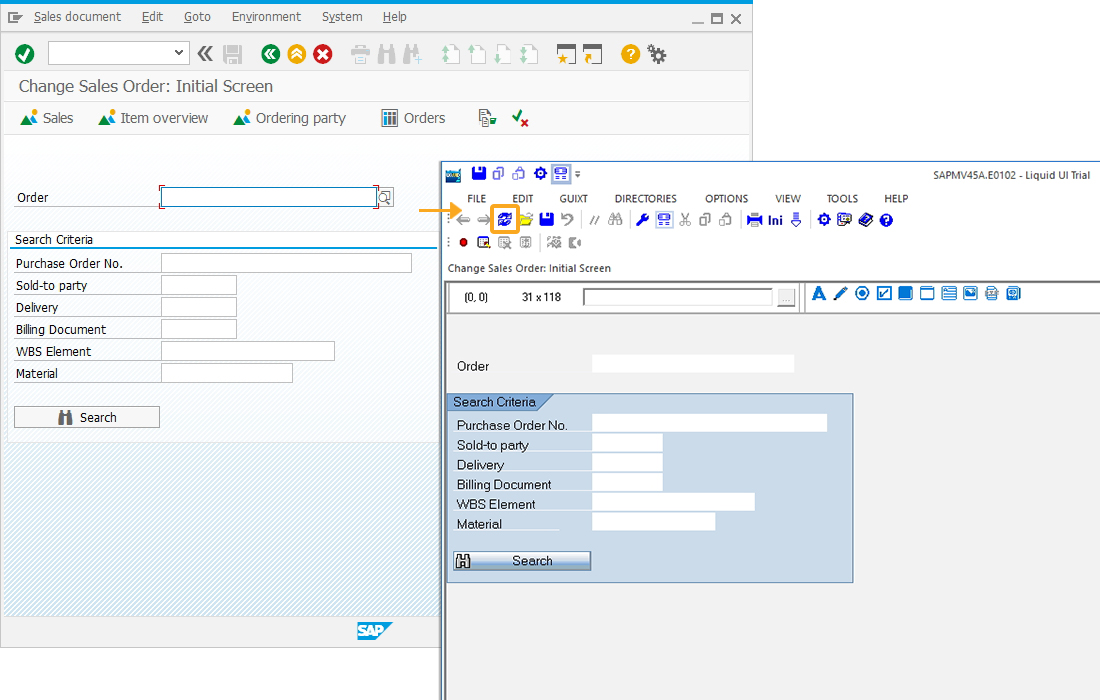
Open SAP GUI and navigate to Change Sales Order Overview screen (VA02). Then, refresh the Designer and it replicates the Change Sales Order Overview screen as shown below.
-
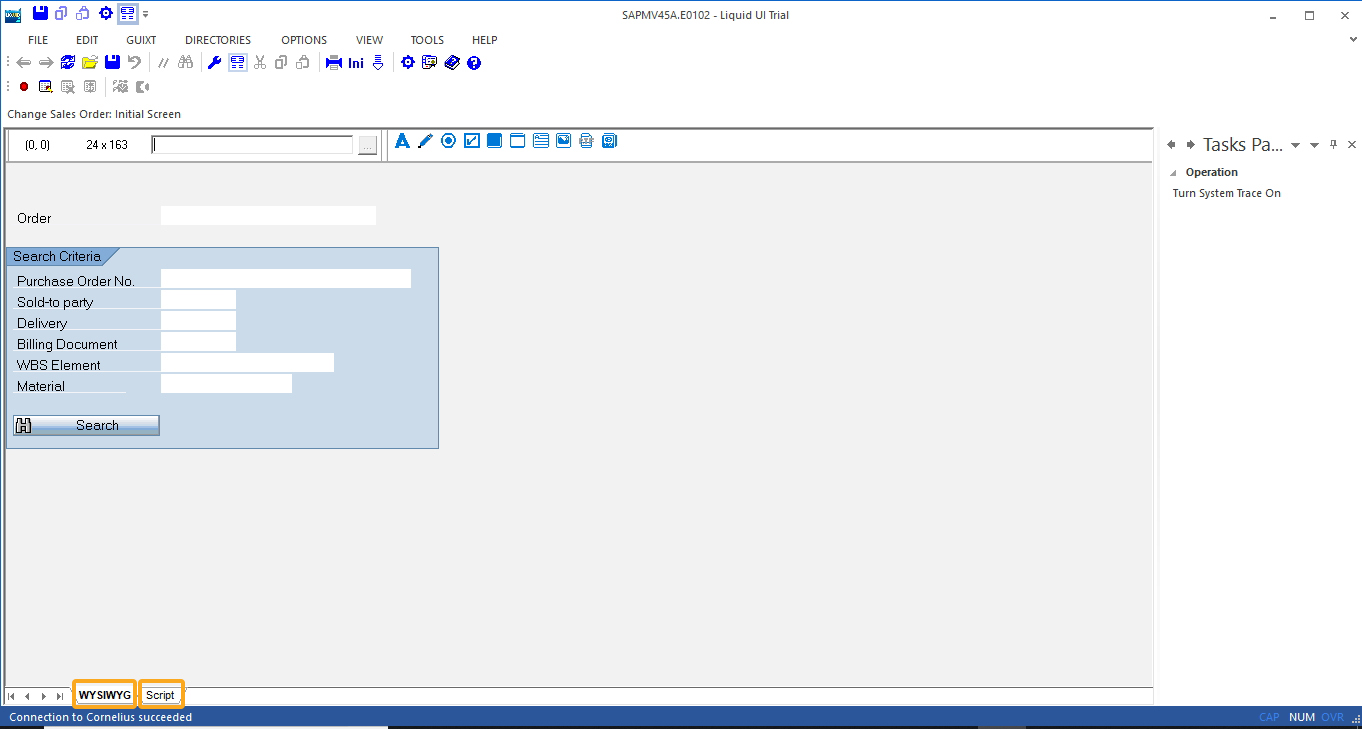
You can toggle between the two editors by clicking on the WYSIWYG and Script tabs located at the bottom of the main Designer window as shown below.
-
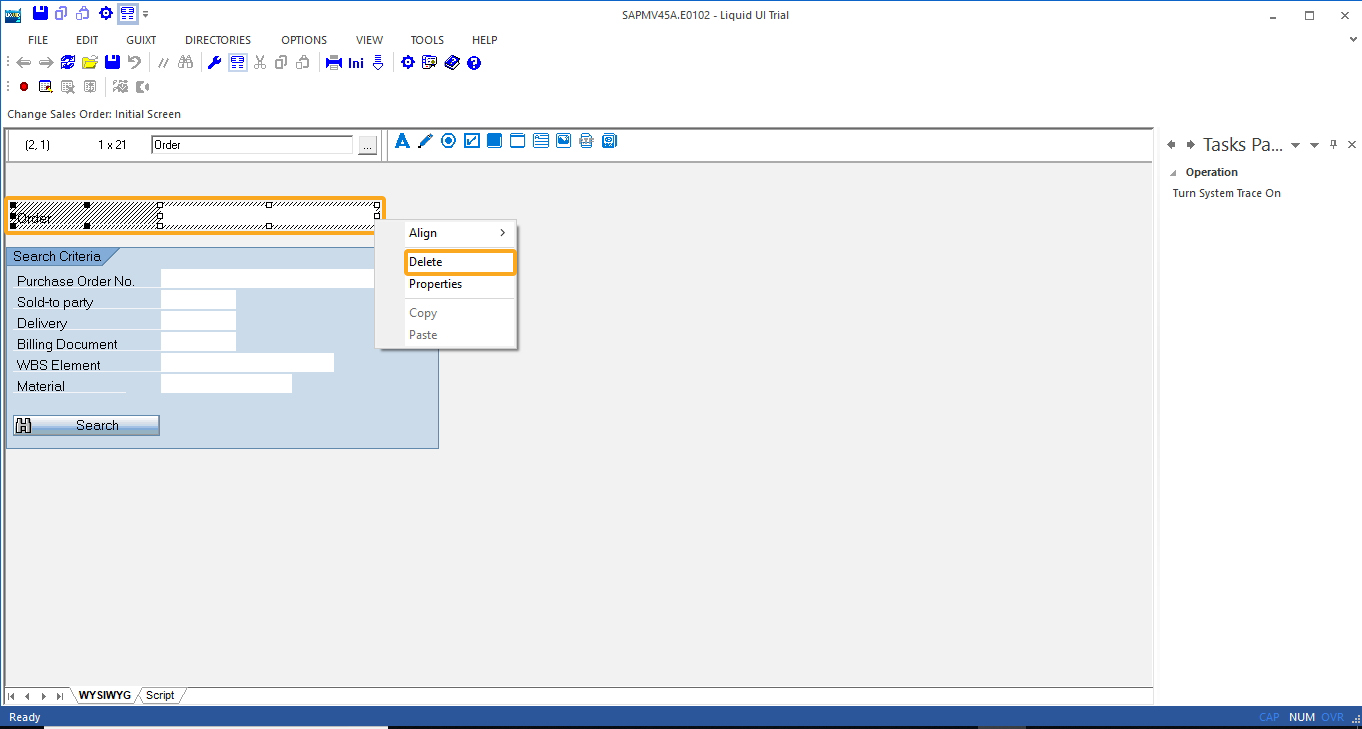
You can modify your SAP screen elements using drag and drop method. Delete the Order field by selecting the Inputfield and Dropdownlist with Ctrl key. Then, right click and select delete option to remove the Order inputfiled from the screen.
-
Click Save to save the newly created script file for the changes made in the VA02 transaction.
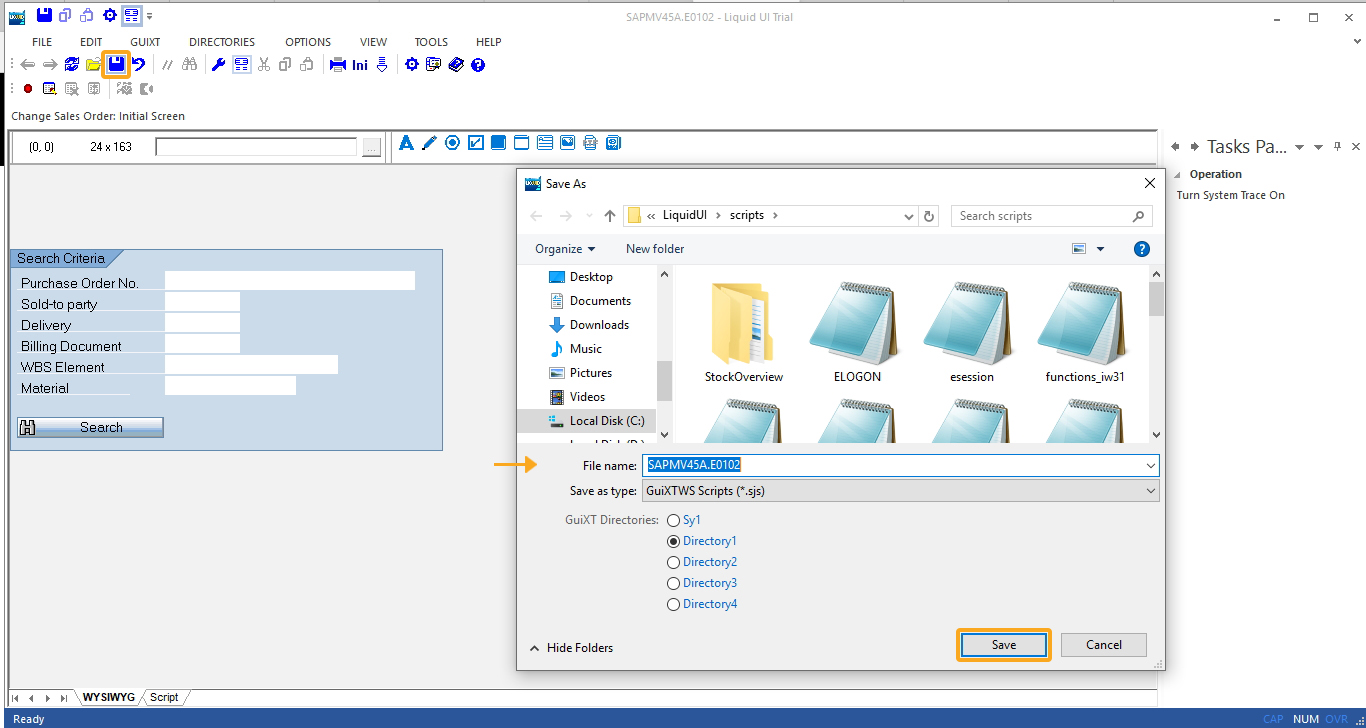
Note: You need to save the script file in the same script directory path set for Liquid UI Server. Under Designer Options, you can set the script directory path.
-
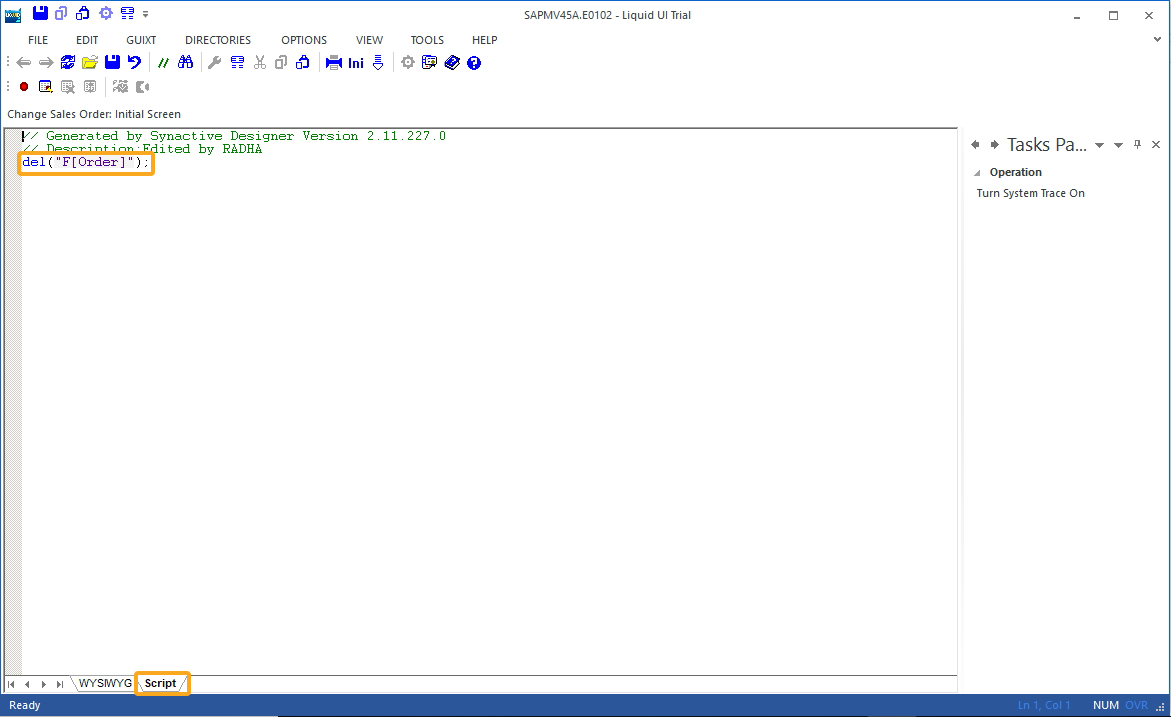
In the Script Editor window, you can see the script generated automatically after deleting the Order inputfield as shown below:
-
You can rearrange the required fields in the Designer's WYSIWYG editor.

-
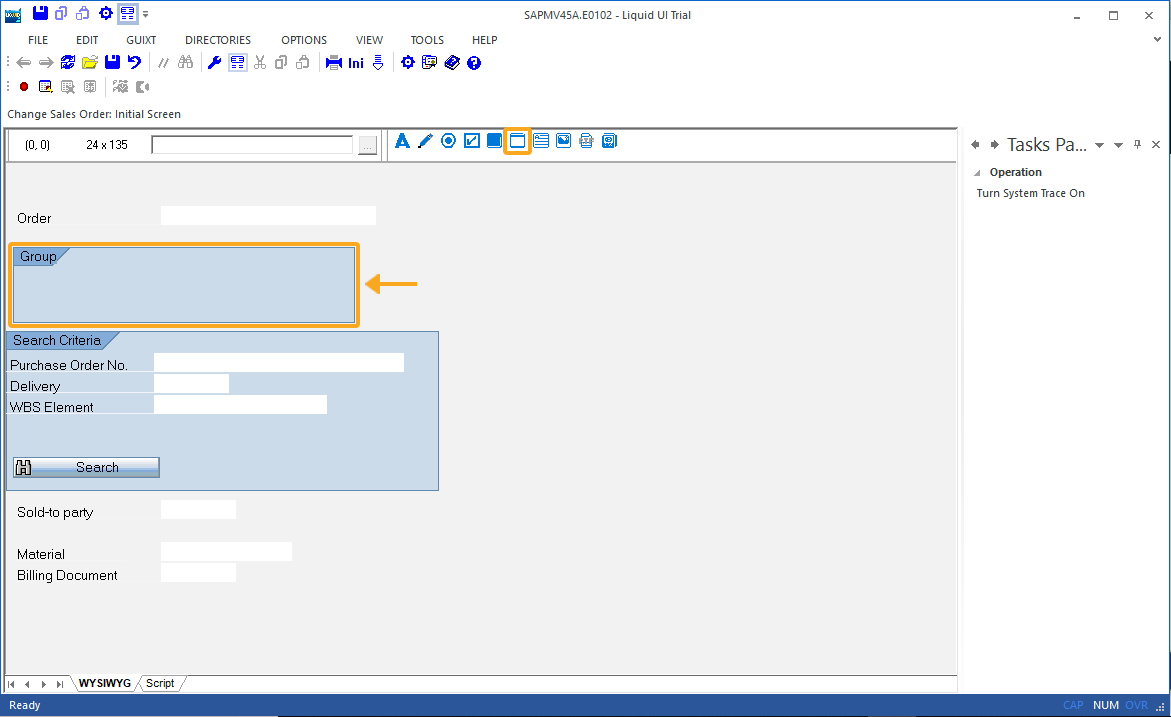
Click the groupbox icon in the designer and place the groupbox on the screen as shown below.
-
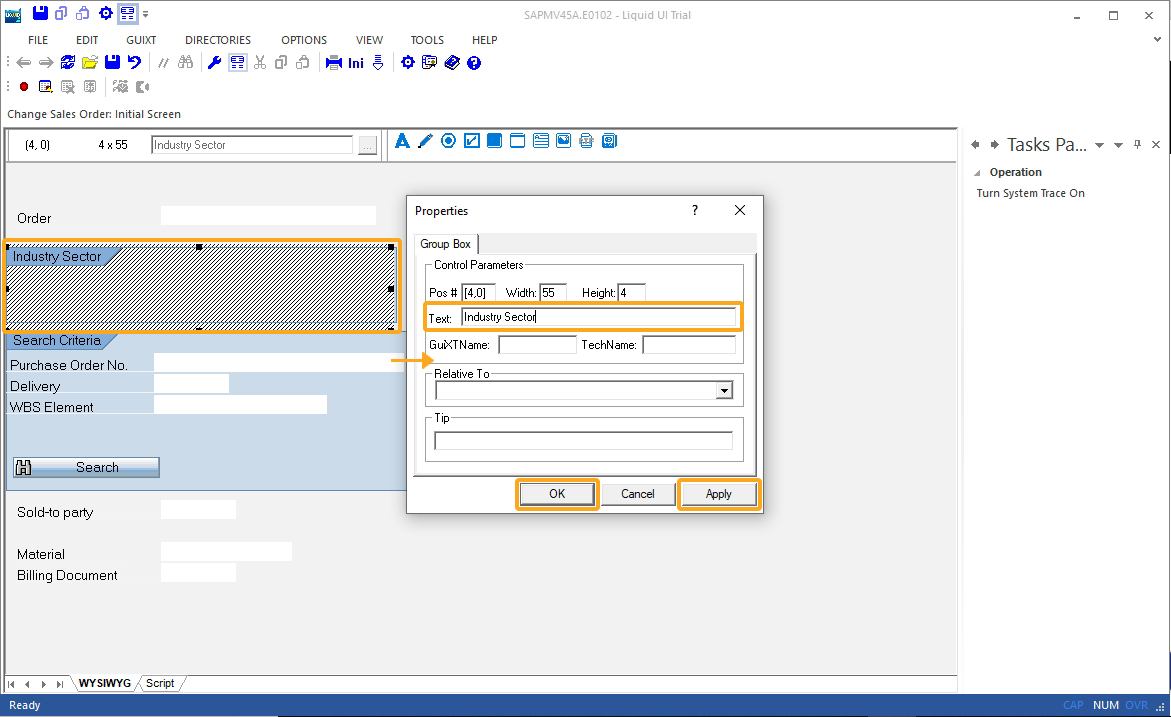
Double-click the groupbox to open its property window. Edit the text field as Industry Sector to set as its label name and then click Apply and OK.
-
Click the Pushbutton icon on Designer and place it on the groupbox as shown below.
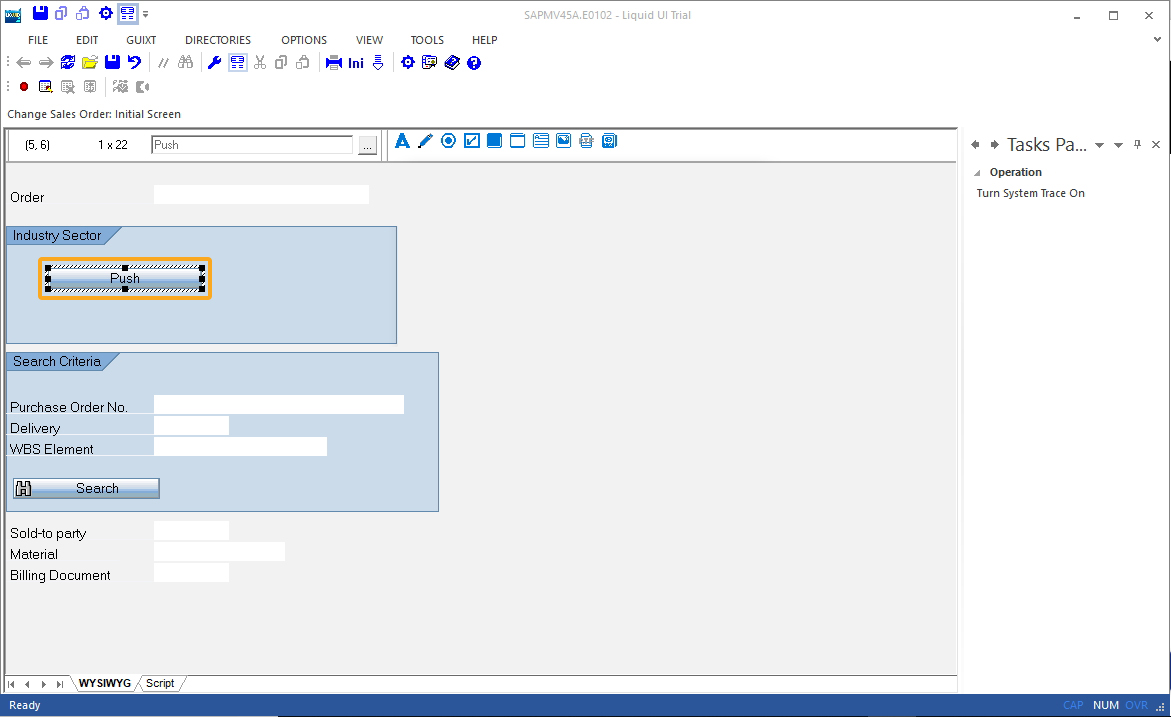
-
Double click on the pushbutton to open its property window and enter the desired label name in the Text field and then click Apply and OK.
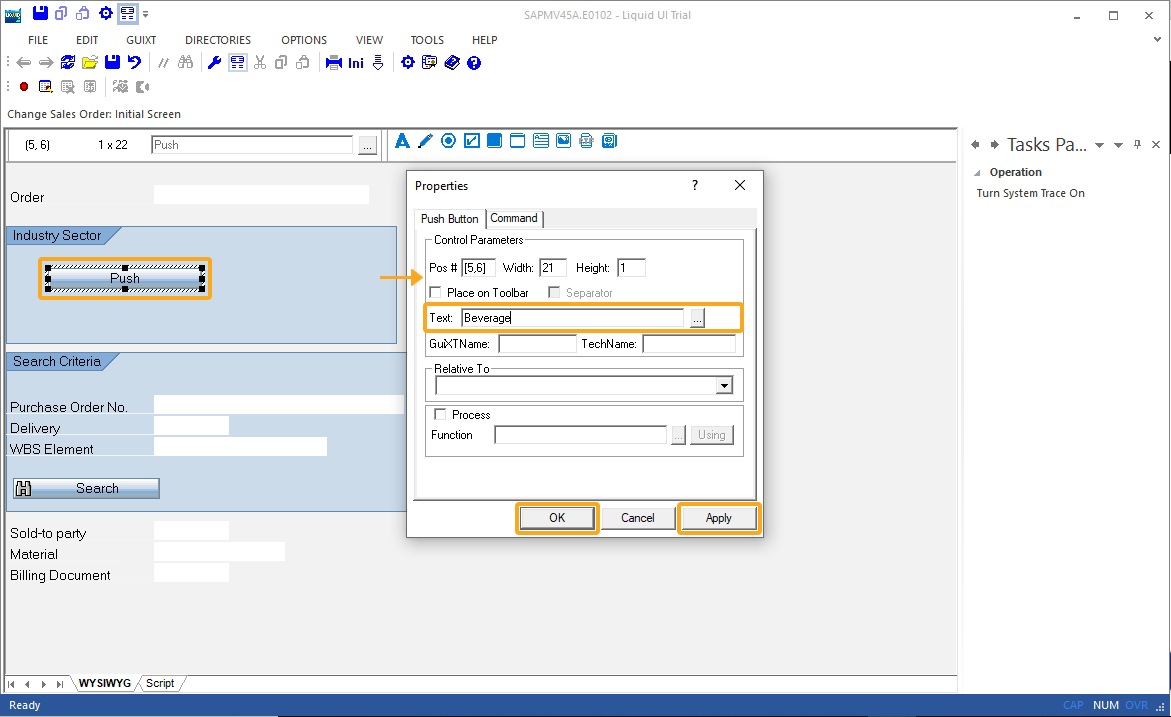
-
Similarly, you can add more pushbuttons on the Industry Sector groupbox in the Designer's WYSIWYG editor.
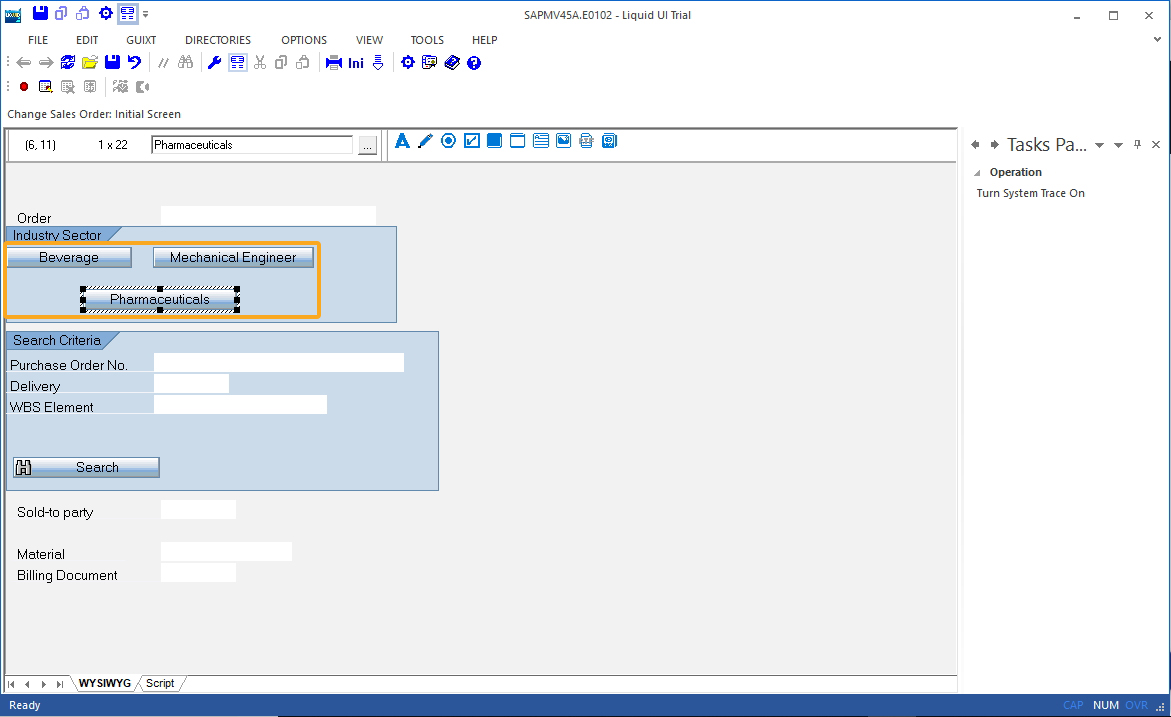
-
The Designer's script editor window will automatically generate the script after completing every action under WYSIWYG editor. Click save to see the changes in Designer and SAP GUI.
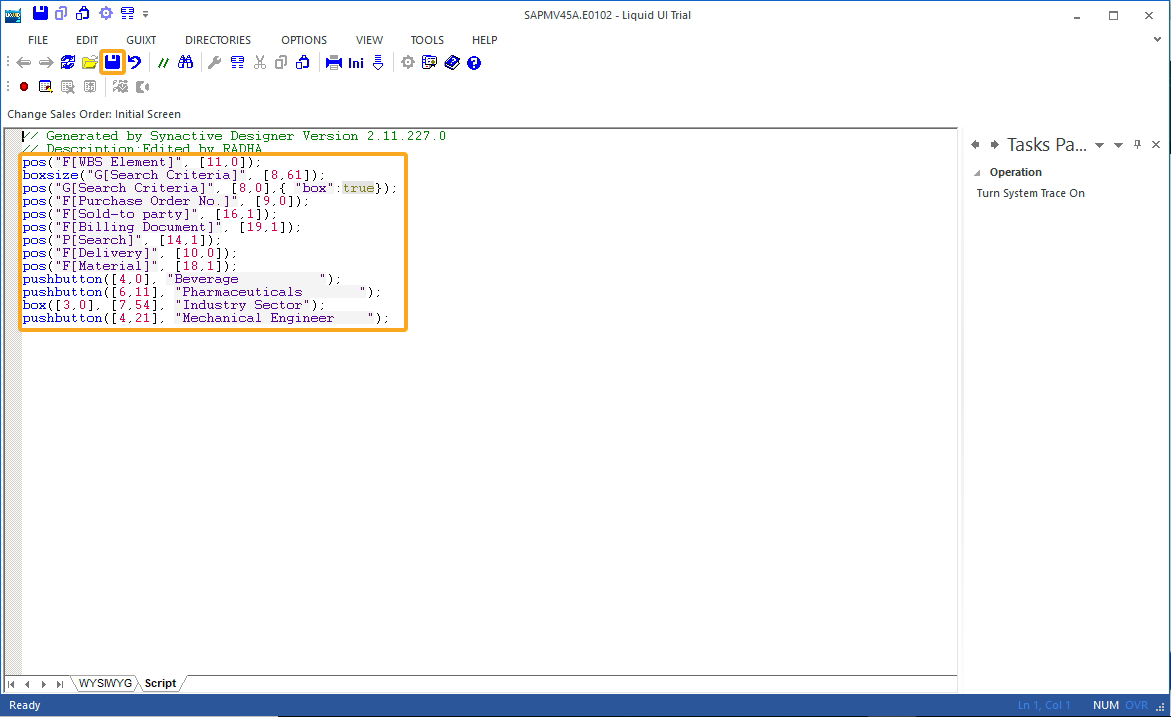
-
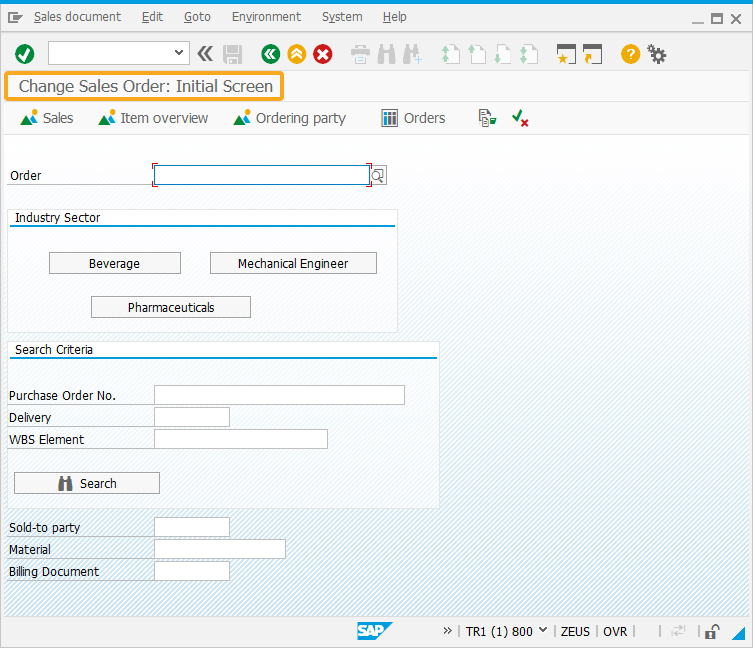
Now, the Change Sales Order Overview screen appears as shown below.
Learn more about Liquid UI Designer.


