Prerequisites
- Products: Liquid UI WS, Liquid UI Server or Local DLL, Client Software
- Commands: del(), text(), title(), onUIEvents()
Purpose
You will learn how to customize the dialog box that displays the list of all opened sessions and add functionality to the pop-up window. To demonstrate this, we’ll walk you through the following steps:
- Delete the image container on the SAP screen using the del command.
- Add a pushbutton to enter /o in the command field and open a new session
- Add a function to display the dialog box that displays the current session information
- Add a function to customize the dialog box
- Add functionality to the dialog box that displays the list of opened sessions
User Interface
//Create this file inside your script folder for customizing the SAP Easy Access screen: SAPLSMTR_NAVIGATION.E0100.sjs
//Now, let's start adding the Liquid UI script to the above file and save it.
- Logon to SAP and delete the image container using the del command on the SAP Easy Access screen, as shown below.
// Deletes an image container on the easy access screen
del("X[IMAGE_CONTAINER]");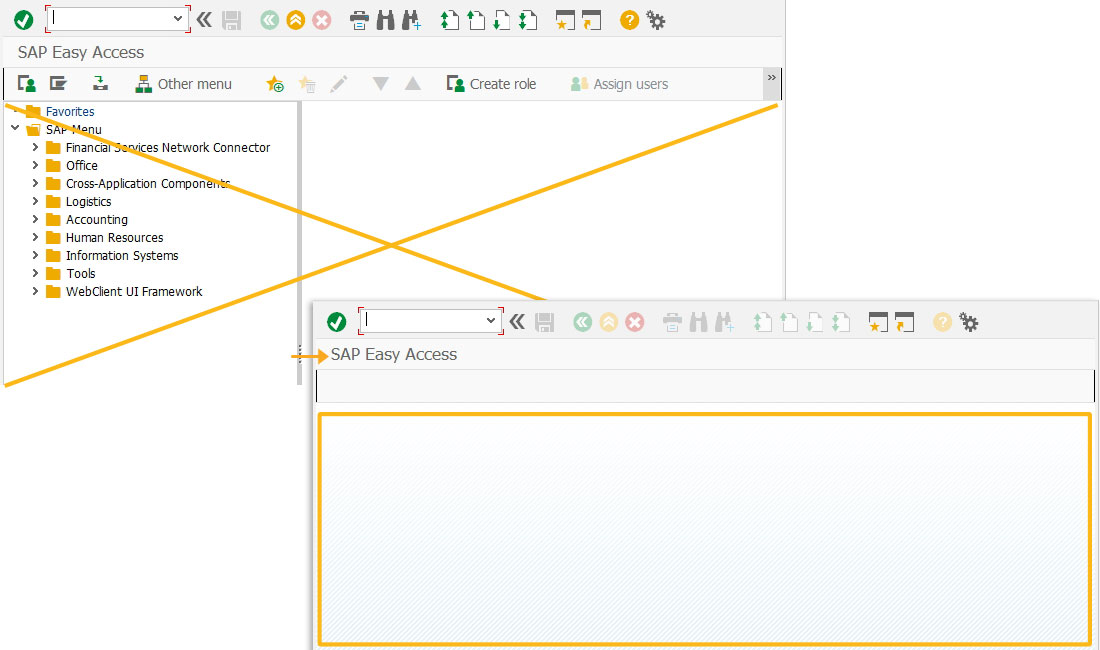
- Add a pushbutton with the label Execute Pricing to enter /o in the command field and open a new session on click.
// Creates a pushbutton with a label as Execute Pricing and enter /o in the transaction field to open a new session on click
pushbutton([1,1], 'Execute Pricing', '/o');
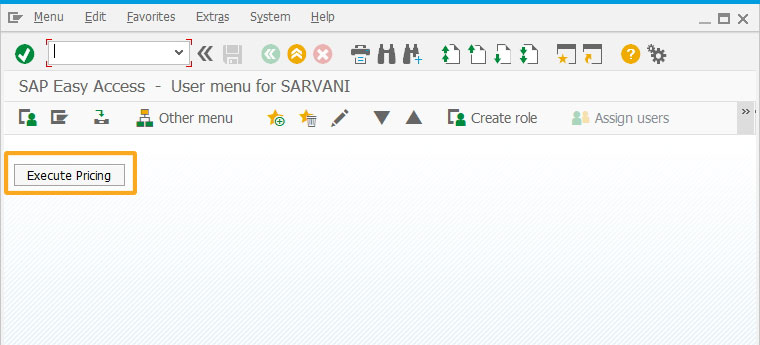
- Click the pushbutton Execute Pricing to display the Back-End Sessions dialog box, as shown in the image below.
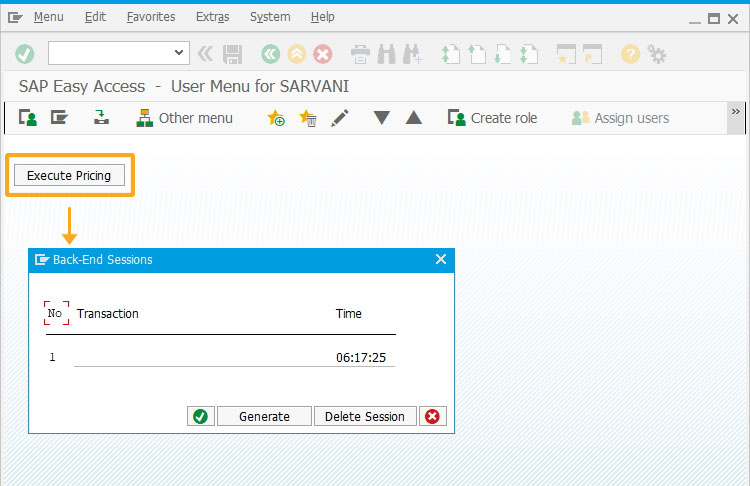
//Create this file inside your script folder for customizing the Back-End sessions dialog box: RSM04000_ALV_NEW.E2000.sjs
//Now, let's start adding the Liquid UI script to the above file and save it.
- Delete the text on the pop-up screen using the clearscreen command.
// Clears the text on the screen
 clearscreen();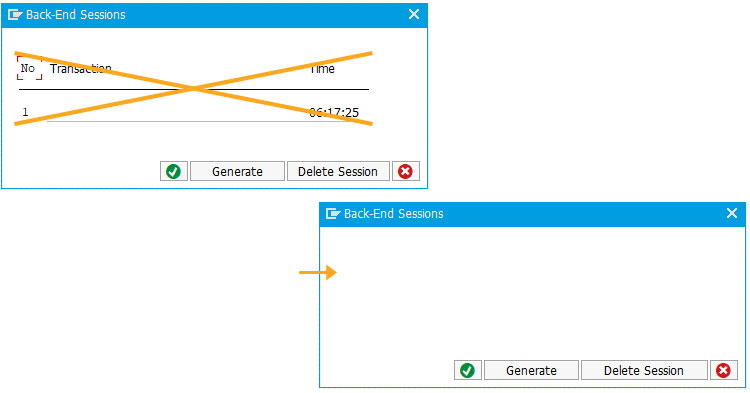
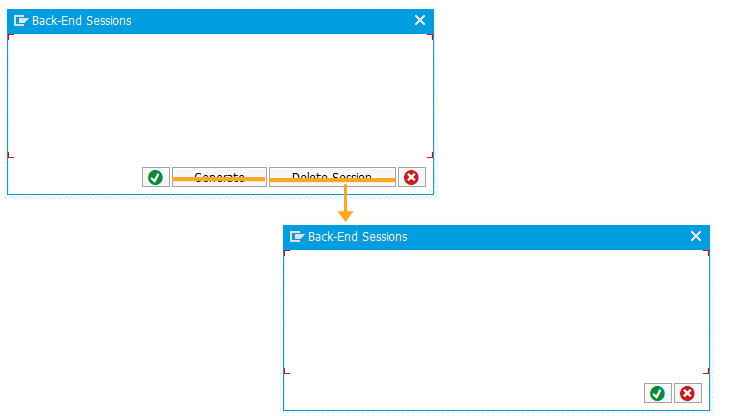
- Delete the Generate and Delete Session pushbuttons using the del command on the pop-up screen.
// Deletes two pushbuttons Generate and Delete Session
 del('P[Generate]');
 del('P[Delete Session]');
- Change the title of the pop-up screen to Decision to Proceed using the title command.
//Changes the pop-up title to Decision to Proceed
title('Decision to Proceed');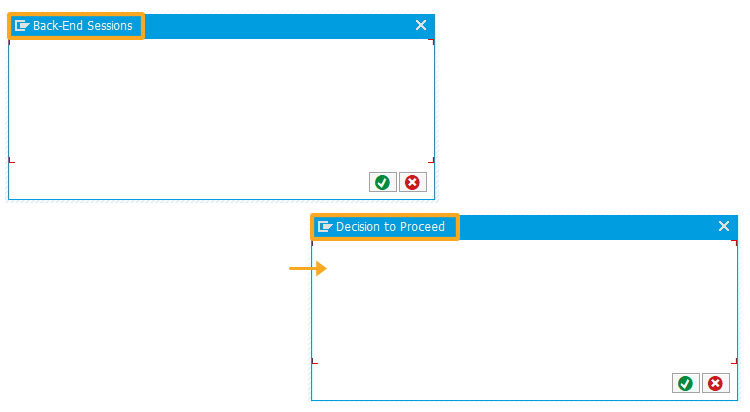
- Now, add the following text on the pop-up screen using the text command. Then, you will see the pop-up changed to Do you want to create pricing conditions? and the pushbuttons Continue and Cancel to Yes and No respectively, as shown in the image below.
// Creates text on the 2nd row and 2nd column
text([2,2], 'Do you want to create pricing conditions?');
// Creates text on the 3rd row and 2nd column
text([3,2], 'Press <Yes> to continue, Press <No> to stop');
// Changes Continue pushbutton text to Yes with icon
text('P[Continue]','@01@Yes');
// Changes Cancel pushbutton text to No with icon
text('P[Cancel]','@02@No');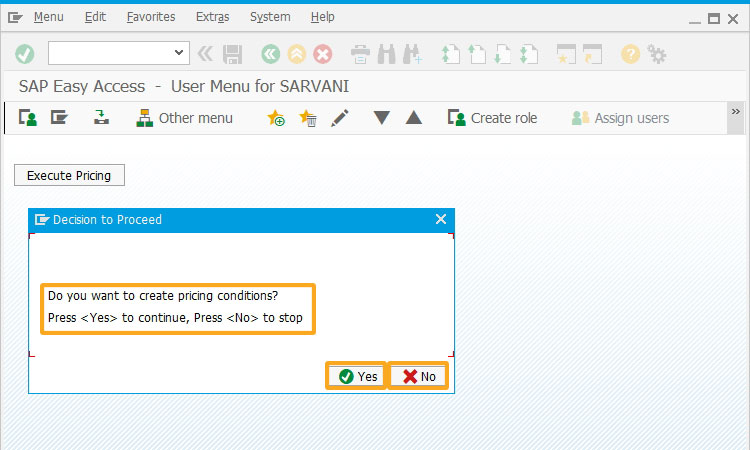
- Add a function executeVK11 to navigate to the Create Condition Records screen (VK11), and assign the PR00 value to the Condition type field.
// This allows a string to be trimmed of all blank spaces
//Function to execute VK11 when the user clicks 'Yes' on the pop-up
function executeVK11() {
 onscreen 'SAPLSMTR_NAVIGATION.0100'
 enter('/nvk11');
 onscreen 'SAPMV13A.0100'
 set('F[Condition type]','PR00');
 enter();
 onscreen 'SAPLV14A.0100'
 enter();
 }
- Click Yes to enter and run the executeVK11 function that navigates to the VK11 transaction. Here, the Condition type field is assigned the PR00 value, as shown below.
//Executes the executeVK11 function and navigates to the VK11 transaction
 onUIEvents['Enter'] = {"fcode":"/12", "process":executeVK11}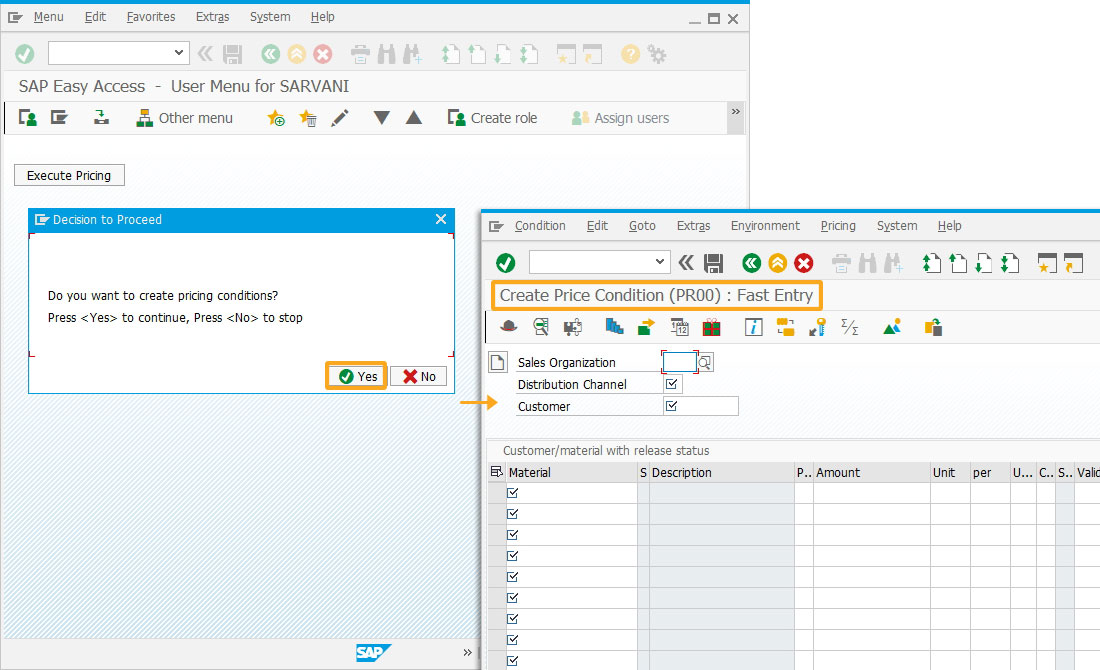
- Click No to perform F12 (cancel) to call off the create pricing conditions process and remain on the same screen.
//Cancels the process and remains on the same screen
onUIEvents['/12'] = {"fcode":"/12"};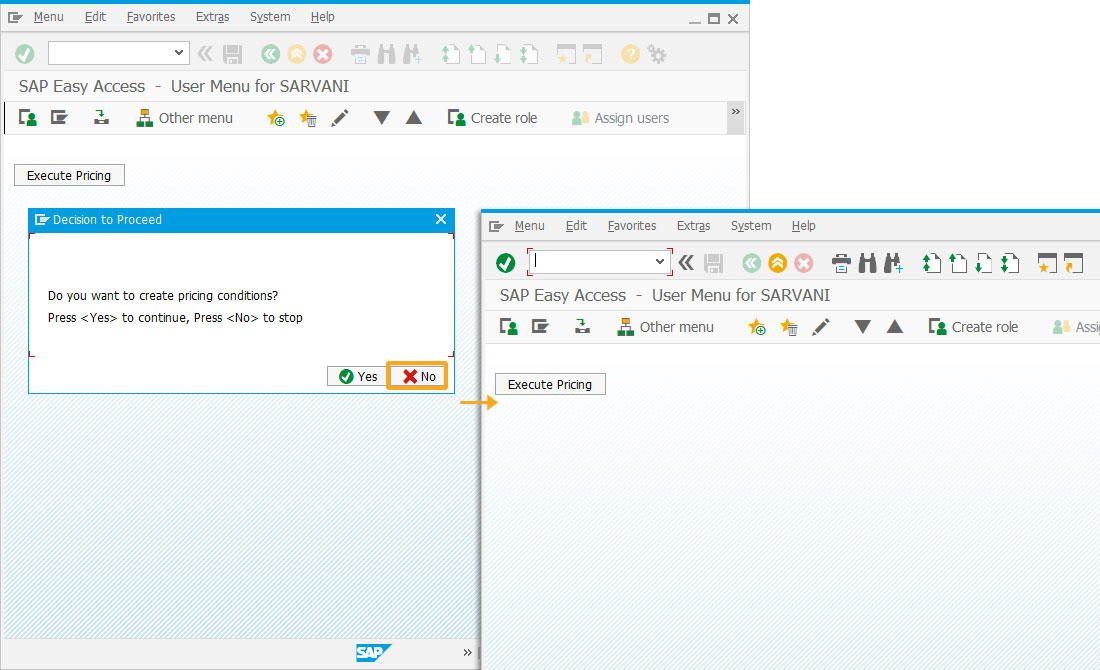
Next Steps

Learn how to display all the details of an SAP message
10 min.
This article is part of the Interpreting function codes tutorial.


