Pre-requisites
- Configure your Liquid UI Server.
Click here for details on configuring the Liquid UI Server. - Configure your SAP clients.
Click here for details on configuring the SAP client.
Purpose
This article guides you through the process of customizing your SAP screen using Liquid UI SDK.
SAP customizations can be done in two ways:
- Manual Process (Creating the script in a text editor using Liquid UI WS)
- Using Designer (using drag-and-drop options w/o coding)
Manual Process
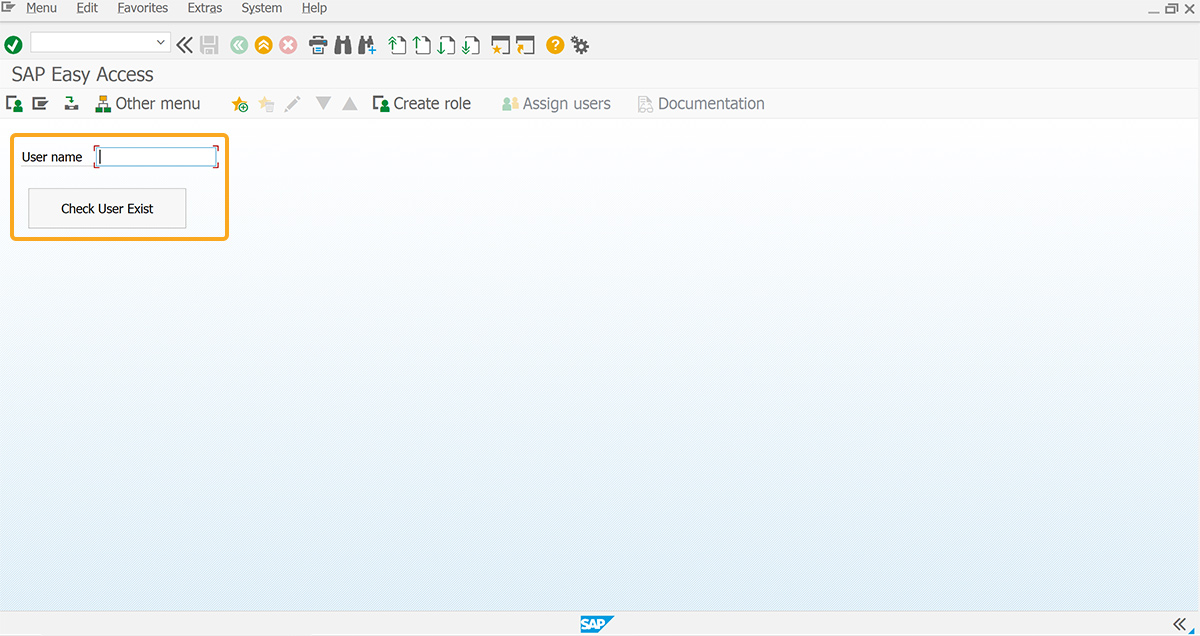
To demonstrate this process, we are considering the SAP Easy Access screen as an example and guide you through the following.
- Delete the image container on the SAP Easy Access screen using the del(), then refresh the screen to see the changes, as shown below.
// Deletes the image container on the SAP screen
del("X[IMAGE_CONTAINER]");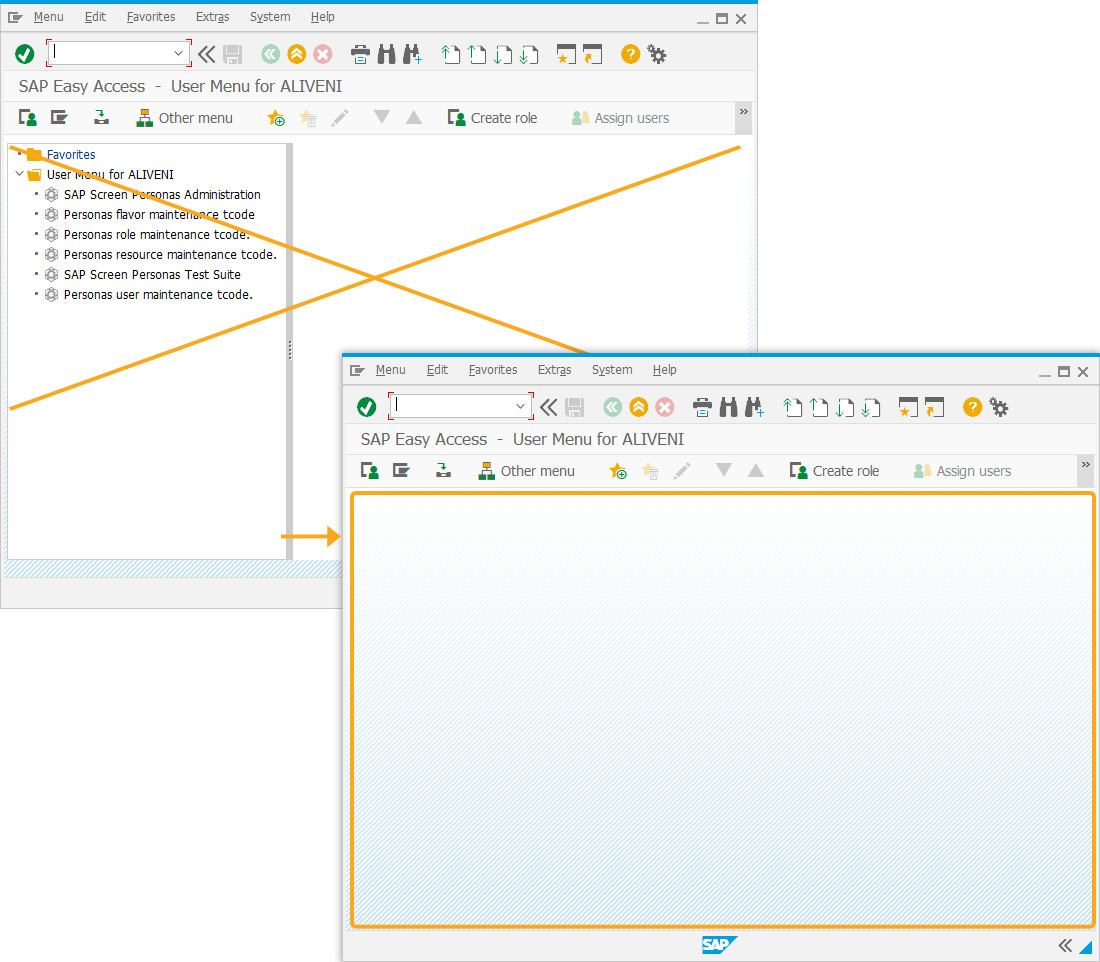
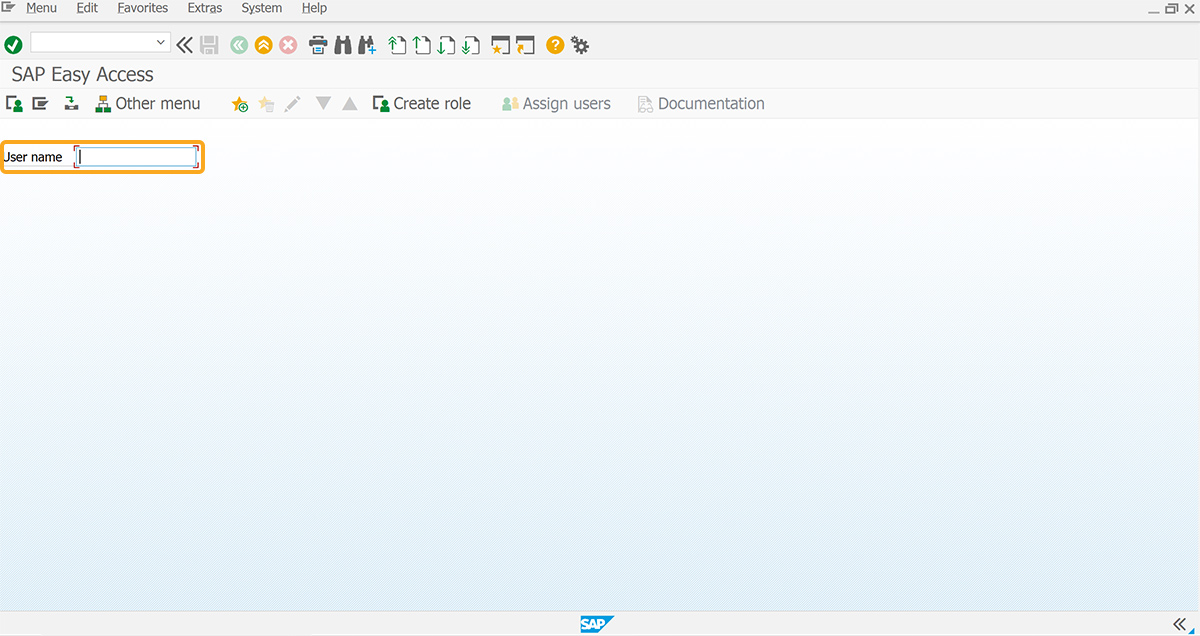
- Add an input field labeled User name.
//Creates input field
inputfield([1,0],"User name",[1,10],{"size":15});
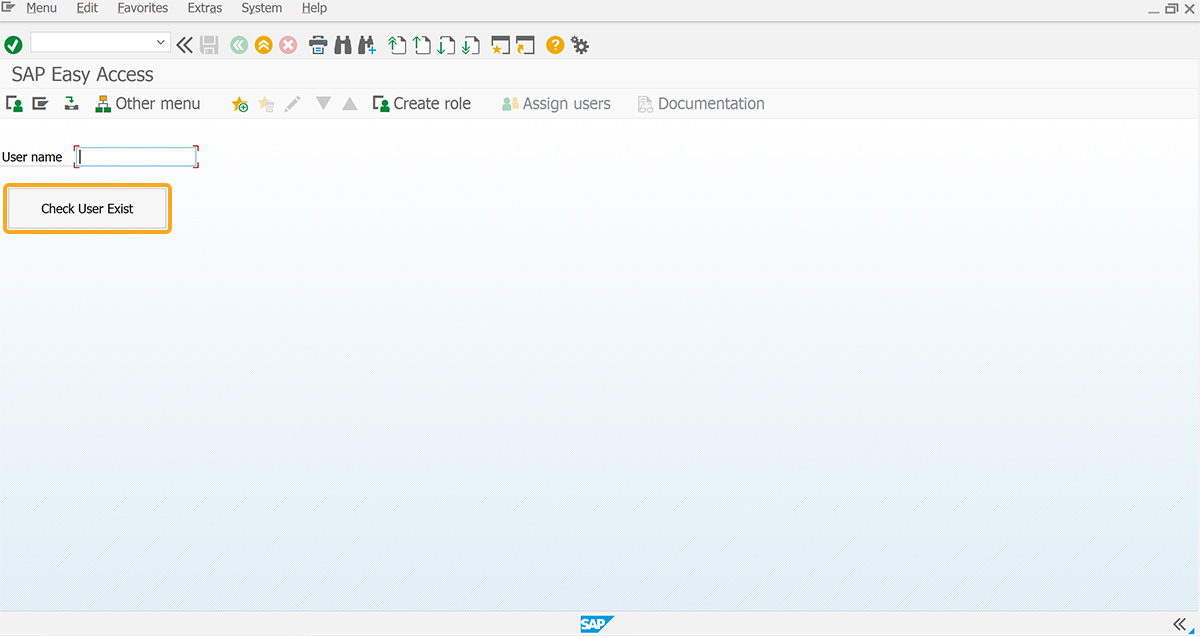
- Add a push button labeled Check User Exist.
//Creates a push button
pushbutton([3,1],["Check User Exist"],{"size":[2.20]});
Using Designer
To demonstrate this process, we are considering the SAP Easy Access screen as an example and guide you through the following using Designer (a no-code tool).
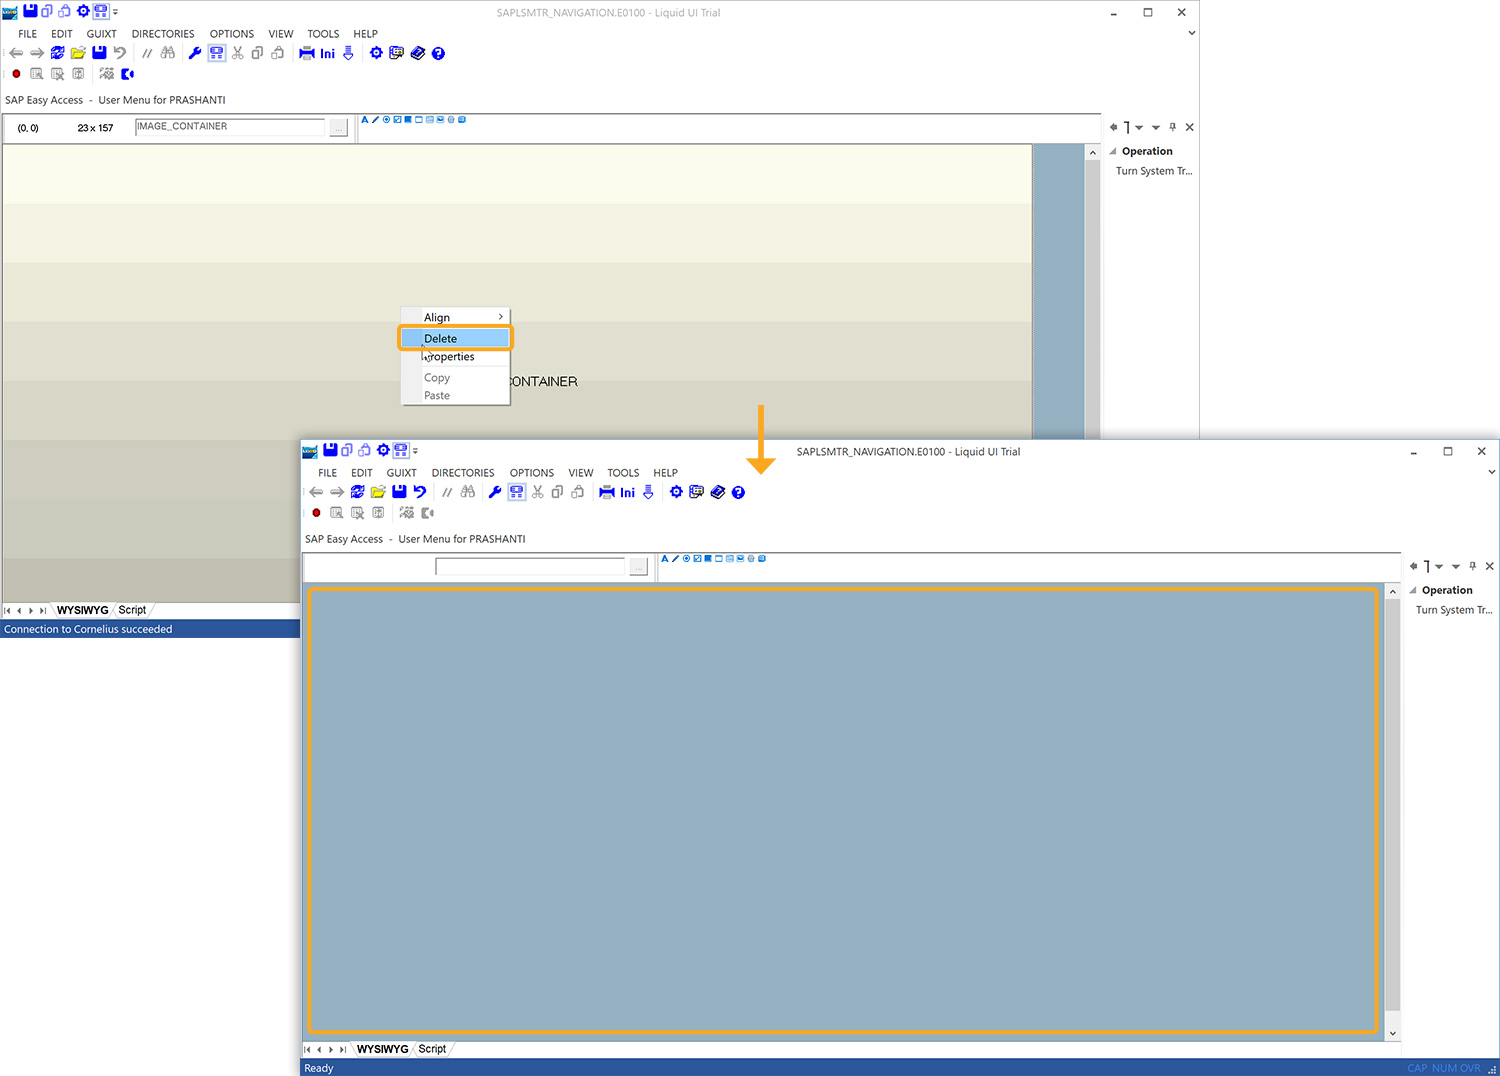
- Log into SAP GUI and Launch Liquid UI Designer. Then, the designer screen will replicate the SAP screen. Right-click and select the Delete option, or press the “Delete” key on the keyboard to delete the image container on the screen, as shown in the image below.
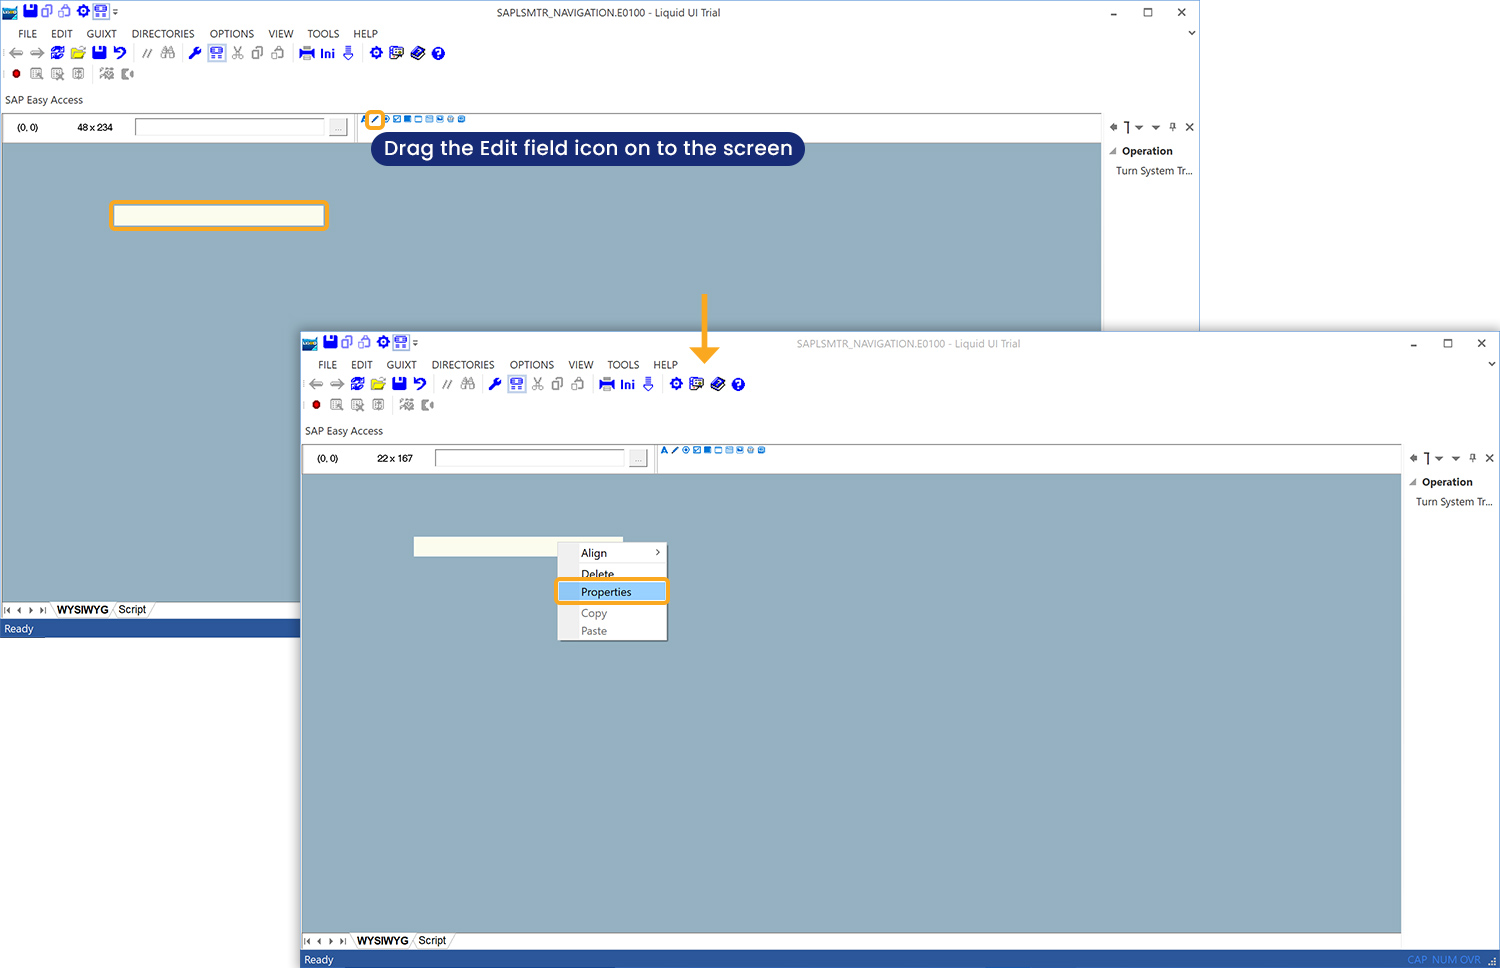
- To add an input field, click and drag the Edit field icon on to the screen. Right-click and select Properties to set the size of the input field.
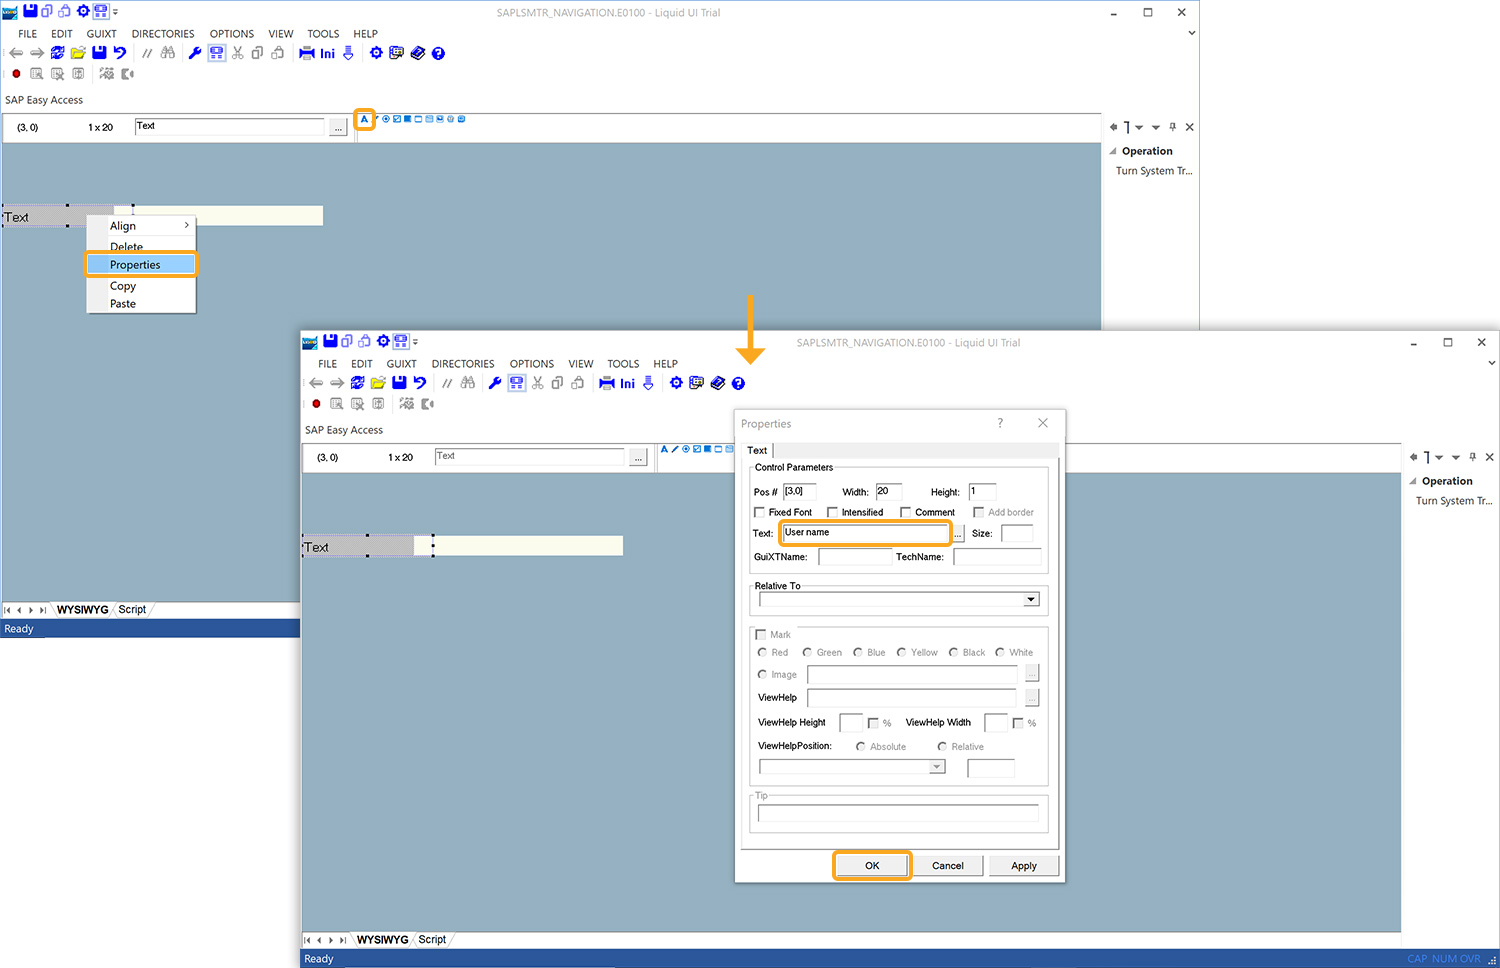
- To add text to the input field, click and drag the Text icon on to the screen. Then, right-click and select Properties and rename as User name, and click OK.
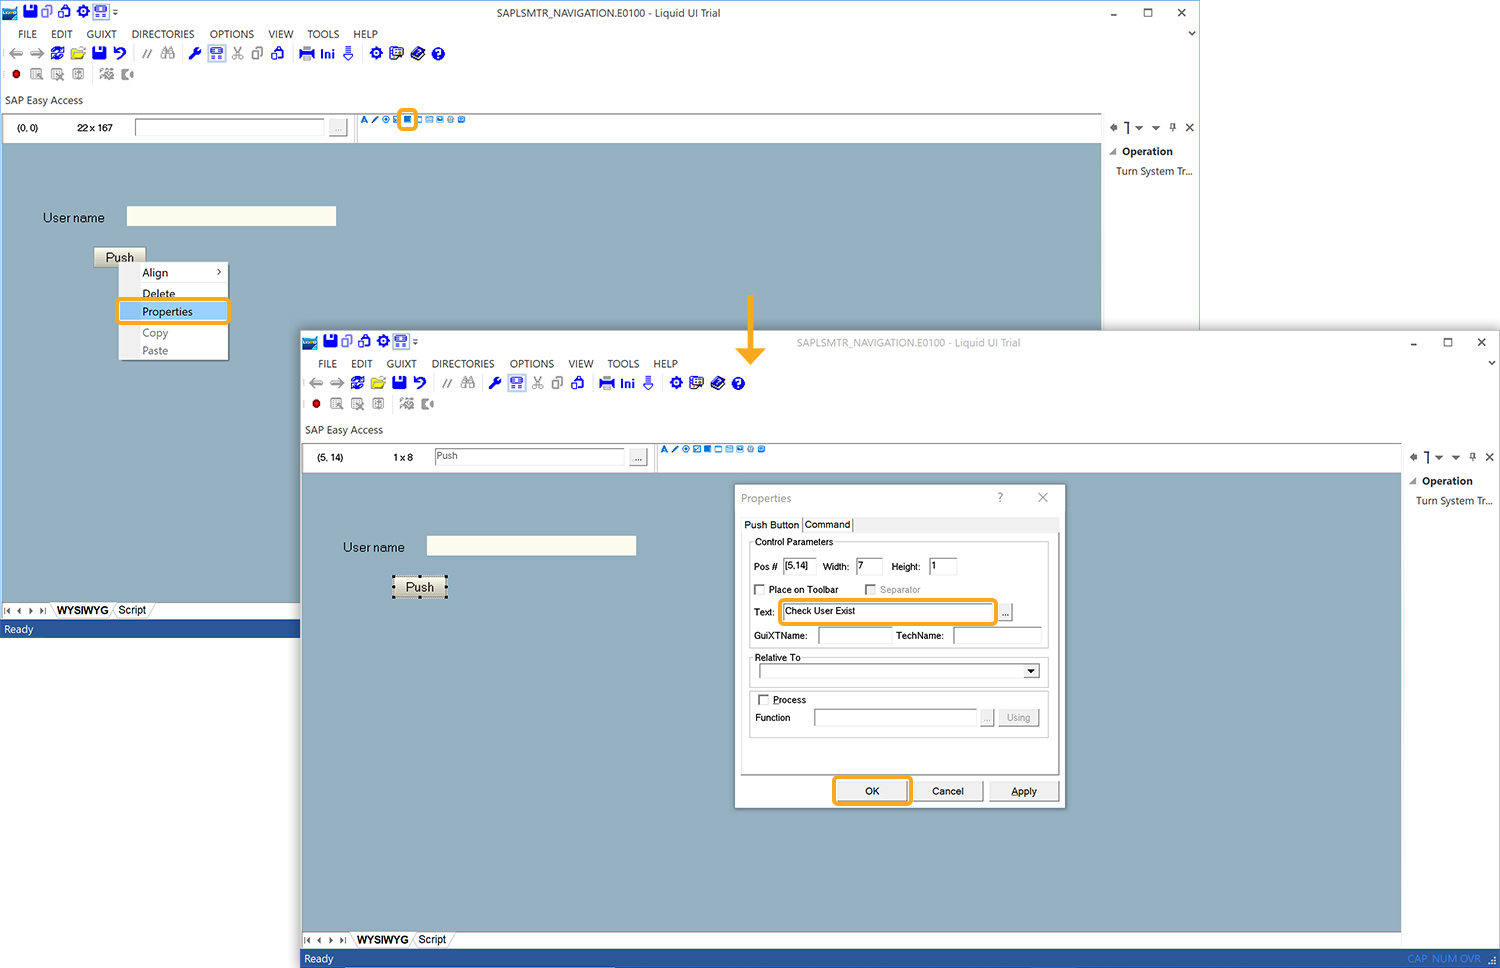
- To add a push button, click and drag the Push button icon on to the screen. Then, right-click and select Properties to rename the push button as Check User Exist, then click OK to proceed.
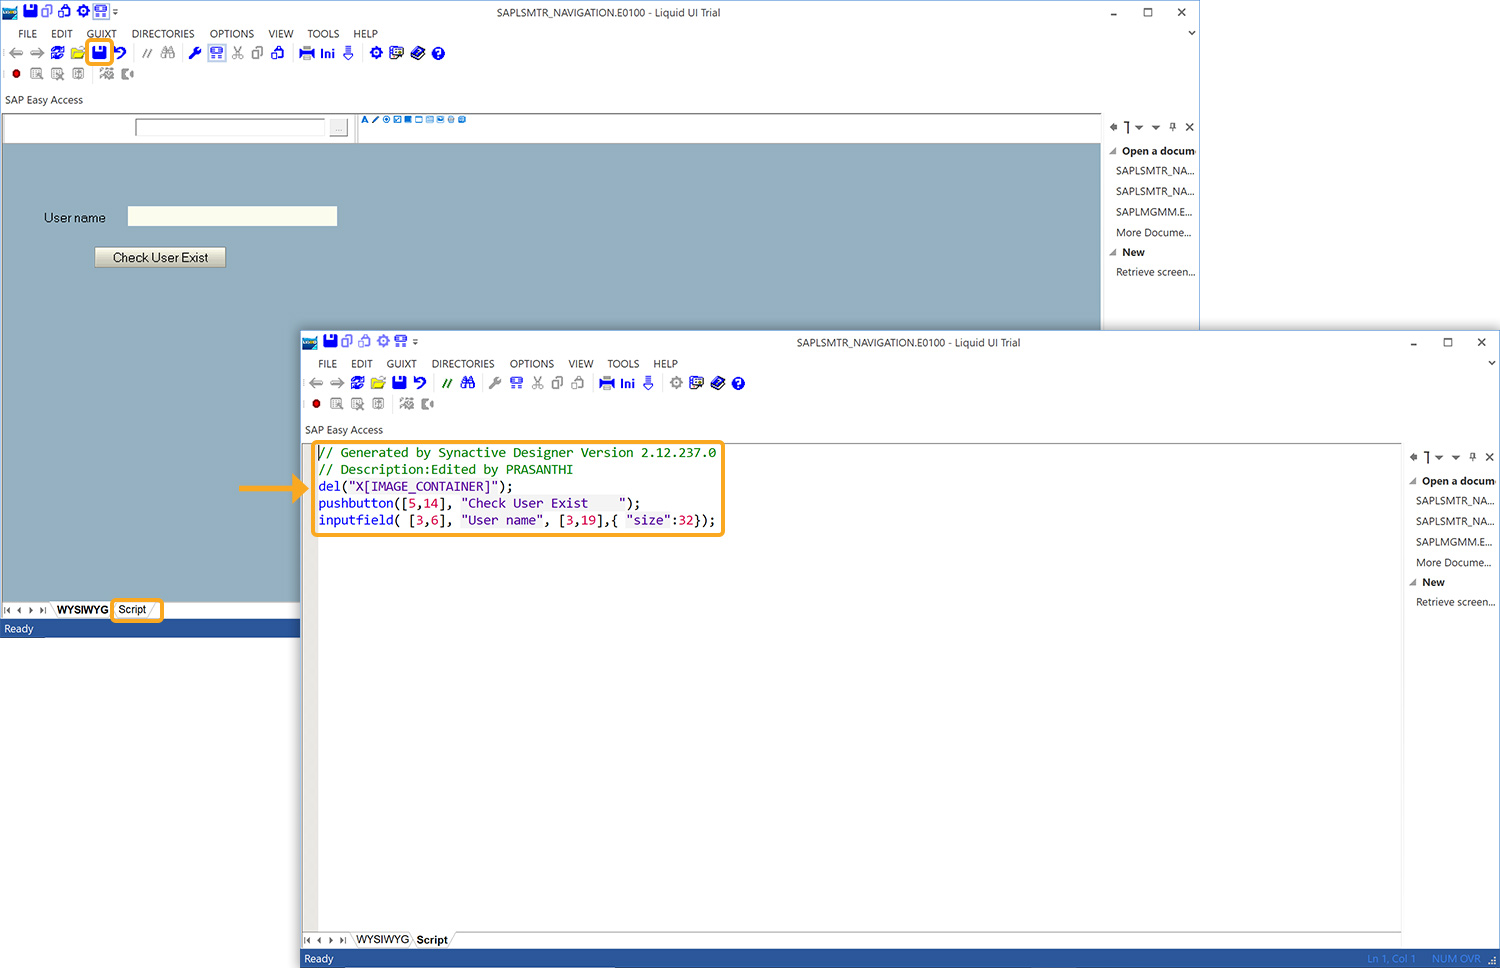
- Save the changes, and click on the Script tab. Then, you can see the autogenerated script for the actions performed (image container deletion, addition of input field, and push button), as shown below.
- Now, refresh the SAP Easy Access screen to see the changes.
Click here for details on customizing your SAP using Liquid UI SDK.
Click here for details on customizing your SAP with WS scripts in various scenarios.


