LAMP enables users to efficiently manage their SAP connections by providing a centralized location for creating, modifying, and deleting connections. This eliminates the need to maintain an additional server for managing SAP connections, and it provides a convenient way to select the required SAP connection from an existing list.
In this article, you will learn how to add and update the SAP connections to LAMP.
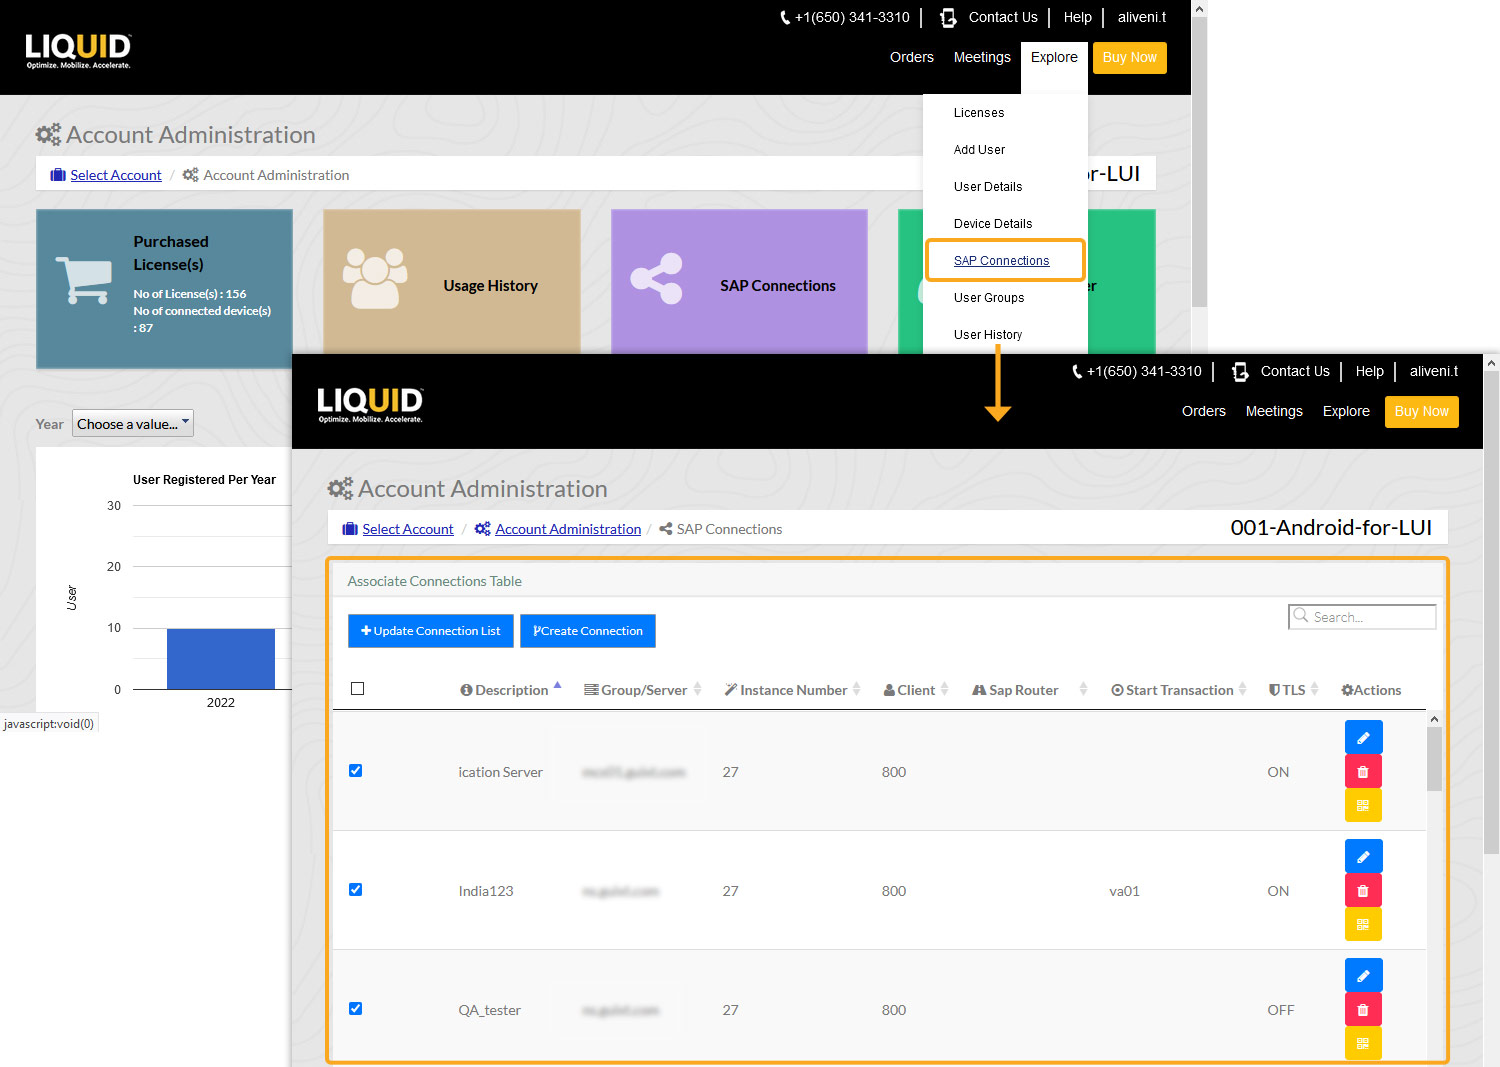
- Select SAP Connections from the Explore menu to open the Associate Connections table, which lists available connections and allows you to create new or modify existing ones.

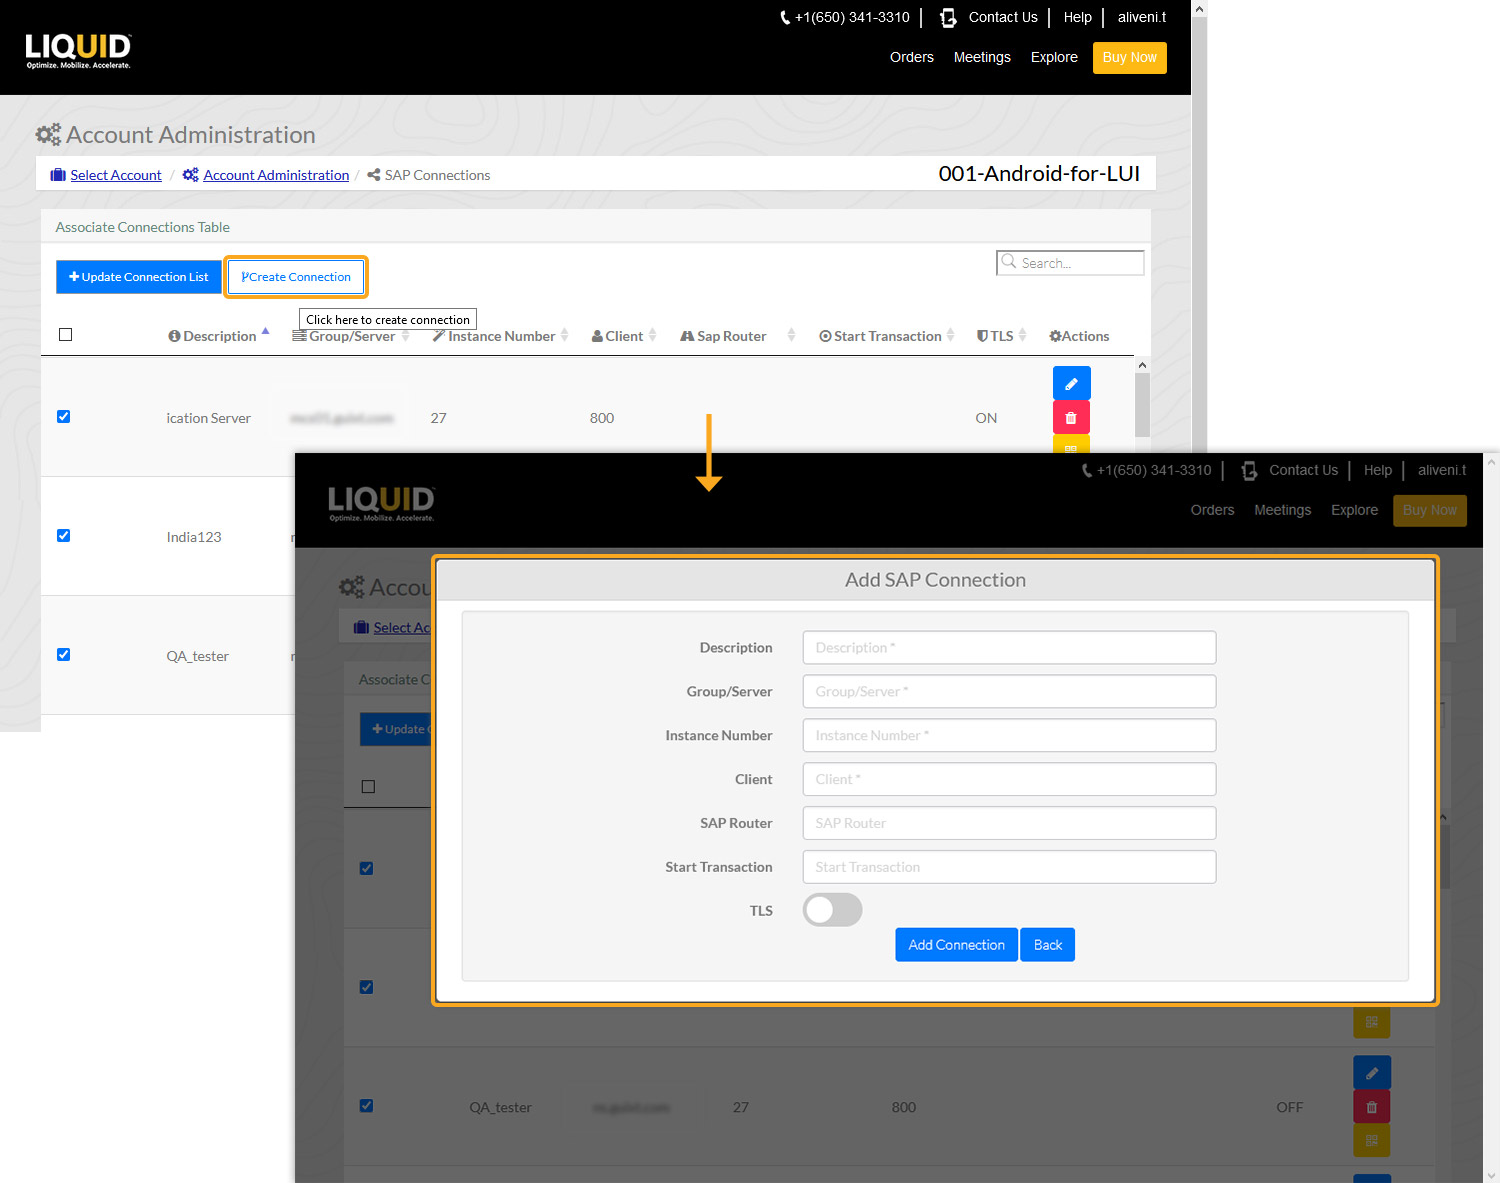
- Click on the Create Connection tab to create a new SAP Connection. The Add SAP Connection popup window appears, with the following fields:
- Description: Specify server-related information.
- Group/Server: SAP server's name or IP address.
- Instance Number: Target port for connecting to the SAP or Liquid UI server.
- Client: The SAP client ID.
- SAP Router: Router address if using one.
- Start Transaction: Tcode to direct the user login to the Liquid UI app.
- TLS: Enables/disables the TLS option.

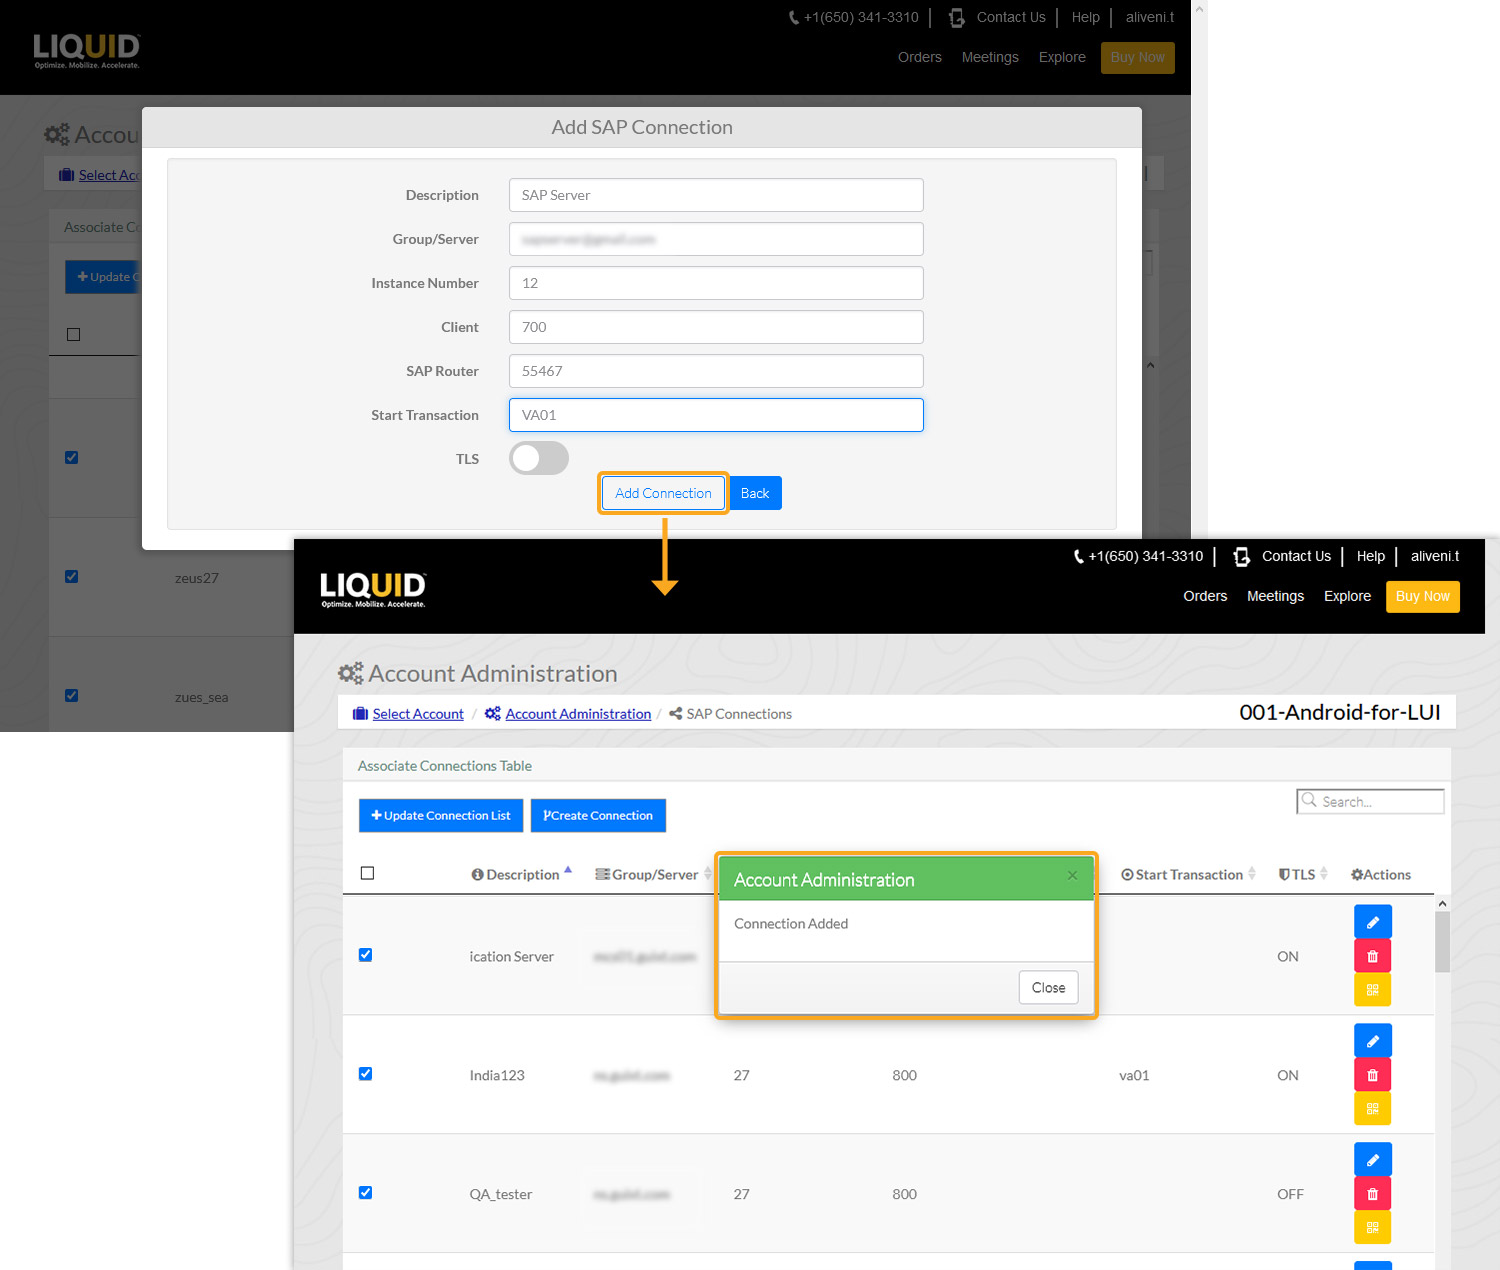
- Click the Add Connection button to add a server connection. A popup will appear confirming the successful addition.

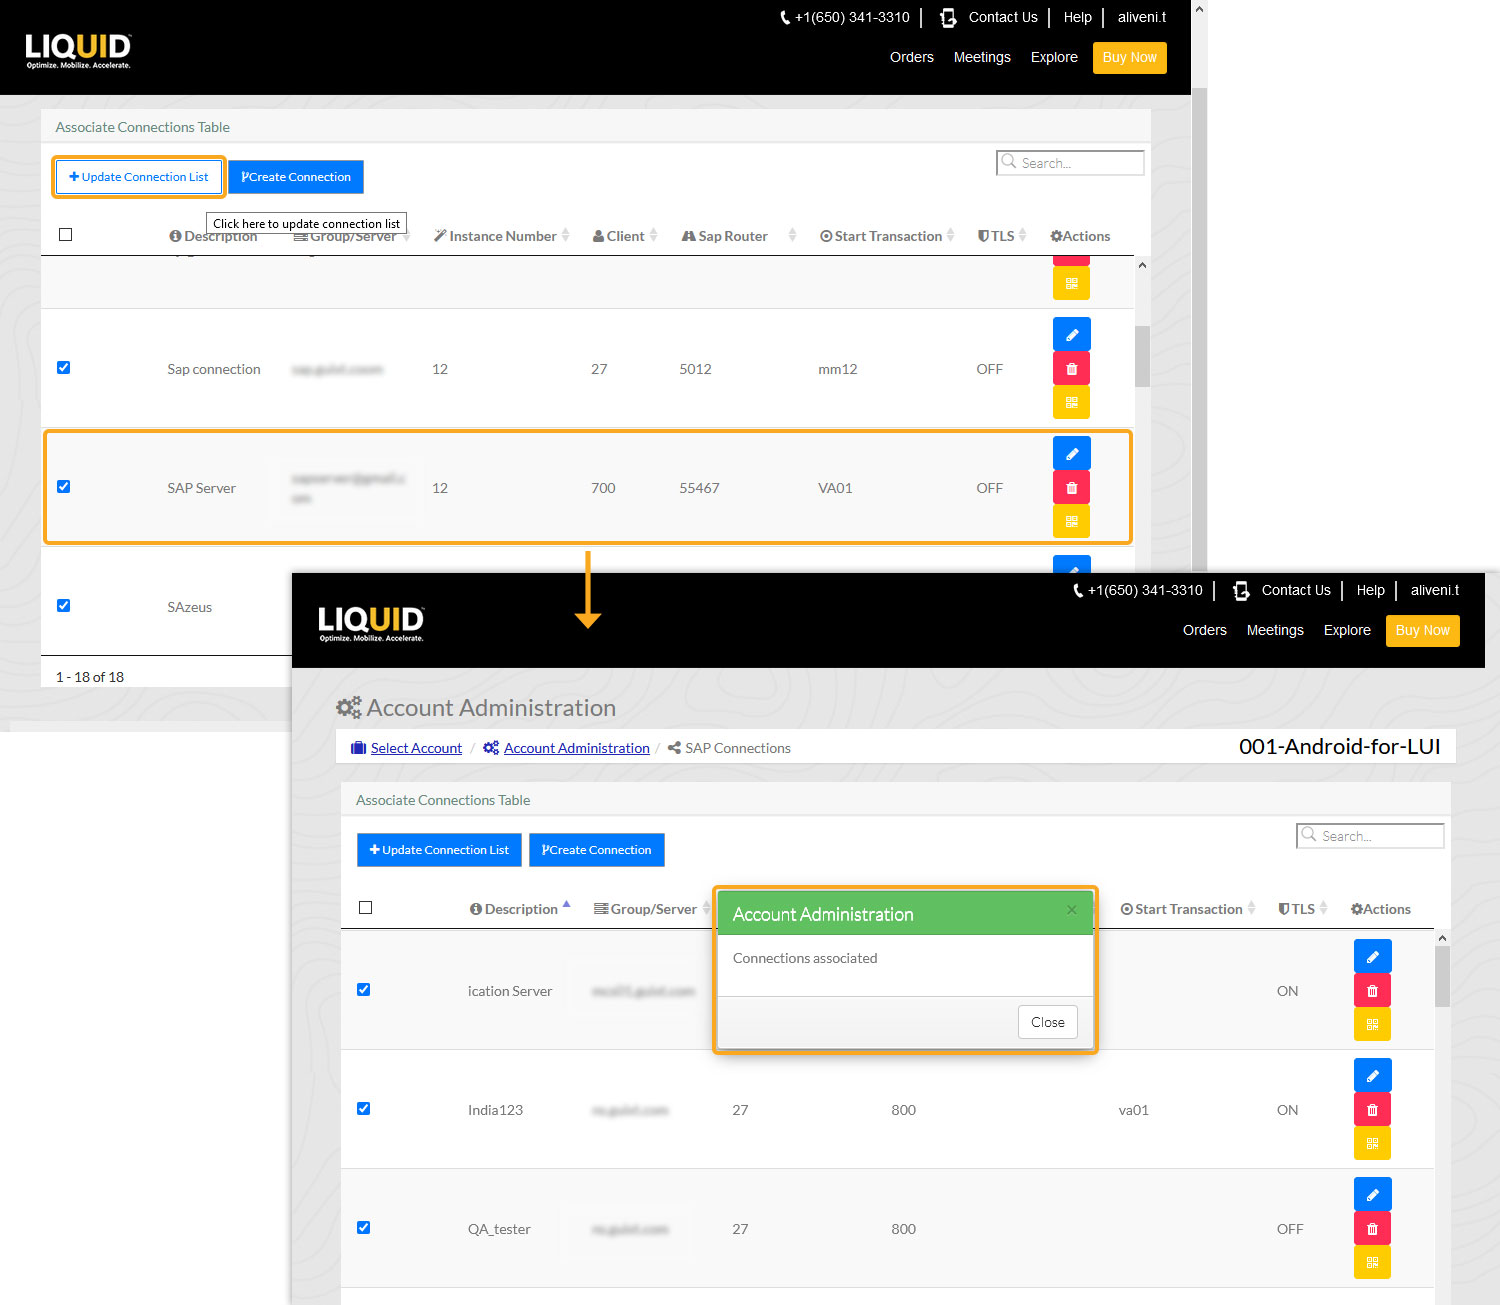
- Finally, click on Update Connection List to add the connection to the associated table.


