Prerequisites
- Products: Liquid UI WS, Liquid UI Server or Local DLL, Client Software
- Commands: del(), checkbox(), set()
Purpose
In this article, you will learn how to use the checkbox value to customize tabs of the Change Sales Order screen. We'll guide you through the following steps.
- Add the checkbox to customize the tabs on the screen
- Assign a checkbox value into a variable
- Customize the screen based on the variable value
User Interface
//Create this file inside your script folder for customizing Change Sales Order: Initial screen SAPMV45A.E0101.sjs
//Now, let's start adding the Liquid UI script to the above file and save it.
Customization
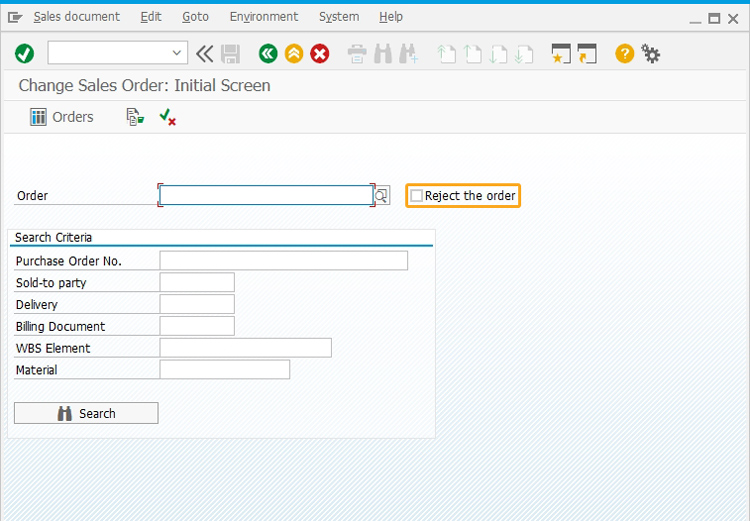
- Add a checkbox with the label “ Reject the order” parallel to the Order input field.
// Creates a checkbox "Reject the order"
Checkbox({"field":"F[Order]","offset":[0,25]},"Reject the order",{"name":"z_reject"});

- Here, we are assigning the checkbox value to a variable using the set command
// Assign checkbox value to a variable
set("V[z_temp]","&V[z_reject]");
- Now, assign the z_iw21_textbox1 variable value to null
// Set null value to the text box initially
set("z_iw21_textbox1","");
- Add a condition to delete the unnecessary tabs on the screen based on the checkbox value.
// Deletes the unnecessary tabs based on the condition
if (z_reject=="X")
{
del("P[Sales]");
del("P[Item detail]");
del("P[Item overview]");
del("P[Ordering party]");
del("P[Procurement]");
del("P[Shipping]");
}
else{
del("P[Reason for rejection]");
}
SAP Process
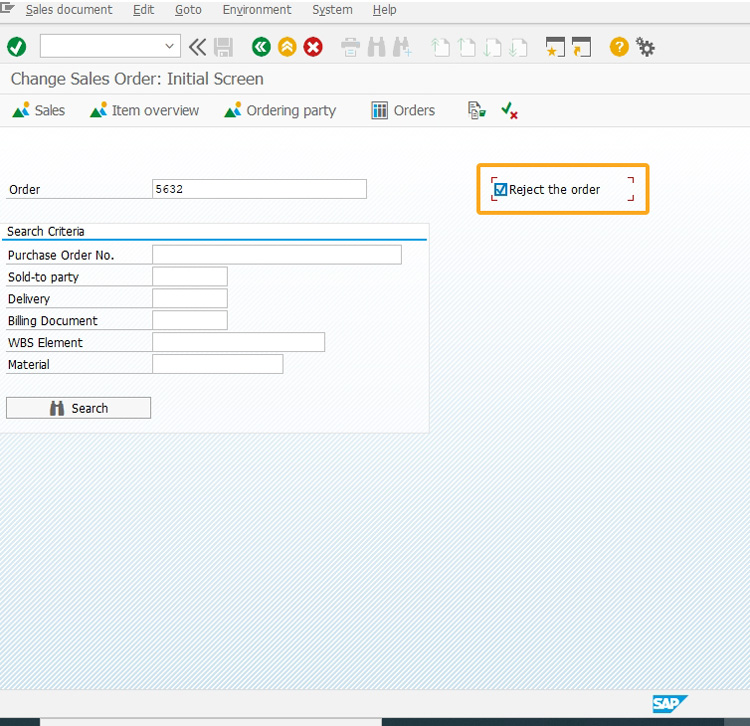
- Logon to SAP and navigate to the Change Sales Order: Initial Screen. You can see the checkbox Reject the order added parallel to the Order input field. Enter the value for the Order input field, select the checkbox and click enter, as shown below.

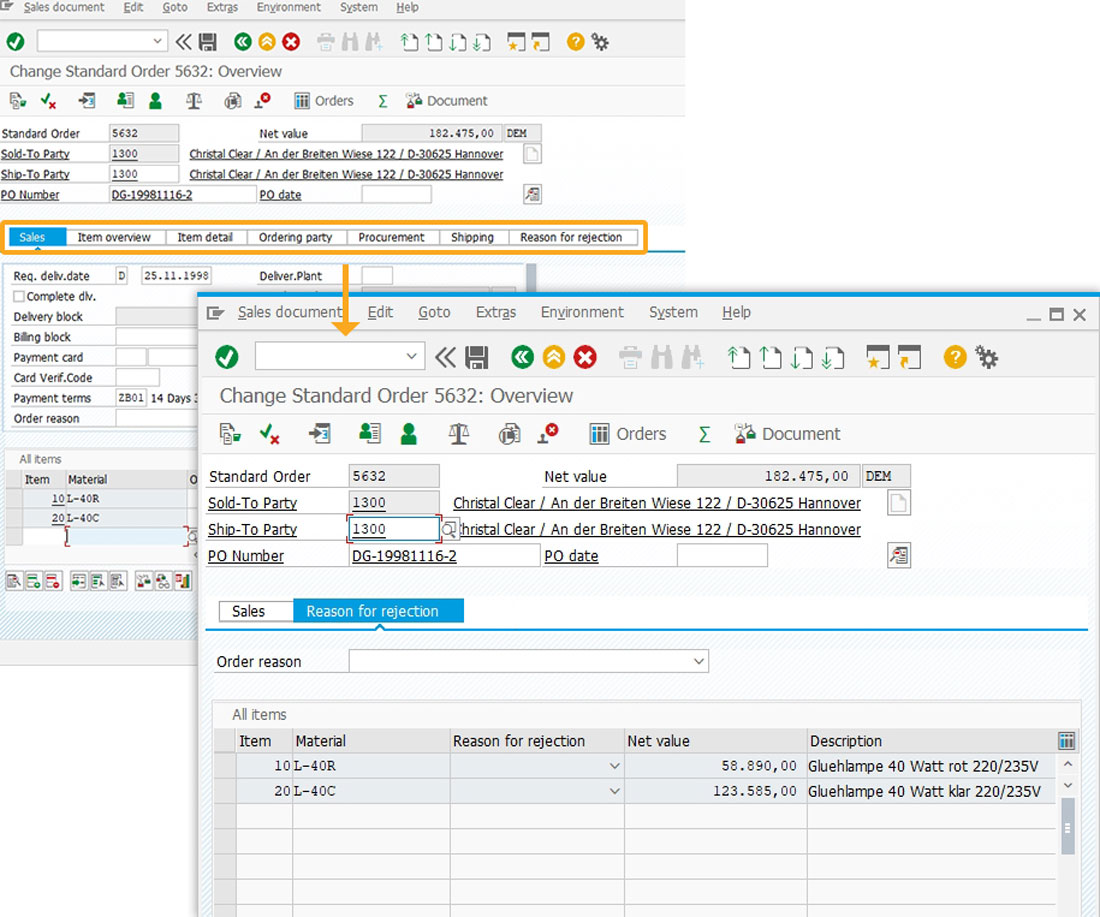
- Now, you will be navigated to the Change Sales Order: Overview screen which displays only the Reason for Rejection and Sales tabs, as the checkbox " Reject the order" is selected.

Next Steps

Create notification in a single click
Learn how to create a notification with a single click.
10 min.
This article is part of the Screens combination/aggregation tutorial.


