Prerequisites
- Products: Liquid UI WS, Liquid UI Server or Local DLL, Client Software
- Commands: set(), column()
Purpose
In this scenario, you will learn how to assign a value to an existing SAP table cell, then assign a table cell value to a variable, and in the end, assign a value to a custom column. These WS capabilities are demonstrated on the Display Sales Order: Overview screen (VA02) as an example. We will walk you through the following steps.
- Assign values to an SAP column
- Assign column values to a variable
- Assign values to a Liquid UI column
//Create this file inside your script folder customizing the Change Sales Order: Overview screen: SAPMV45A.E4001.sjs
//Now, let's start adding the Liquid UI script to the above file and save it.
Assigning values to table cells
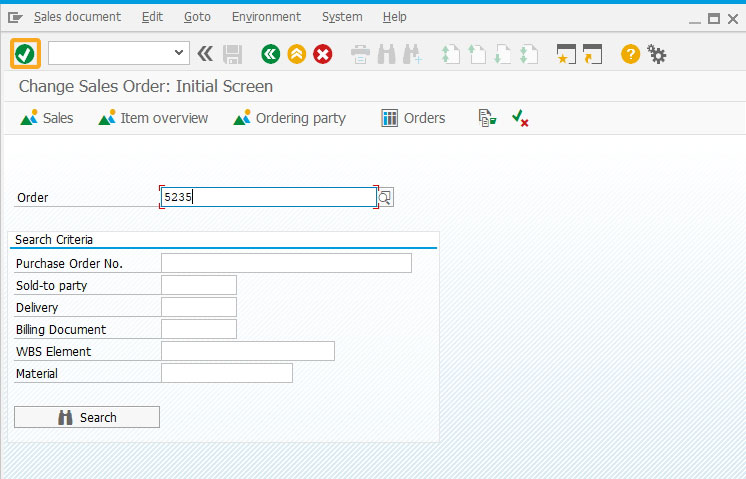
- Navigate to the Change Sales Order: Initial Screen (VA02), and enter the value 5235 in the Order input field; click enter.
- Then, you will navigate to the Display Sales Order: Overview screen. Set the Material column first row value with t-bw03-05, and the Order quantity column first row with value 240, as shown in the image below.
set("cell[All items,Material,1]", "t-bw03-05");
set("cell[All items,Order quantity,1]", "240");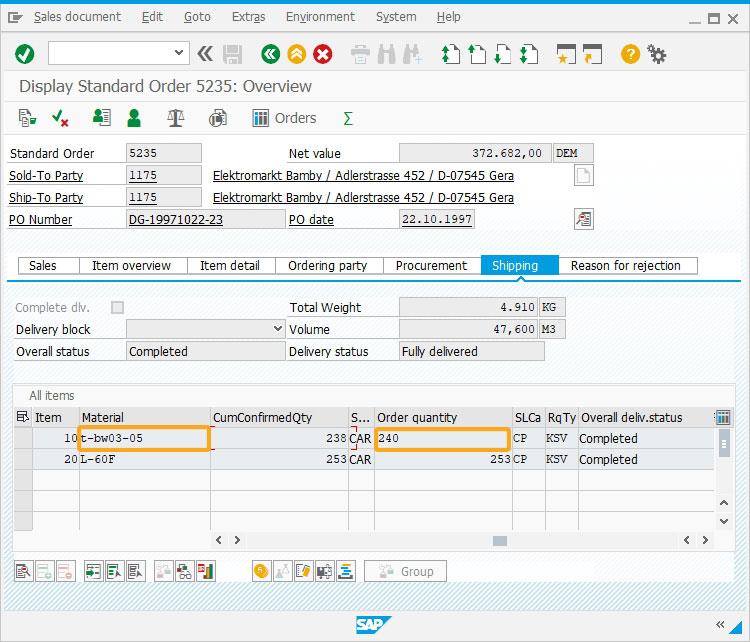
Now, you have successfully assigned the values for the two table column cells Material and Order quantity.
Assigning table cell value to a variable
- You can also perform the reverse operation i.e., assigning the value from a given table field to the variable. To assign the value contained in the Material cell in the first row of the All items table to the variable 'z_mat2, use the following script:
set('V[z_mat2]', '&cell[All items,Material,1]');
println('Order Quantity:'+z_mat2+'' );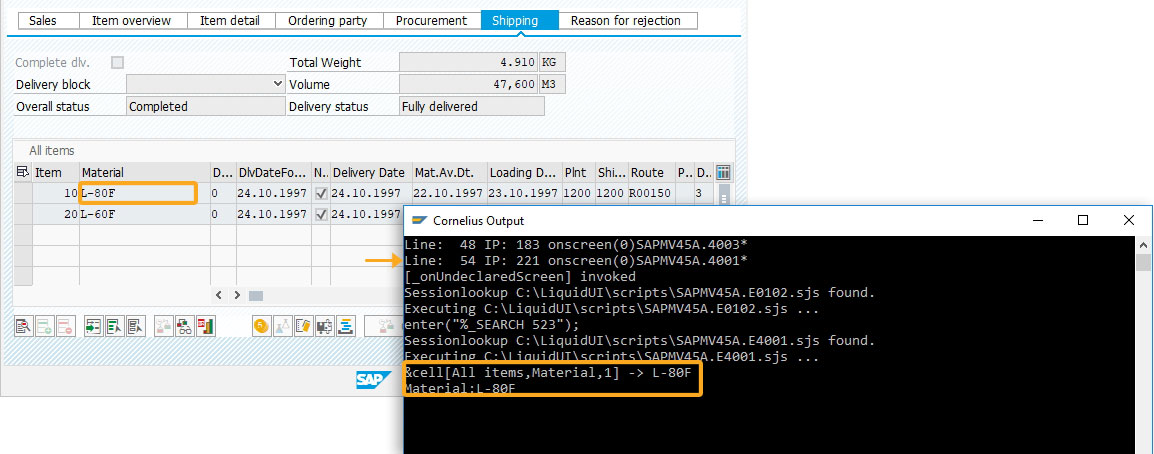
Thus, the value of the Material cell in the first row of the All items table is successfully assigned to the variable z_mat2.
Assigning values to a table column
- Create a Liquid UI column in a native SAP table (All items) using the column command, as shown below.
column("Weight",{"table":"All Items","size":8,"name":"estcost","position":2});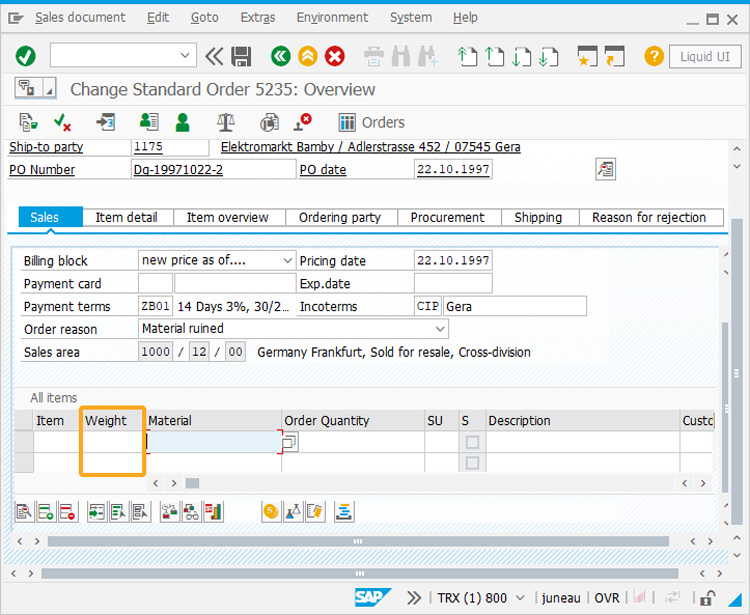
- Assign values 1, 56, and 101 to the first three cells in the new column Weight using the following script:
set("V[estcost.1]","1");
set("V[estcost.2]","56");
set("V[estcost.3]","101");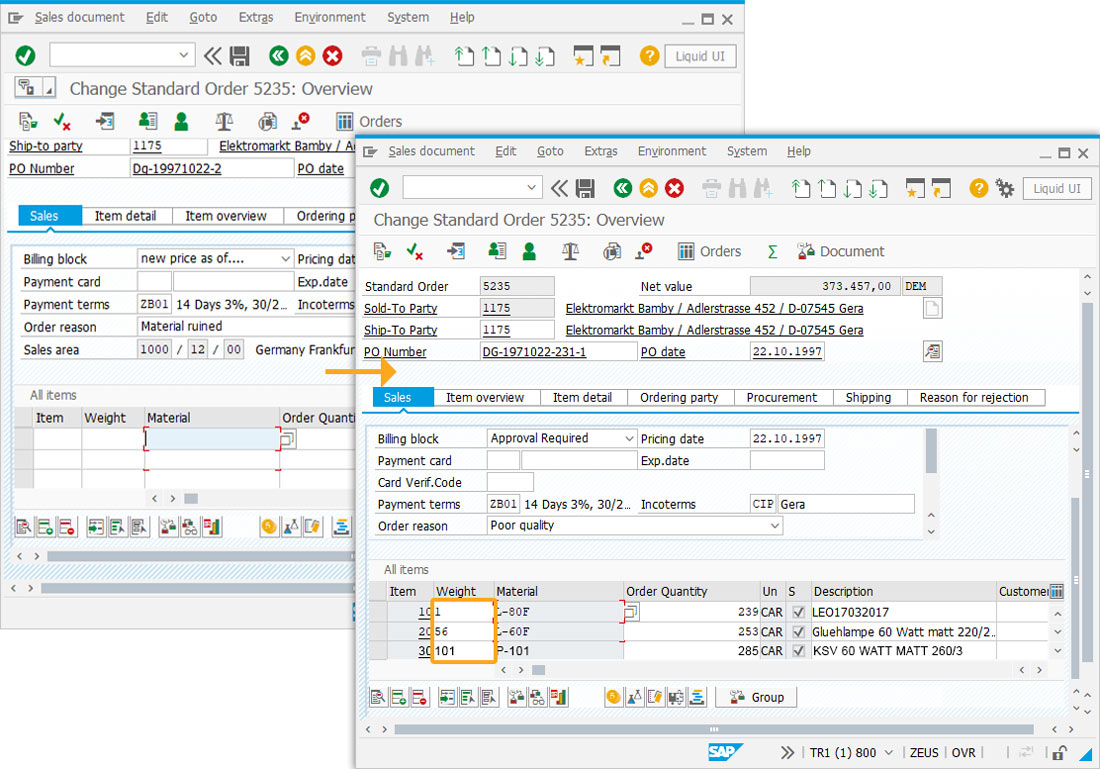
Next Steps

Learn how to access data from SAP table using table scrolling logic.
10 min.
This article is part of the 4.0 Take a deep dive into the SAP table and Liquid UI table


