Prerequisites
- Products: Liquid UI WS, Liquid UI Server or Local DLL, Client Software
- Commands: pushbutton(), onscreen(), enter(), del(), table(), title()
Purpose
Learn how to view the required item details of your sales order on the Display Sales Order: Initial Screen. To demonstrate this, we'll walk you through the following steps.
- Delete unnecessary elements on the SAP screen using del()
- Add an input field to enter Order number
- Add a pushbutton to run a process on click
- Add functionality to retrieve values from the Change Sales Order Overview screen and place them in the Liquid UI table
//Create this file inside your script folder for customizing the Display Sales Order: Initial Screen SAPMV45A.E0102.sjs
//Now, let's add the Liquid UI script to the above file and save it.
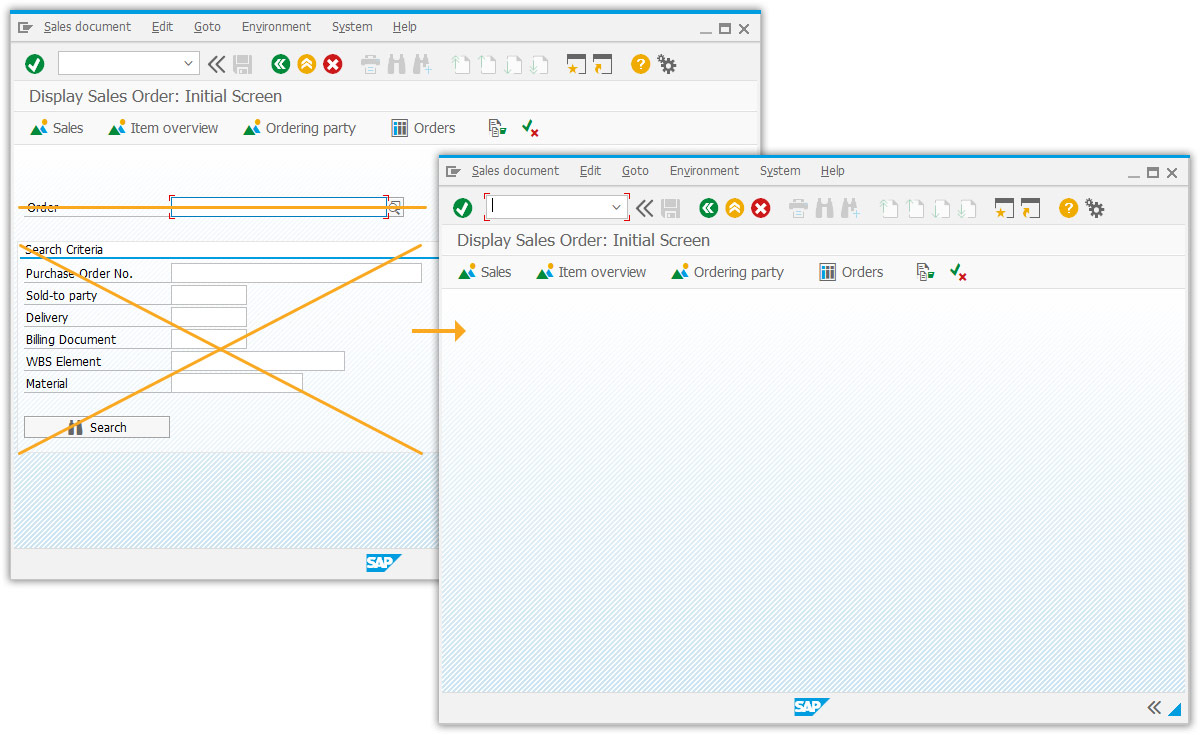
- Delete the Order input field and Search Criteria group box on the screen, as shown below.
//Deletes an Order inputfield
del("F[Order]");
//Deletes Search Criteria groupbox with all the elements
del("G[Search Criteria]");
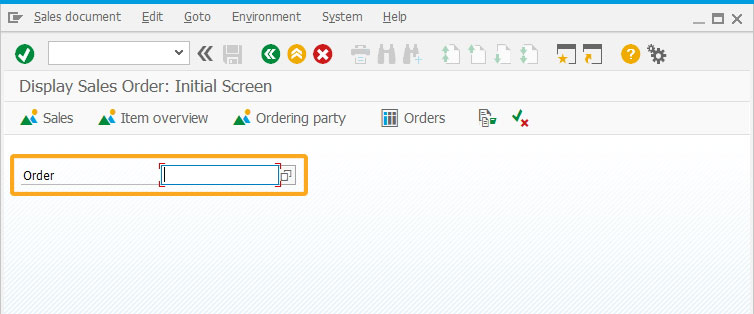
- Add Order input field with a searchhelp option assigned to select the order number.
//Creates an inputfield with the Order as a label
inputfield( [1,2], "Order", [1,22],{"name":"z_message_info","shname":"VBELN","size":16, "searchhelp":"VMVA"});
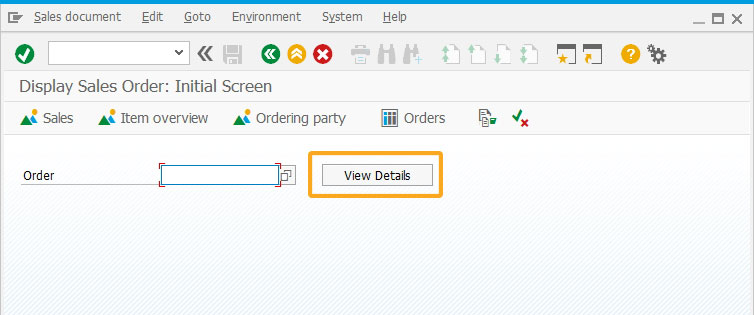
- Add View Details pushbutton to execute the z_AssigntoSAPTable function on click.
//Creates a pushbutton to run a process using the parameters
pushbutton([1,45], "View Details","?",{"process":z_AssigntoSAPTable,"size":[1,15],"using":{"z_message_info":z_message_info}});
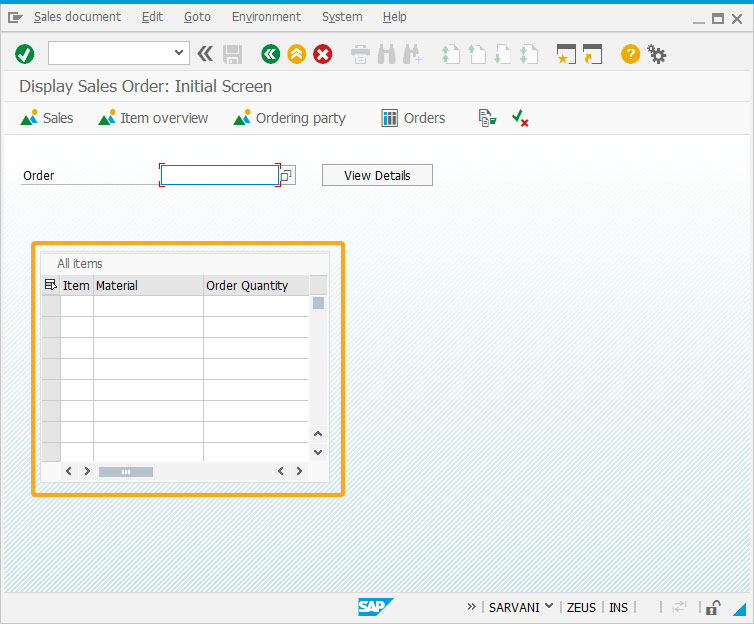
- Add All items table with three columns namely Item, Material, and Order Quantity to get values into them.
//Creates a table with 3 columns and 10 rows
table([5,5],[15,45],{"name":"va01_AllItems","title":"All items", "rows":10, "rowselection":true,"columnselection":true});
column('Item',{"table":"va01_AllItems","size":4,"name":"z_va01_item","position":1});
column('Material',{"table":"va01_AllItems","size":15,"name":"z_va01_material","position":2});
column('Order Quantity',{"table":"va01_AllItems","size":15,"name":"z_va01_Orderquantity","position":3});
- Add a function to get values from the All items table in the VA03 overview screen and place them on the initial screen.
//Creates a function to retrieve table values
function z_AssigntoSAPTable(param){
   println(param.z_message_info);
  temp_items=[];
  temp_material=[];
  temp_quantity=[];

onscreen 'SAPMV45A.0102'
 set('F[Order]', "&V[z_message_info]");
 enter();
onscreen 'SAPMSDYP.0010'
   enter();

onscreen 'SAPMSDYP.0010'
   enter();

onscreen 'SAPMV45A.4001'
	  absrow = 1;
      relrow = 1;
      gettableattribute("T[All items]",{"firstvisiblerow":"FVisRow", "lastvisiblerow":"LVisRow", "lastrow":"LastRow"});
      if(FVisRow==1) {
       goto new_row;
      }
      enter("/ScrollToLine=&V[absrow]", {"table":"T[All items]"});
	  new_screen:;

onscreen 'SAPMV45A.4001'

        gettableattribute("T[All items]", {"firstvisiblerow":"FVisRow", "lastvisiblerow":"LVisRow", "lastrow":"LastRow"});
		relrow = 1;
        new_row:;
        if(absrow>LVisRow){
         enter("/ScrollToLine=&V[absrow]", {"table":"T[All items]"});
         goto new_screen;
		}
       if(absrow>LastRow){
         goto end_of_table;
       }

		set("V[z_va01_item]","&cell[All items,Item,&V[relrow]]");
		set("V[z_va01_mat]","&cell[All items,Material,&V[relrow]]");
		set("V[z_va01_OQ]","&cell[All items,Order Quantity,&V[relrow]]");
		println('The item Data is '+z_va01_item+':');
		println('The Material Data is '+z_va01_mat+':');
		println('The Order Quantity Data is '+z_va01_OQ+':');
		temp_items.push(z_va01_item);
		temp_material.push(z_va01_mat);
		temp_quantity.push(z_va01_OQ);

      absrow++;
      relrow++;
      goto new_row;
      end_of_table:;
      enter("/ScrollToLine=1",{"table":"T[All items]"});
	   enter("/3");

onscreen 'SAPMV45A.0102'
gettableattribute("T[va01_AllItems]", {"firstvisiblerow":"FisRow", "lastvisiblerow":"LisRow", "lastrow":"LatRow"});
	 var z=1;

	 for(var i=0;i<=temp_items.length;i++)
	  {
		va01_AllItems.z_va01_item[i] = temp_items[i];
		va01_AllItems.z_va01_material[i] = temp_material[i];
		va01_AllItems.z_va01_Orderquantity[i] = temp_quantity[i];
		z=z+1;

	 }
	 enter("?");

}
- Enter the Order number in the Order input field. Click the View Details pushbutton.
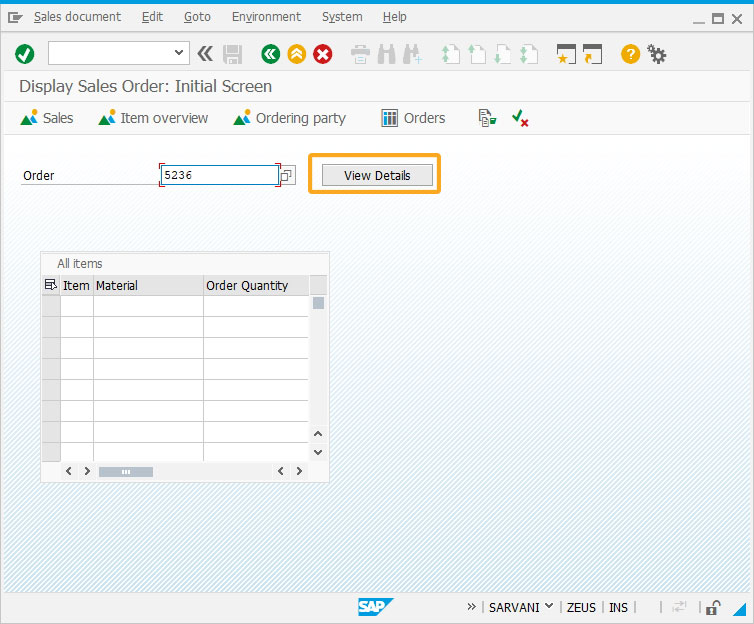
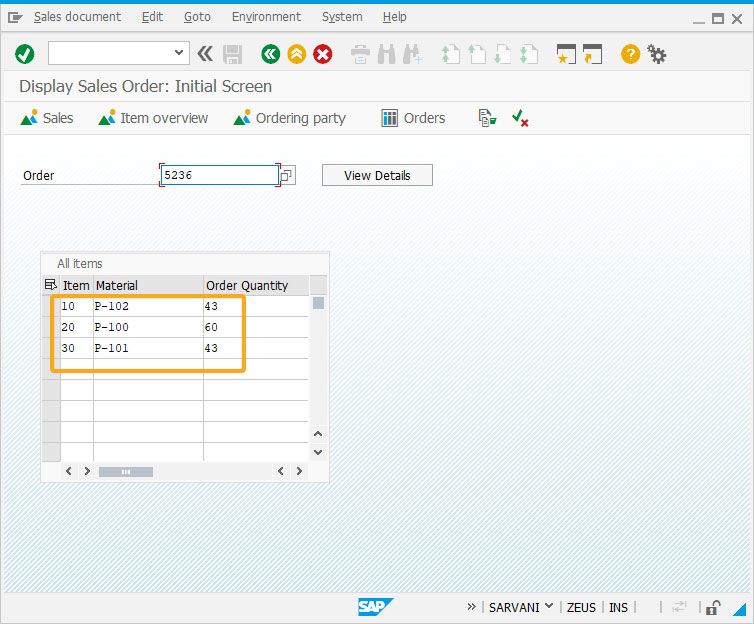
- You will see the Order details of the required columns displayed on the same screen, as shown below.
Next Steps

Scenario 3 - Creating Material with Condition
Learn how to create a material by pre-setting the required values for the required fields.
Learn how to create a material by pre-setting the required values for the required fields.
10 min.
This article is part of the Screens combination/aggregation
Attached files: sapmv54a.e0102.sjs.sjs


