Prerequisites
- Products: Liquid UI WS, Liquid UI Server or Local DLL, Client Software
- Commands: pushbutton(), del(), set(), radiobutton(), checkbox()
Purpose
This article guides you on how to use set() to assign values to the required fields automatically. Here, we are considering the SAP Easy Access screen to demonstrate the process and walk you through the following scenarios:
- Assign values to the input fields on the same screen.
- Assign values to the radio buttons on the different screens.
User Interface
//Create the file SAPMV45A.E0101.sjs inside your scripts folder for customizing the Create Sales Order: Initial Screen
//Now, add the Liquid UI script to the above file, and save it
Assign values to the input fields on the same screen.
Customization
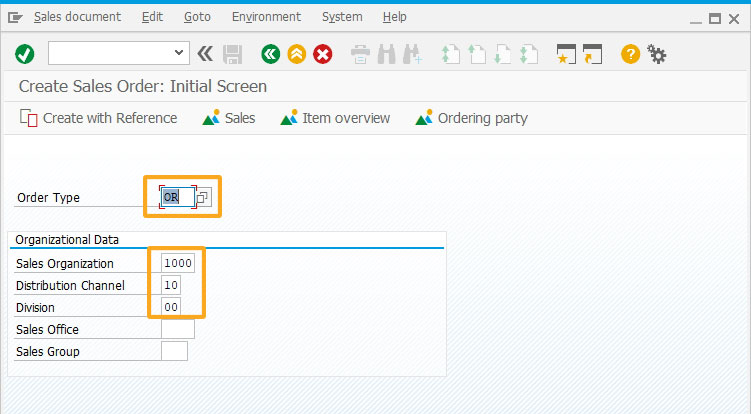
- Login to SAP, navigate to the VA01 screen, and assign values to the required input fields, as shown in the image below.
//Assigns values to the input fields
set("F[Order Type]","OR");
set("F[Sales organization]","1000");
set("F[Distribution Channel]","10");
set("F[Division]","00");
Assign values to the radio buttons on the different screen
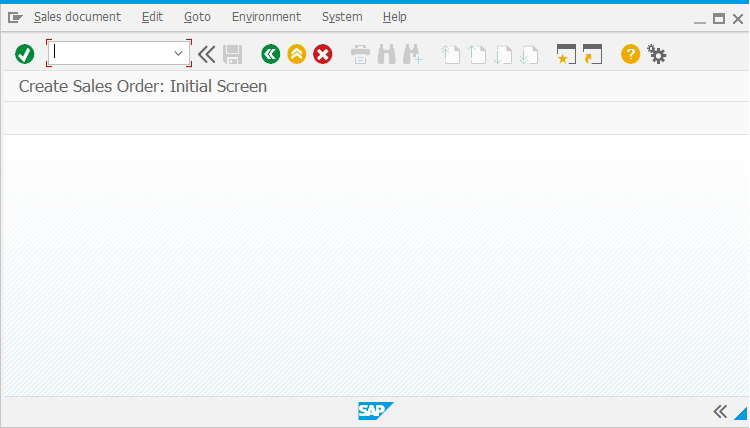
- Delete unnecessary screen elements on the Create Sales Order: Initial Screen using the del(), as shown below.
// Deletes unnecessary screen elements
del("F[Order Type]",{"triple":true});
del("G[Organizational Data]");
del("P[Create with Reference]");
del("P[Sales]");
del("P[Item overview]");
del("P[Ordering party]");
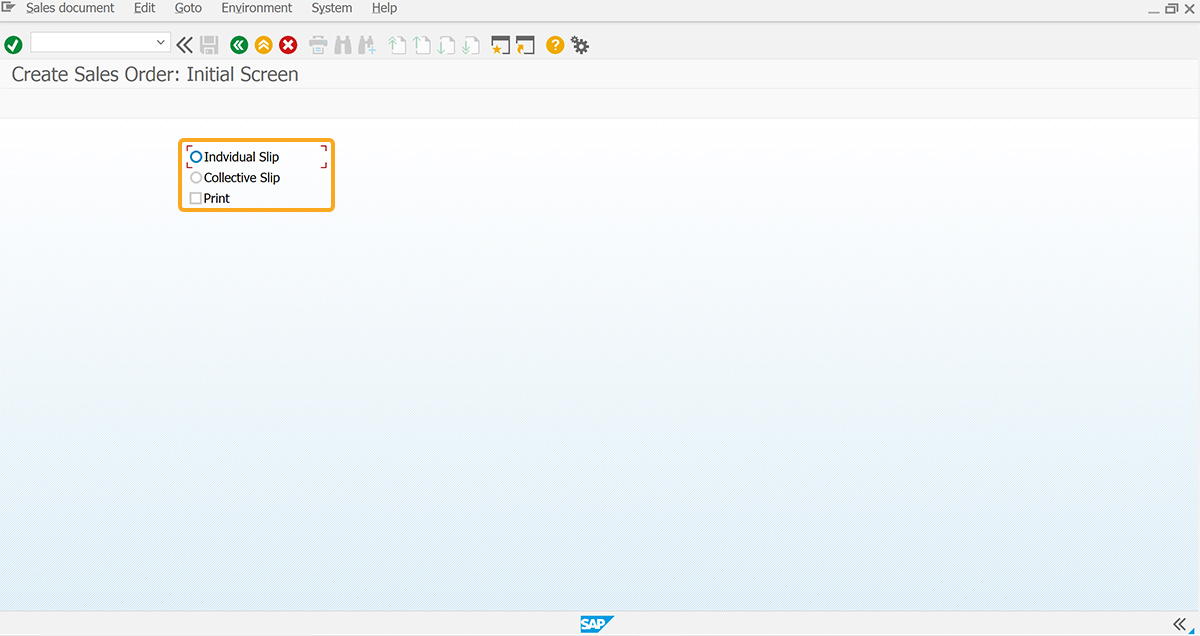
- Add two radio buttons labeled Individual Slip and Collective Slip to assign their values to the desired fields and a checkbox labeled Print, as shown below.
//Creates radiobuttons to assign values
radiobutton([1,25],"Indvidual Slip",{"name":"z_radio","value":"A"});
radiobutton([2,25],"Collective Slip",{"name":"z_radio","value":"B"});
//Creates checkbox to
checkbox([3,25],"Print",{"name":"z_va01_print","default":"0"});
- Add a toolbar push button labeled Movement Type to execute the z_test process on click.
//Creates a push button to execute the process
pushbutton([TOOLBAR],"Movement Type","/nmb1c",{"process":"z_test"});
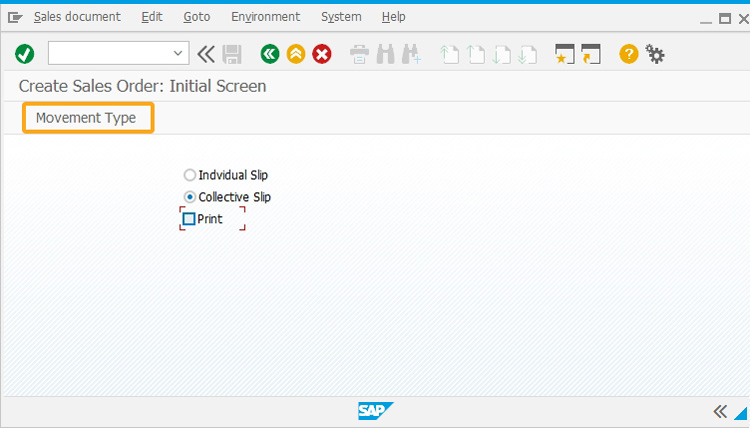
- Add the z_test function to check the radio button value.
//Function to check the radio button value
function z_test() {
        onscreen 'SAPMM07M.0400'
        if(z_radio=="A") {
          set("R[Individual Slip]",""X");
          }
          if(z_radio=="B") {
            set("R[Collective Slip]","X");
          }
        }
SAP Process
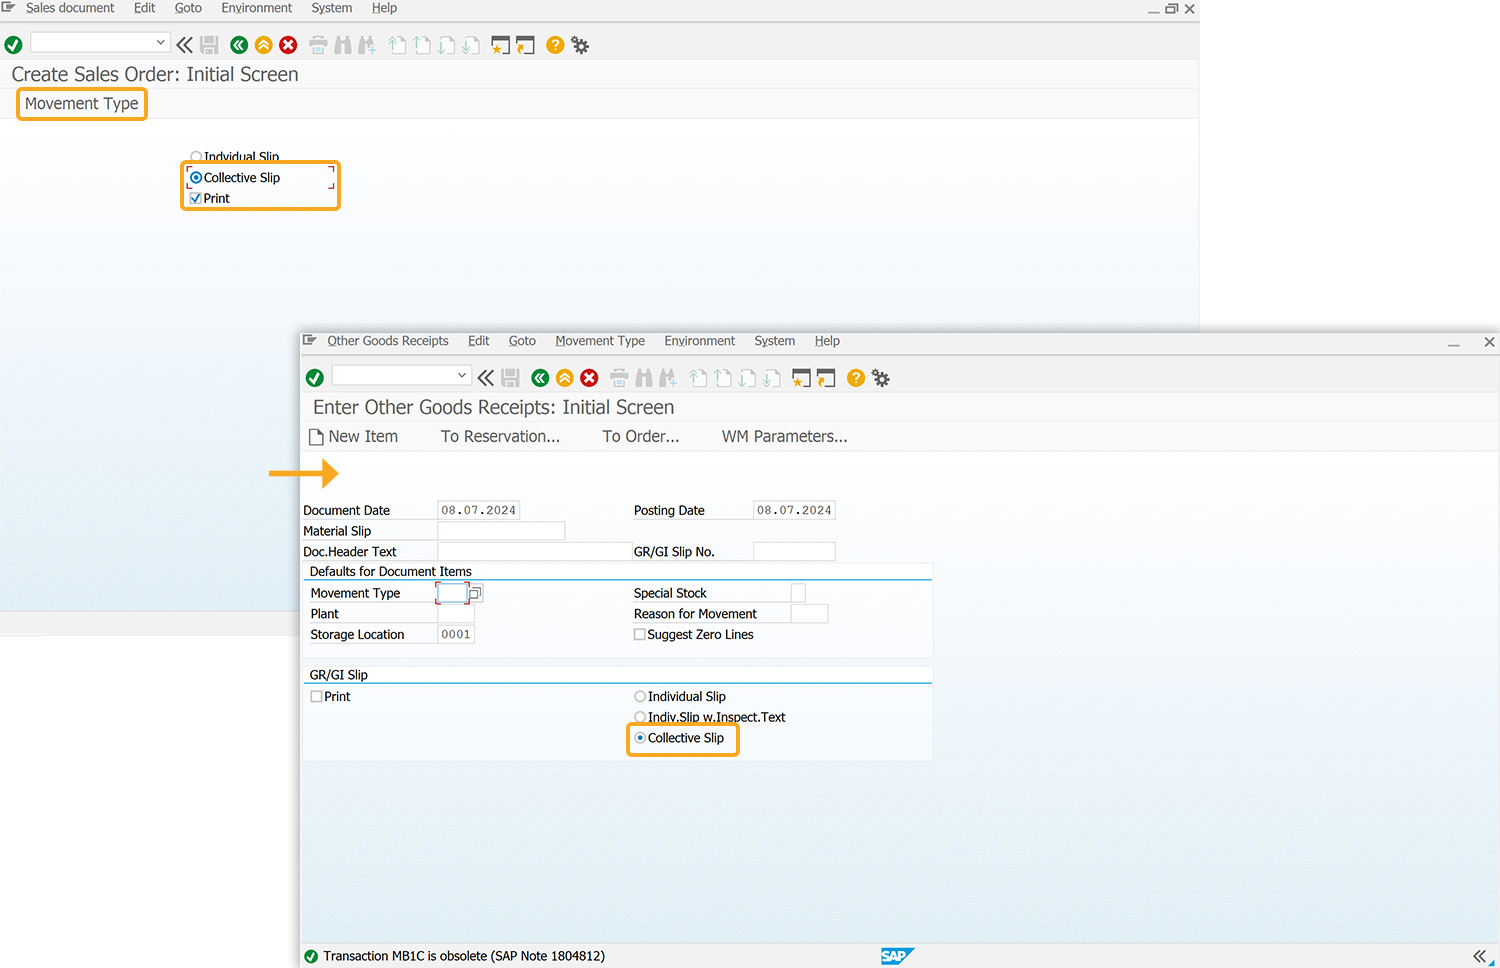
- Refresh the SAP screen, select a radio button, check the Print checkbox, and click the Movement Type toolbar push button. Then, you will be navigated to the MB1C transaction where the Collective Slip radio button is pre-selected, thus allowing radio button values to be passed between screens using set().
