Prerequisites
- Products: Liquid UI WS, Liquid UI Server or Local DLL, Client Software
- Commands: pushbutton(), set(), onscreen(), inputfield(), setcursor(), enter()
Purpose
The article demonstrates how to use the setcursor command to place the cursor into the input field, a table cell, or a position on the list of your choice, based on the SAP Easy Access screen and Create Sales Order: Initial screen we will walk you through you the following scenarios:
- Set cursor on Liquid UI fields
- Set cursor on Table cells
Scenario 1: Set cursor on Liquid UI fields
Place the cursor on the input field using setcursor(), based on the SAP Easy Access screen we’ll guide you through the following actions:
- Delete the image container on the SAP Easy Access screen.
- Add input fields to set the cursor to the required field.
- Set the cursor to the specified input field using setcursor().
User Interface
//Create the file SAPLSMTR_NAVIGATION.E0100.sjs inside your scripts folder for customizing the SAP Easy Access screen.
//Now, add the Liquid UI script to the above file and save it.
Customization
- Delete the image container on the SAP Easy Access screen using the del().
//Deletes the image container on the SAP screen
del("X[IMAGE_CONTAINER]");
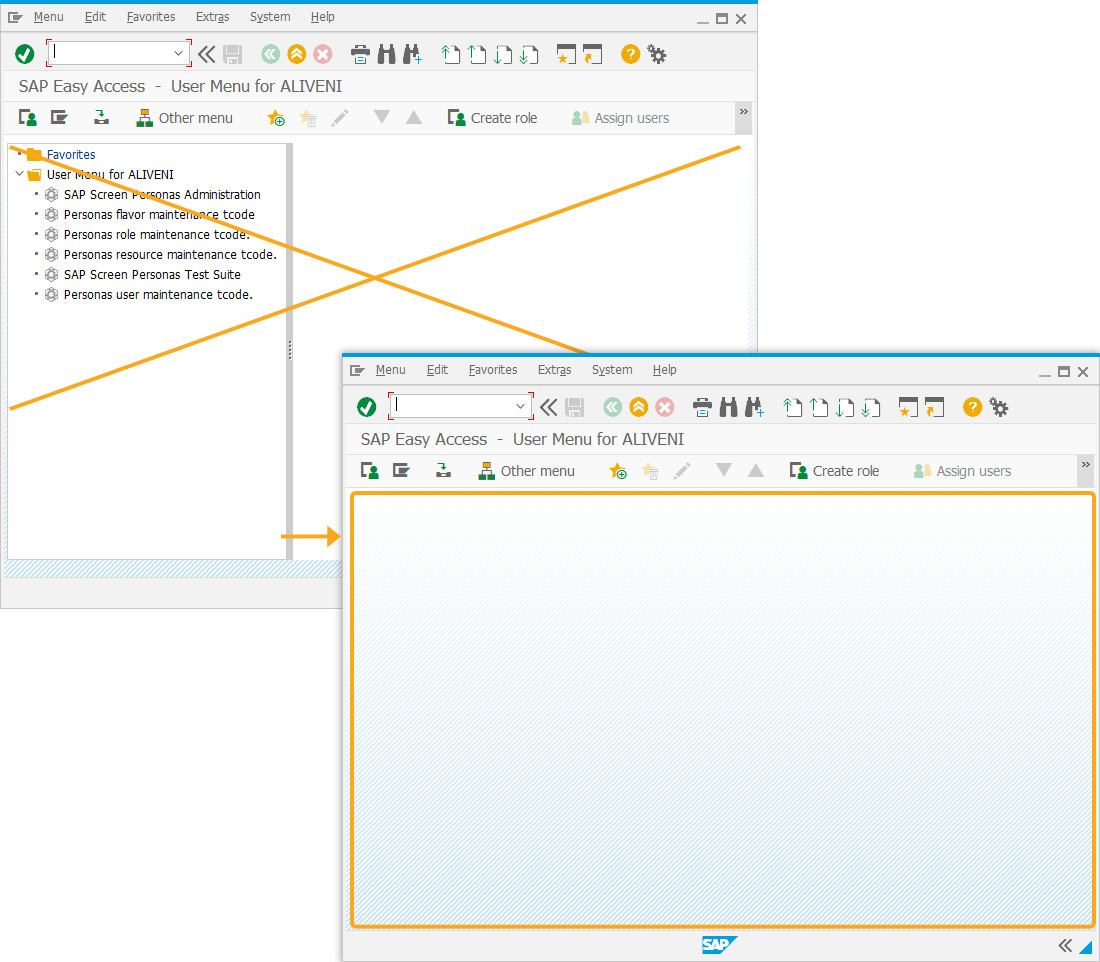
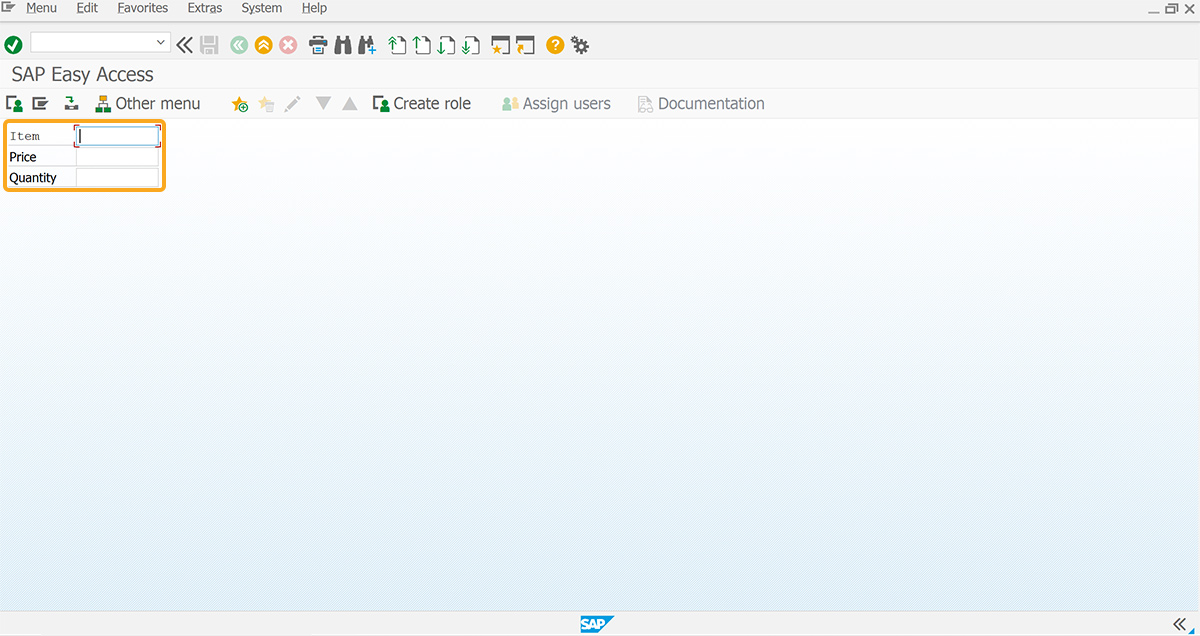
- Add three input fields labeled Item, Price, and Quantity to set the cursor to the specified field.
//Creates three input fields
inputfield([0,1],"Item",[0,10],{"name":"z_test1","size":10});
inputfield([1,1],"Price",[1,10],{"name":"z_test2","size":10});
inputfield([2,1],"Quantity",[2,10],{"name":"z_test3","size":10});
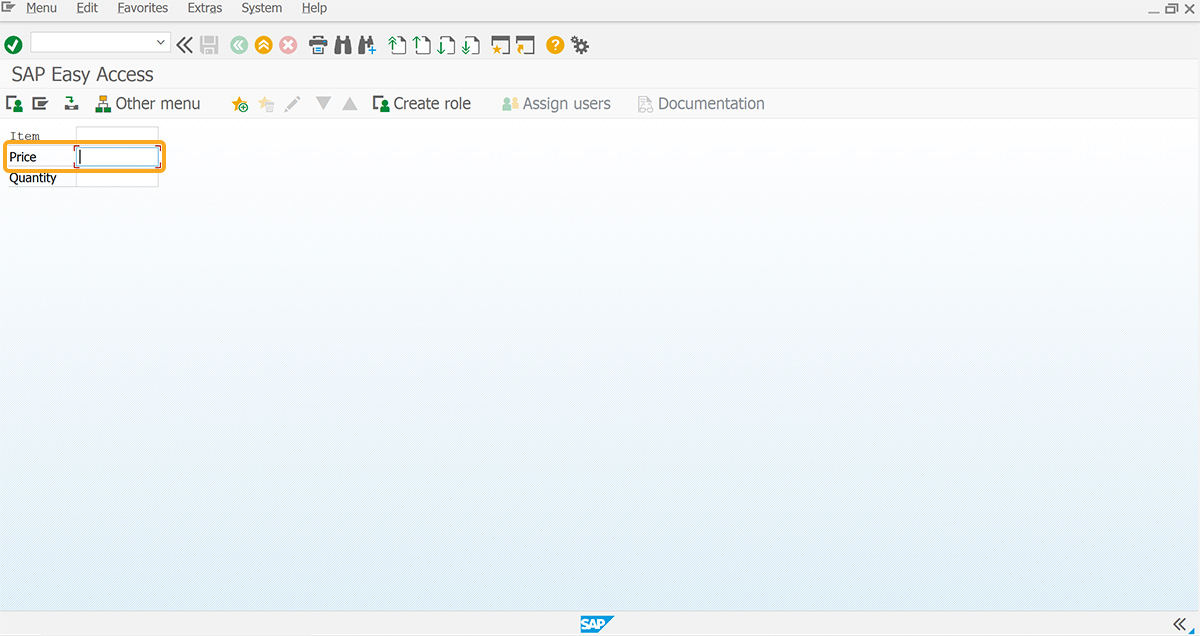
- Set the cursor on the Price input field using the setcursor command.
//Sets the cursor on the Price input field
setcursor("F[Price]");
SAP Process
- Refresh the SAP screen. Then, you can see that the cursor is set on the Price input field, as shown in the image below.
Scenario 2: Set cursor on Table cells
To position the cursor in a specific table cell, consider the Create Sales Order: Initial Screen as an example and we’ll guide you through the following steps:
- Navigate to Create Sales Order: Initial Screen and add a toolbar push button.
- Add a function to set the values.
User Interface
//Create the file SAPMV45A.E0101.sjs inside your scripts folder for customizing the Create Sales Order: Initial Screen.
//Now, add the Liquid UI script to the above file and save it.
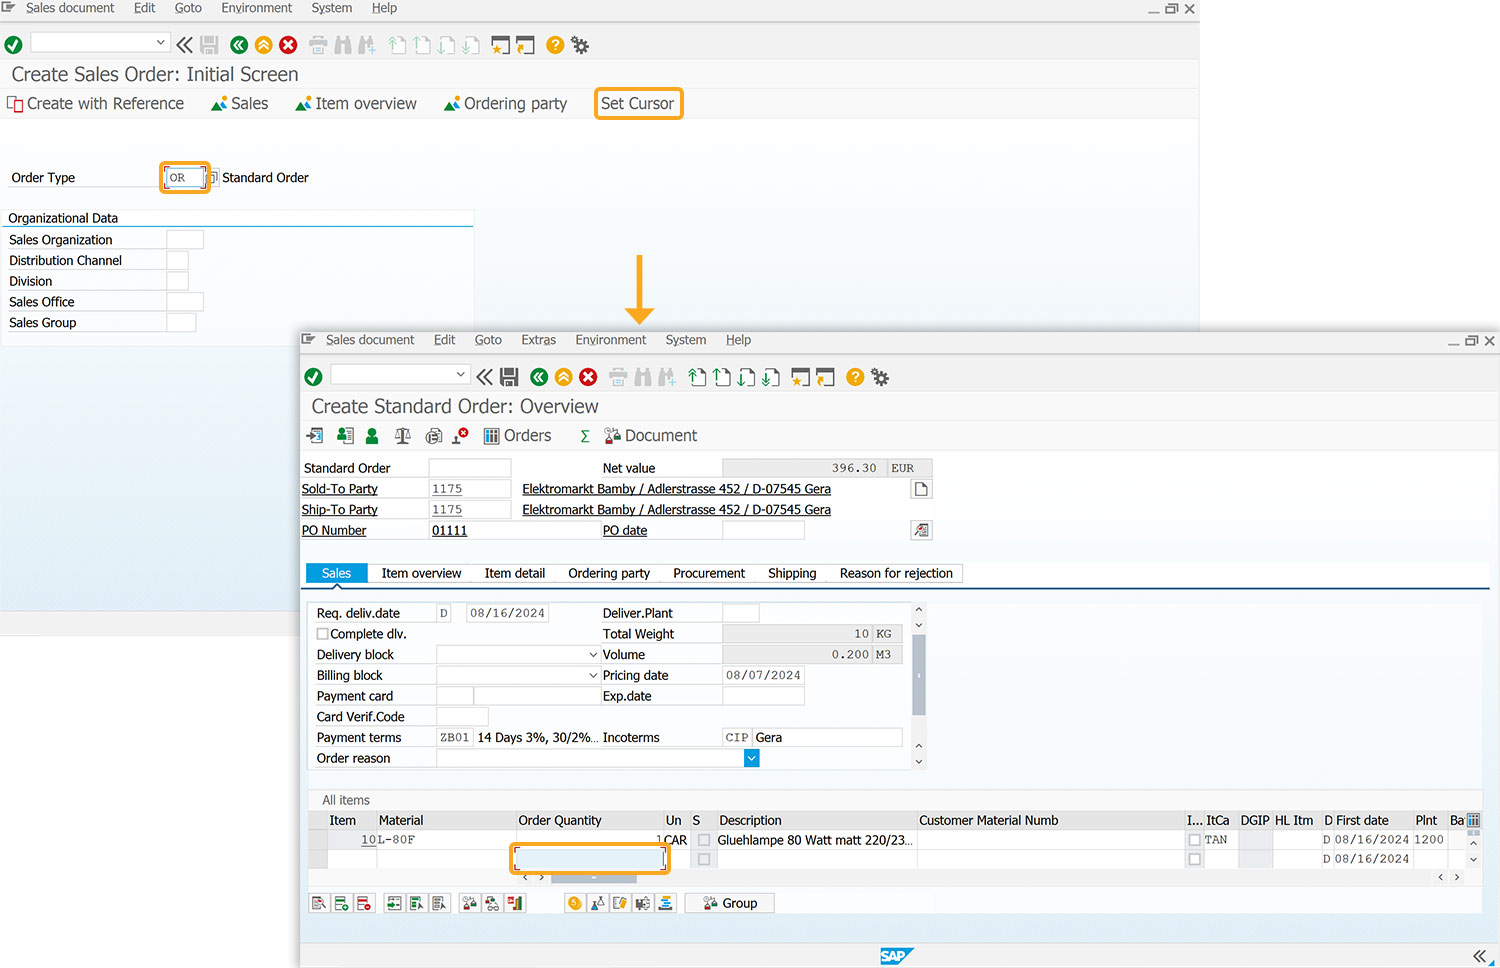
- Log in to SAP, navigate to the VA01 screen, and add a toolbar push button labeled Set Cursor to execute the z_setcursor process on click.
//Creates toolbar push button to execute process
pushbutton([TOOLBAR],"Set Cursor",{"process":z_setcursor});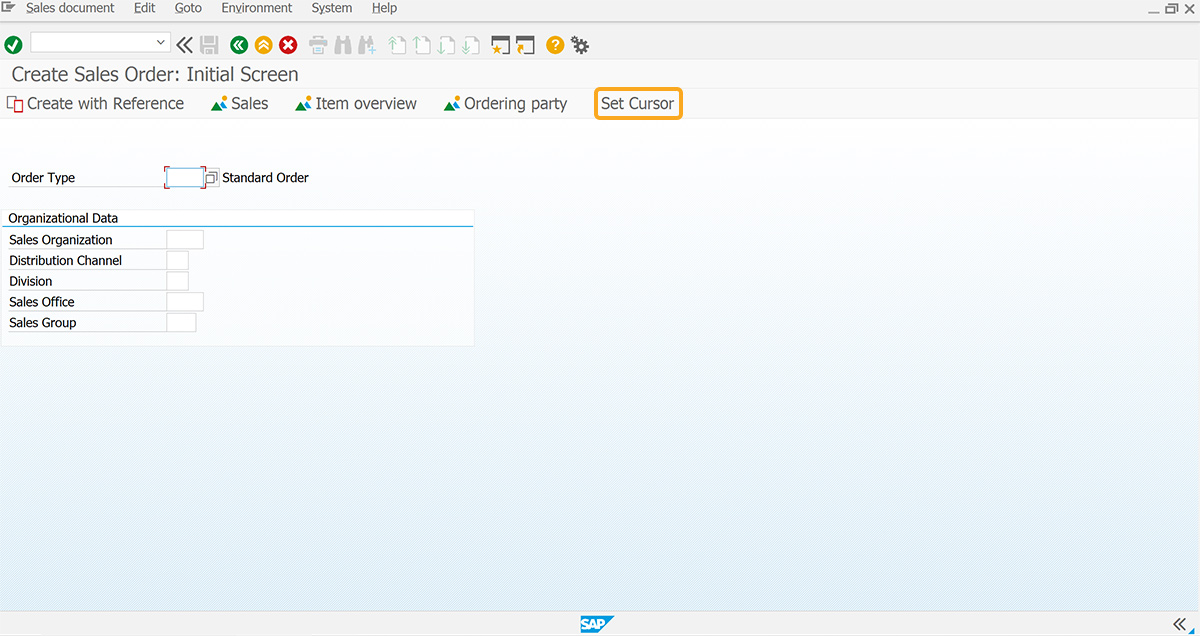
- Add the z_setcursor function to insert values into input fields and place the cursor in the desired table cell.
//Function to set values to the input fields
function z_setcursor(){
  onscreen 'SAPMV45A.0101'
  set('F[Order Type]','or');
  set('F[Sales Organization]','1000');
  set('F[Distribution Channel]','10');
  set('F[Division]','00');
  enter();
  onscreen 'SAPMV45A.4001'
  set('F[Sold-to party]','1175');
  set('F[Ship-to party]','1175');
  set('F[PO Number]','01111');
  set('cell[All items,Material,1]','L-80f');
  set('cell[All items,Order Quantity,1]','1');
  //setcursor('cell[All items,Order Quantity,2]');
  enter();
  onscreen 'SAPMSDYP.0010'
  enter();
  onscreen 'SAPMV45A.4001'
  setcursor('cell[All items,Order Quantity,2]');
  //enter();
}
SAP Process
- Refresh the SAP screen. Enter OR in the Order Type input field and click on the Set Cursor toolbar push button to navigate to the Create Standard Order: Overview Screen, where the cursor is positioned in the second row of the Order Quantity column, as shown below.
