Prerequisites
- Products: Liquid UI WS, Liquid UI Server or Local DLL, Client Software
- Commands: pos()
Purpose
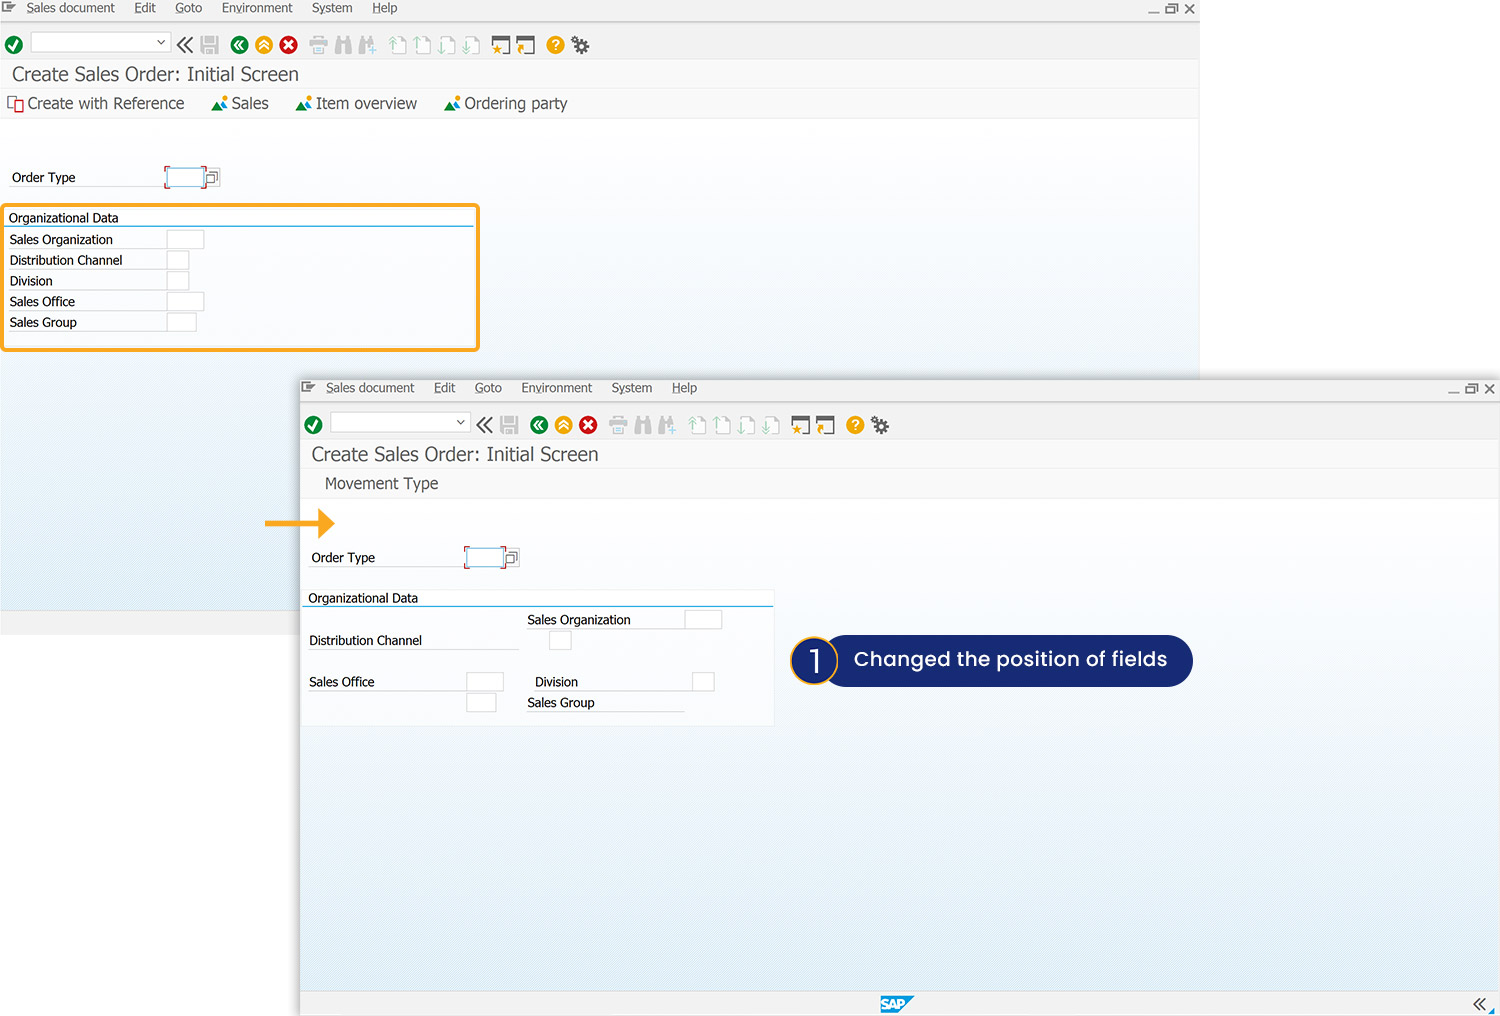
The article demonstrates how to use the pos() to change the position of different input fields within the group box, focusing on the Create Sales Order: Initial Screen. Here, we’ll perform the following actions:
- Navigate to the Create Sales Order: Initial screen
- Change the position of the required input fields
User Interface
//Create the file SAPMV45A.E0101.sjs inside your scripts folder for customizing the Create Sales Order: Initial Screen.
//Now, add the Liquid UI script to the above file and save it.
Customization
- Log on to SAP, navigate to the VA01 screen, and change the position of the required input fields, using the pos().
//Assigns OR Value to Order Type input field
pos("F[Sales Organization]"),[5,30]);
pos(""F[Distribution Channel]"),[6,33],{"value":true});
pos(""F[Sales Group]"),[9,30],{"text":true});
pos(""F[Division]",{"field":F[Sales Office]","offset":[0,30]});
- Refresh the SAP screen, and then you will observe that the specified input field’s position has been changed, as depicted in the image below.


