Purpose
LAMP allows you to configure the Start Transaction and TLS status while creating an SAP connection. Once you synchronize your Android license with LAMP, the designated start transaction and TLS status will appear in the profile list. This article details the process of configuring the start transaction and TLS options in LAMP.

Note: Before synchronizing your Android license, link the appropriate user and Android device to your User Group in LAMP.
To Link a User:
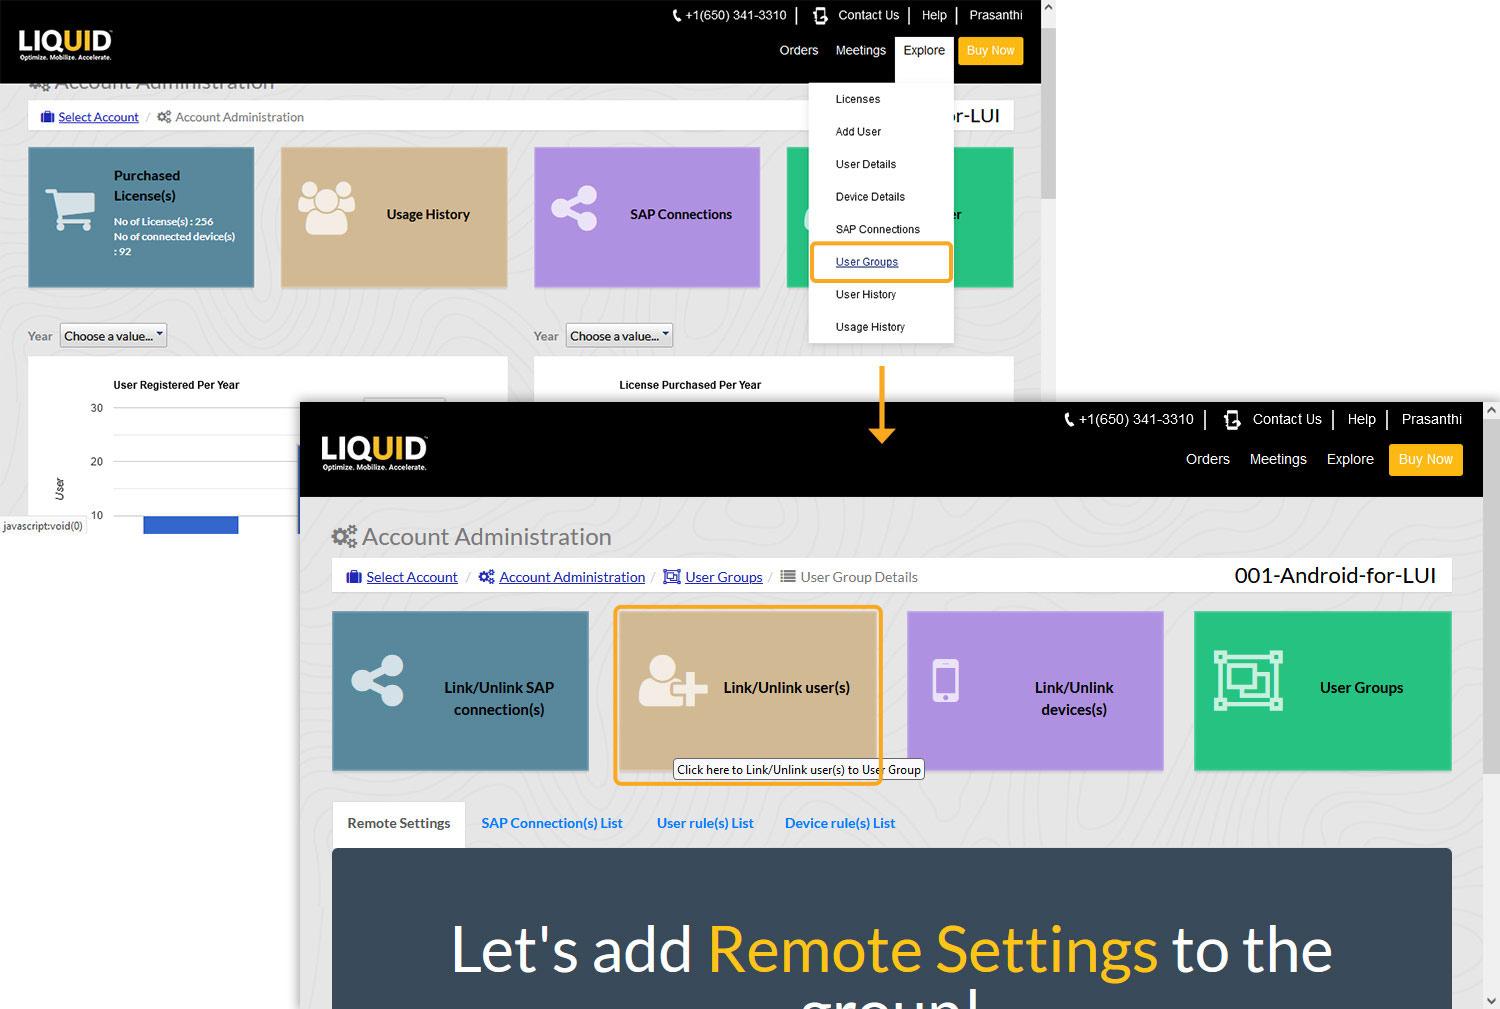
- Log in to LAMP and navigate to your Account Administration screen. Under the Explore menu, click on the User Groups tab. Select the desired user group from the available options to navigate to the User Group Details page. Locate and click on the Link/Unlink user(s) button to proceed.
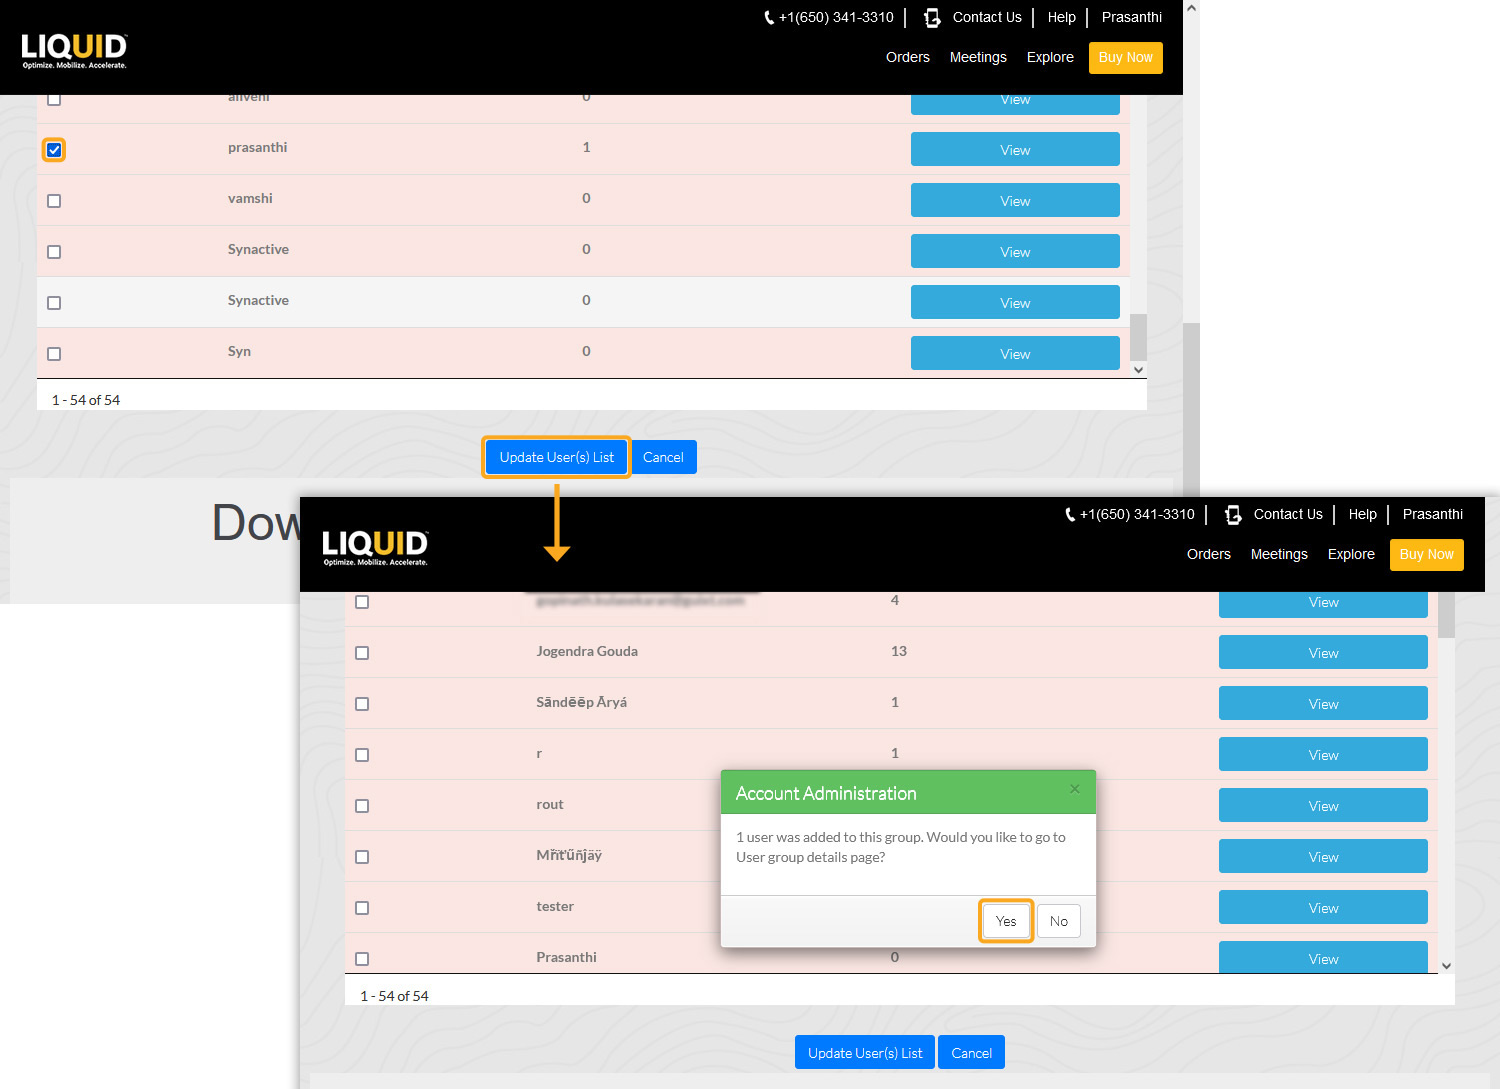
- Select the user you want to link and click the Update User(s) List button. A pop-up window will appear confirming the success. Click Yes to proceed.
To Link a Device:
- Click Link/Unlink device(s) on your User Groups Details screen.
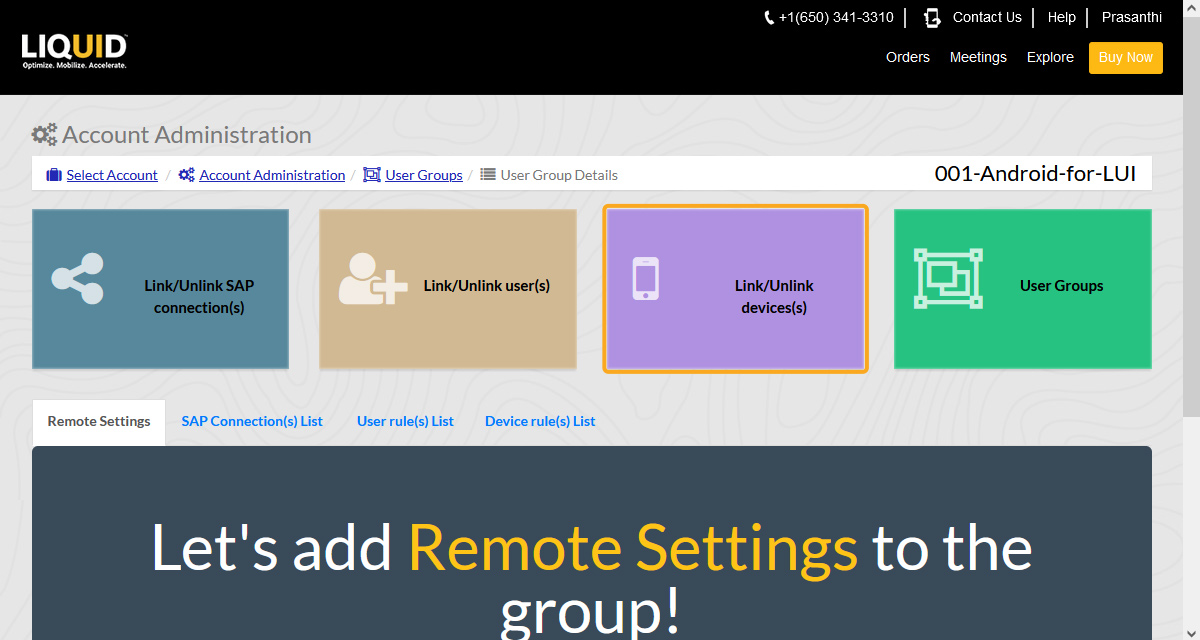
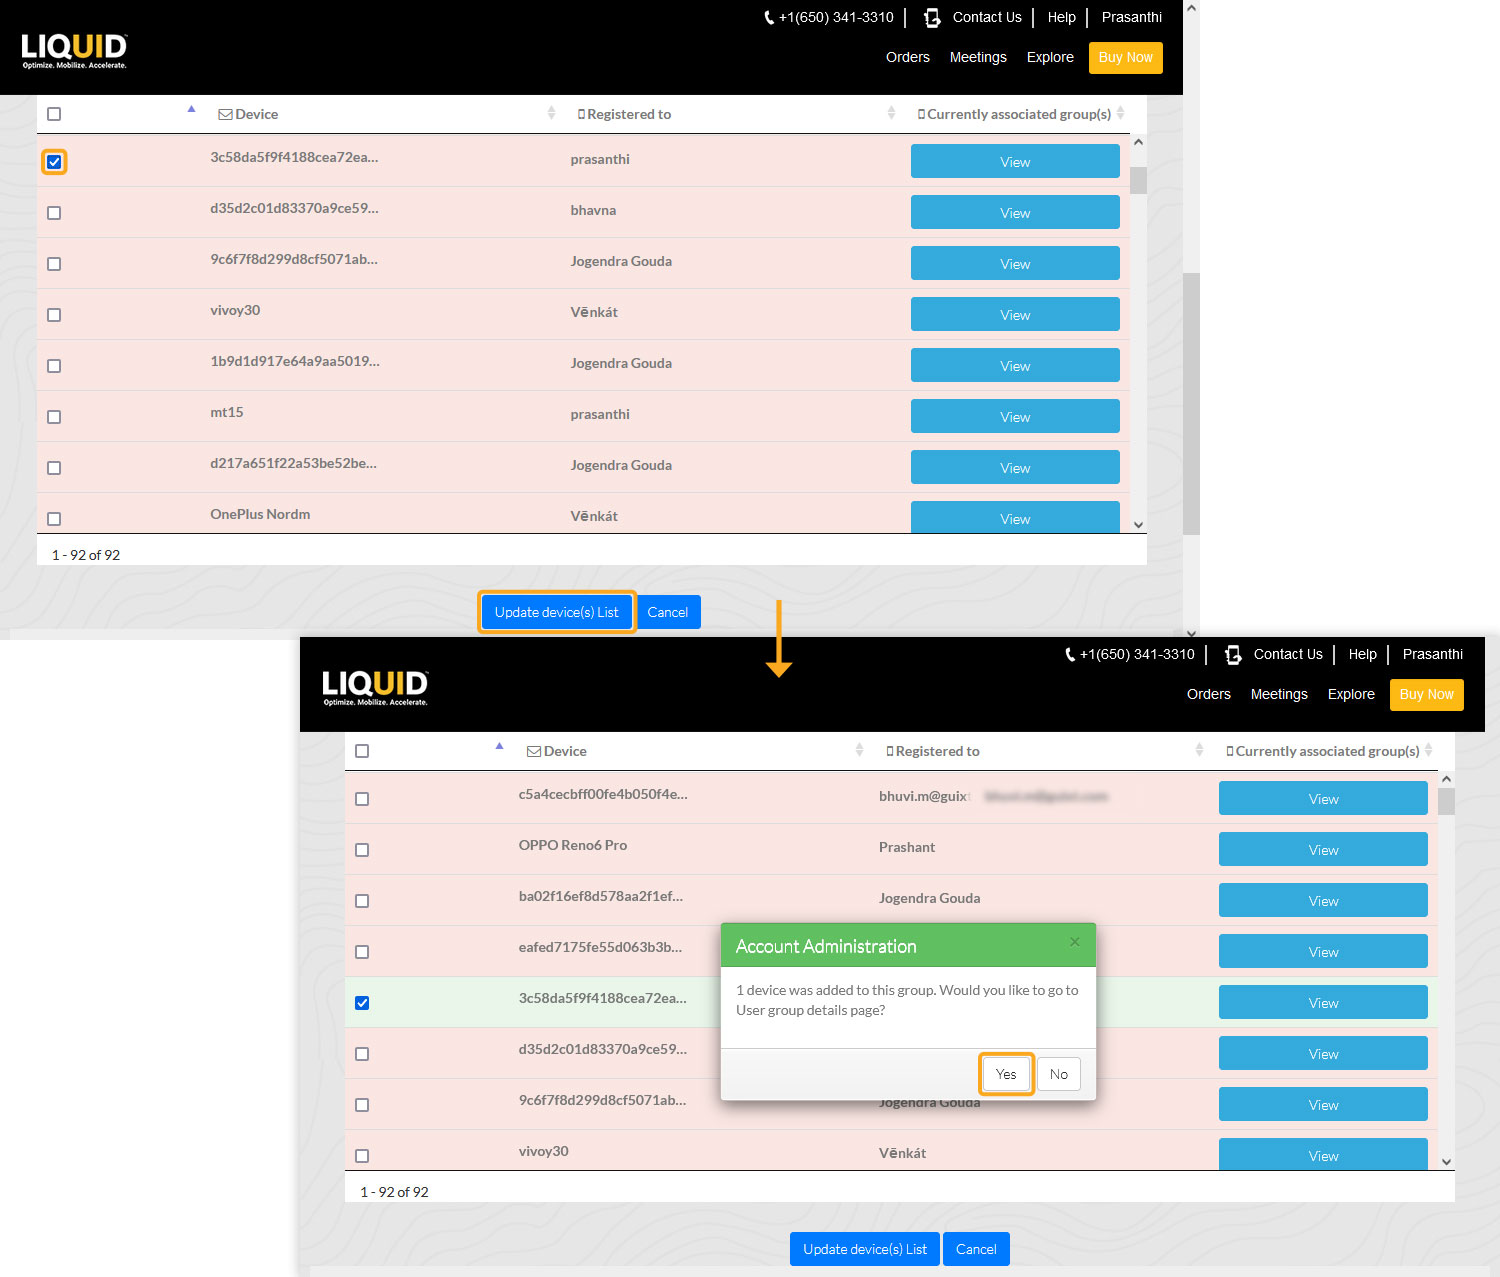
- From the list, select the device you want to link and click the Update device(s) List button. A pop-up window will appear confirming the action. Click Yes to proceed.
Configuring Start transaction and TLS options
The below sequence demonstrates the configuration of the Start Transaction and TLS options while creating an SAP Connection.
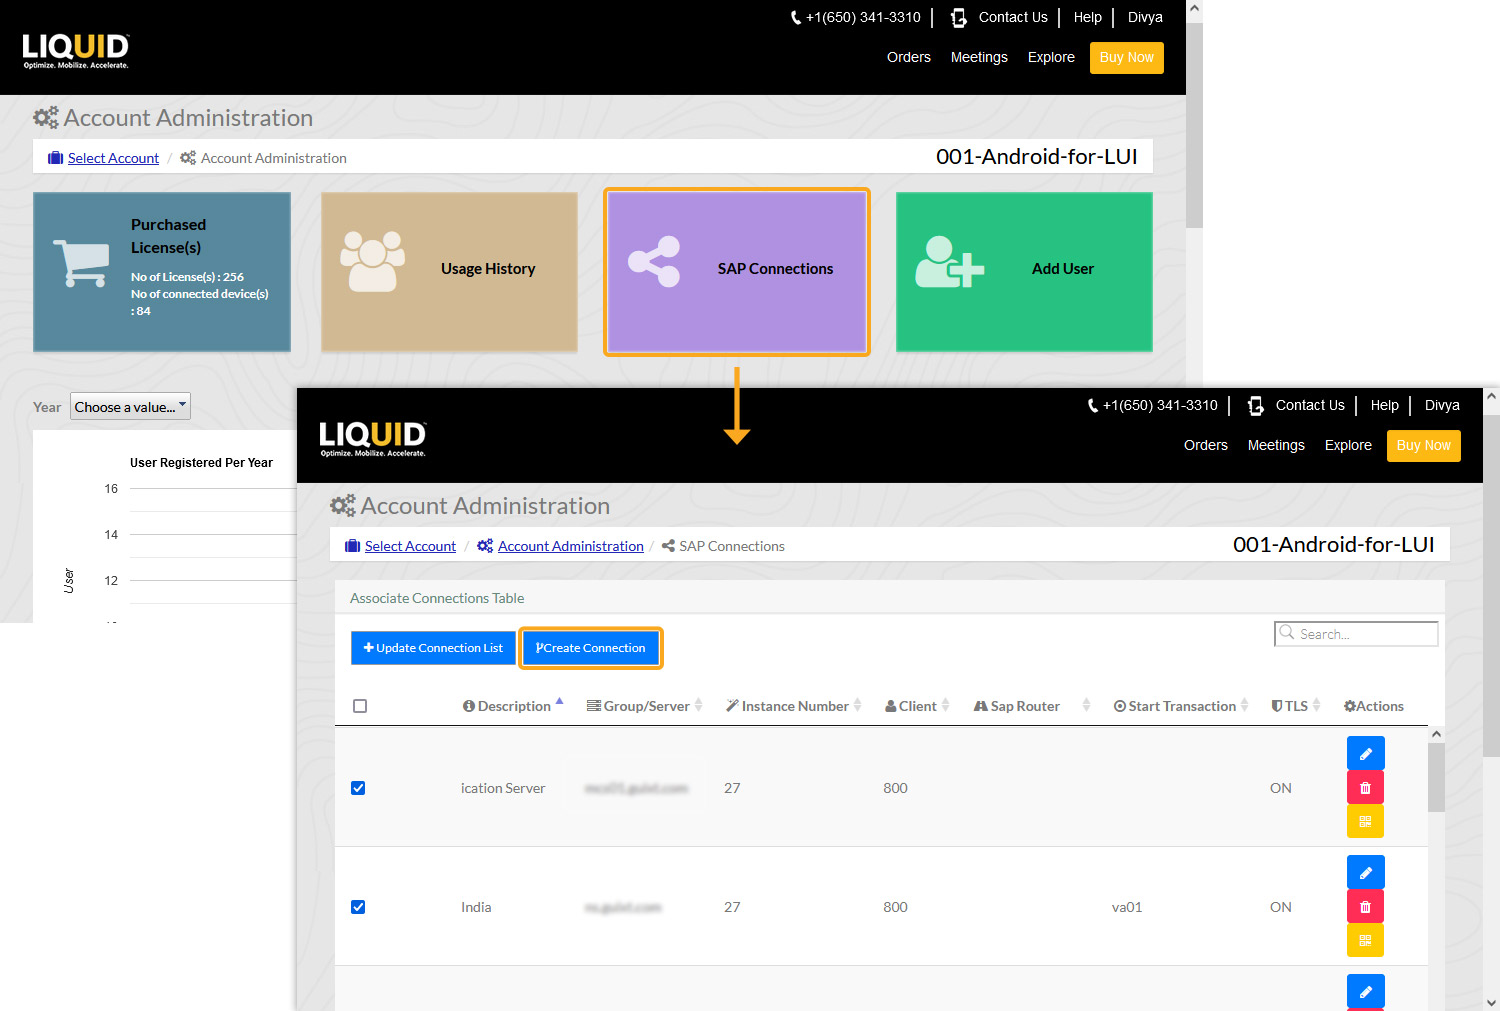
- Click the SAP Connections tab on the Account Administration screen or from the Explore menu and select the Create Connection tab to create a new SAP Connection.
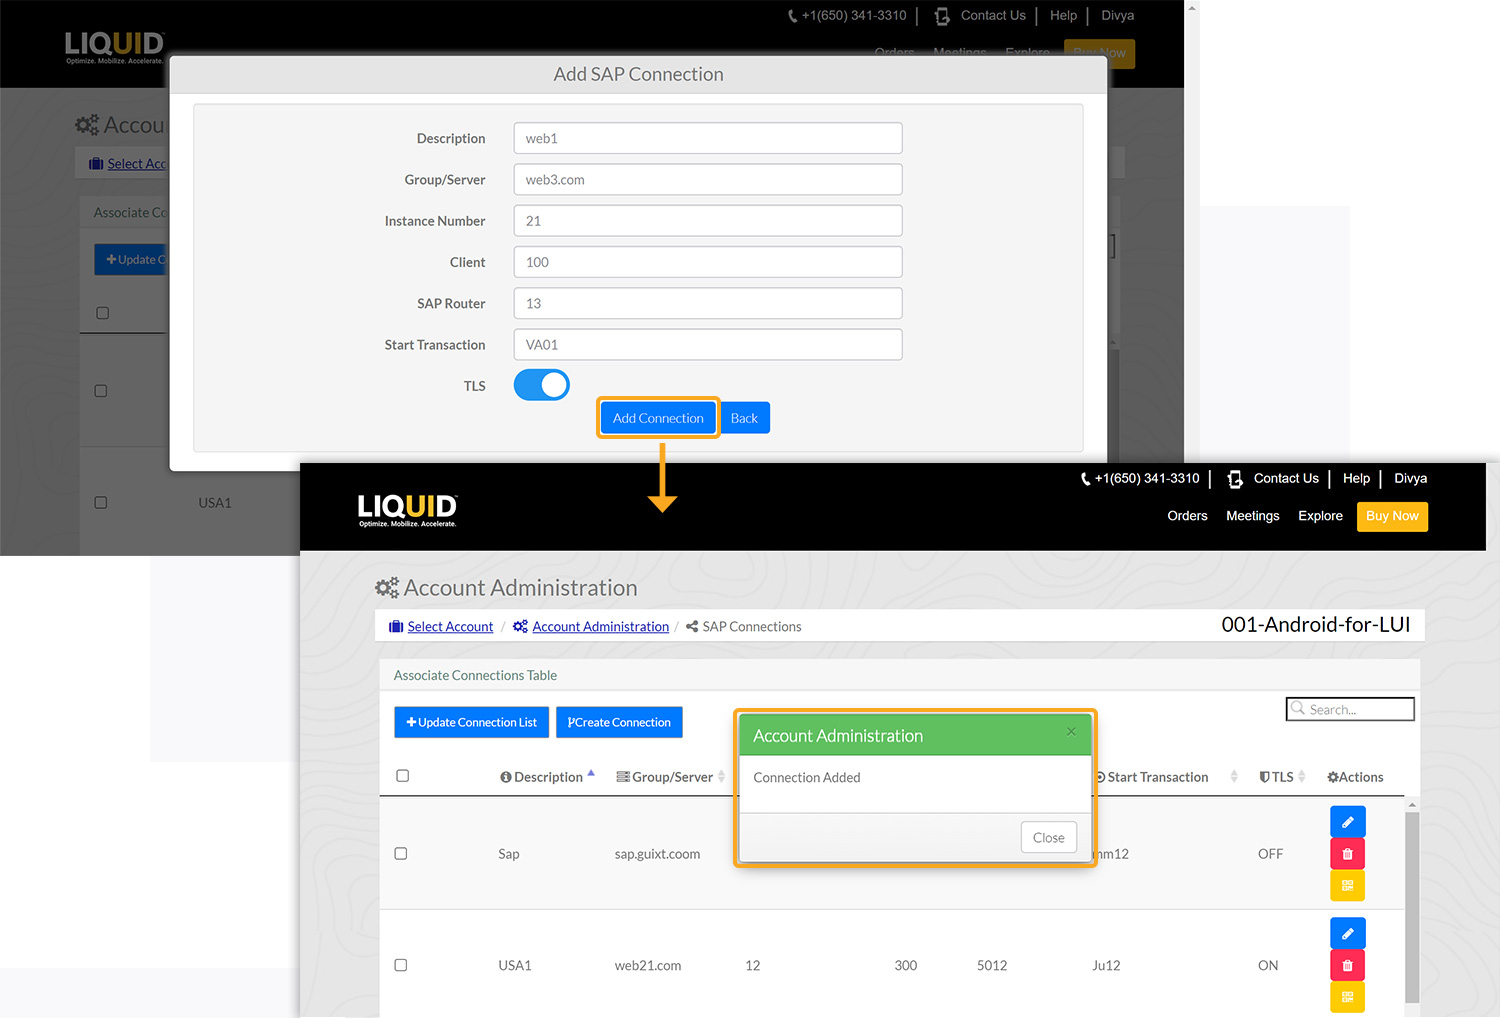
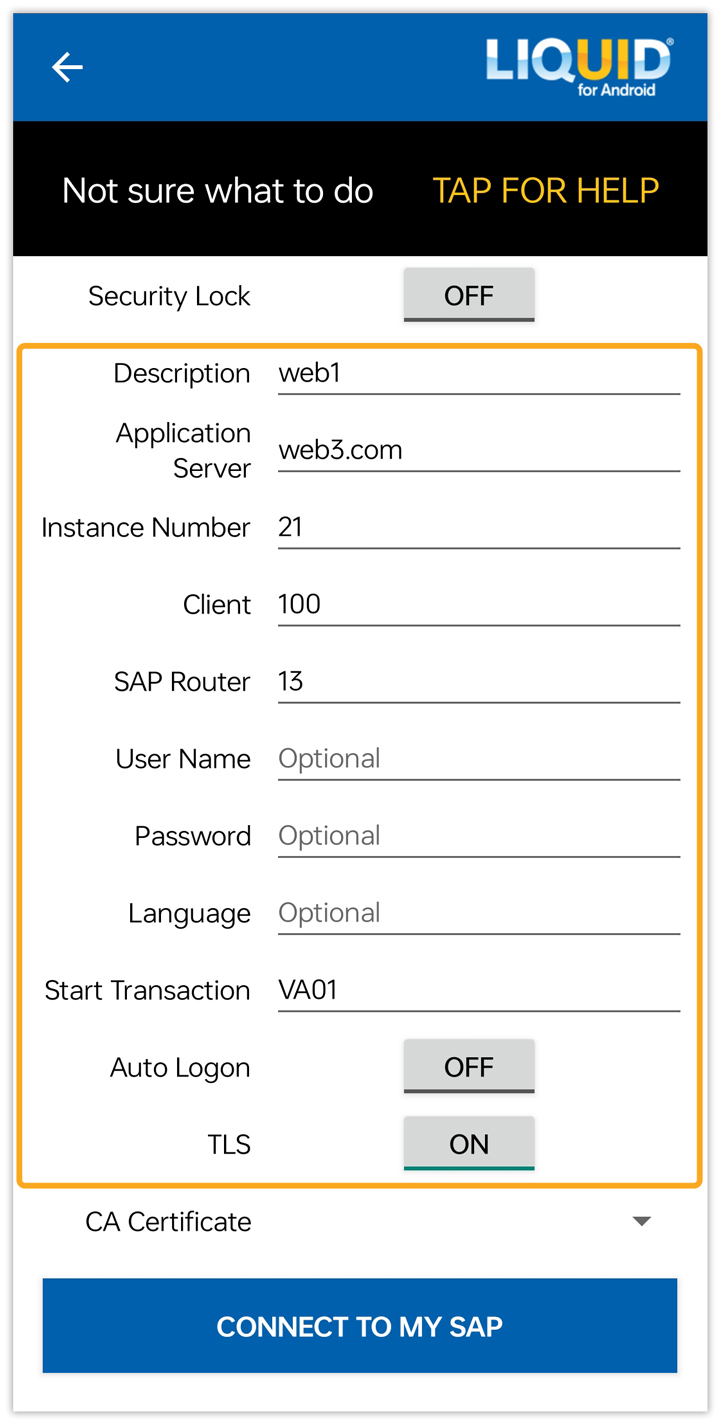
- The Add SAP Connection window will appear with the following fields. Fill out the required details, specifying the Start Transaction (in this case, VA01) and the status of the TLS (enable/disable) option. Once you have done so, click Add Connection. Upon successful addition, a confirmation dialog box will appear, as shown below.
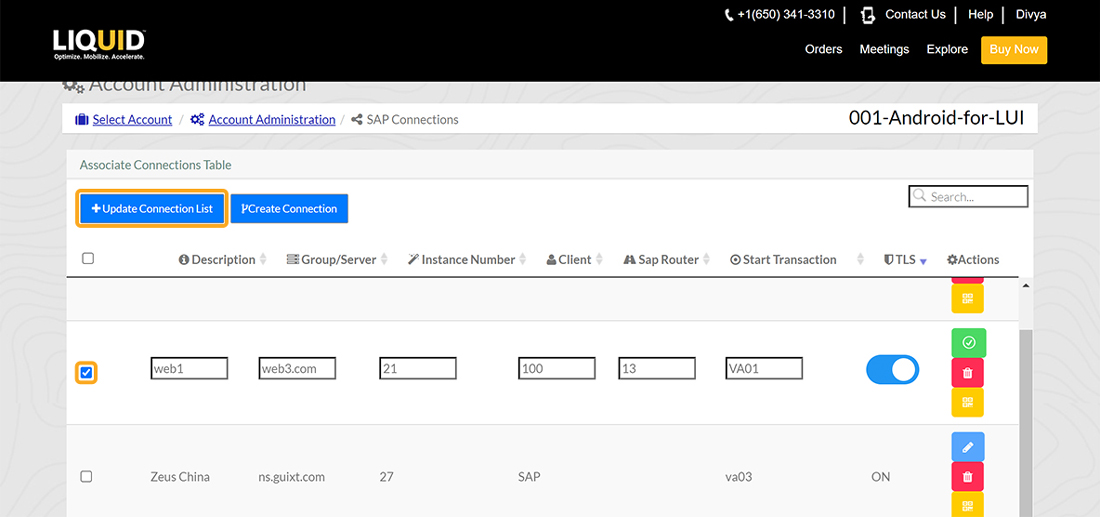
- Select the SAP connection you wish to add and click the Update Connection List button to add that to the desired account, as shown in the image below.
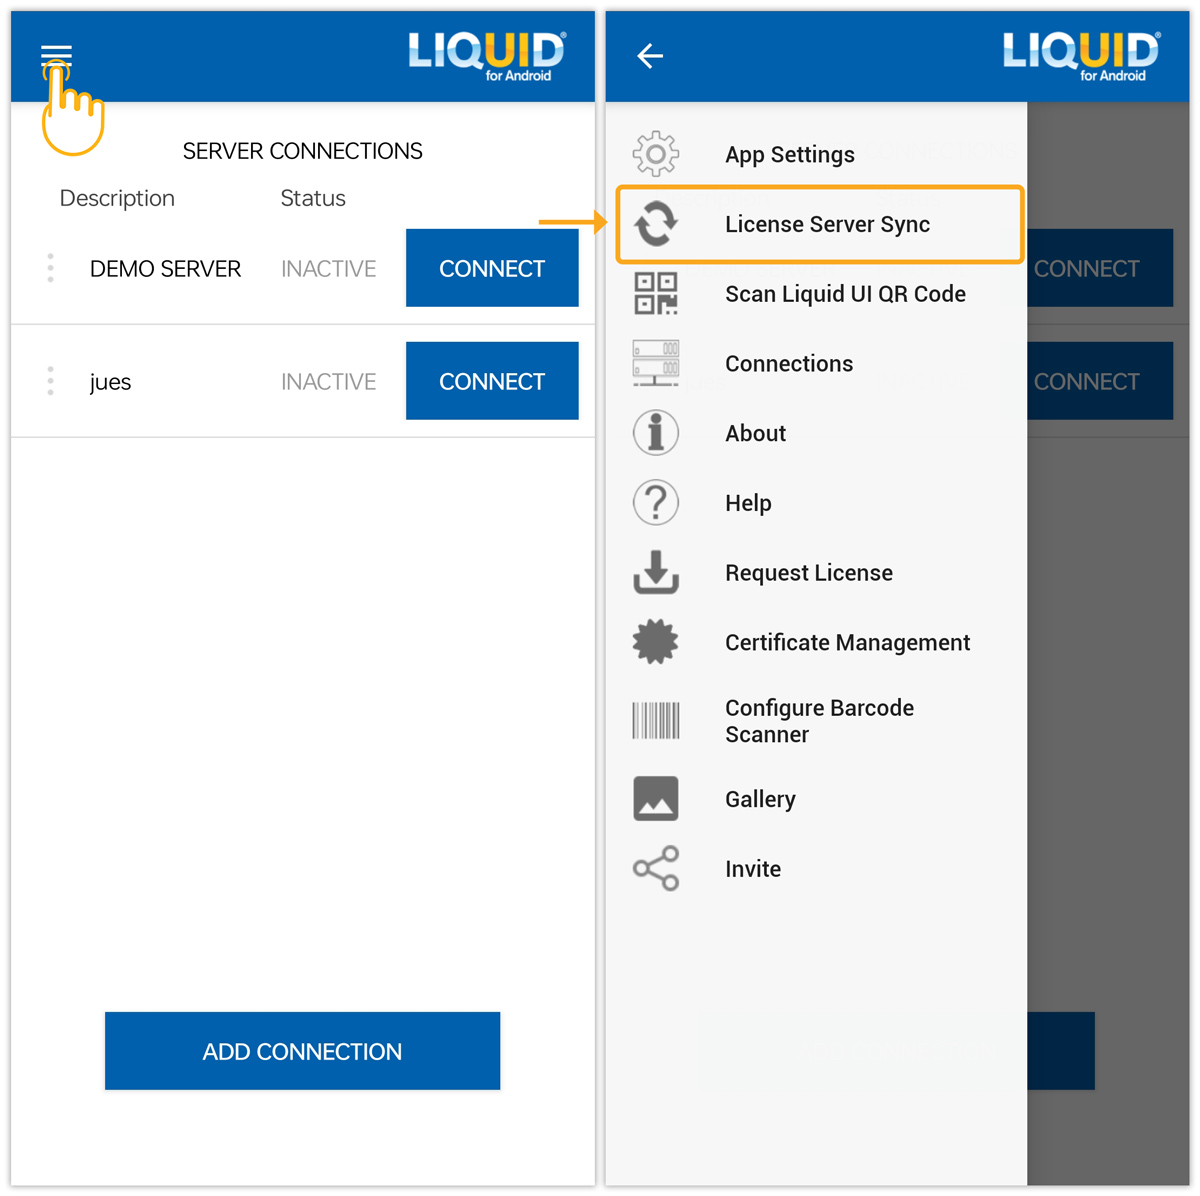
- To sync your Android license, click License Server Sync in Liquid UI for Android, as shown in the image below.
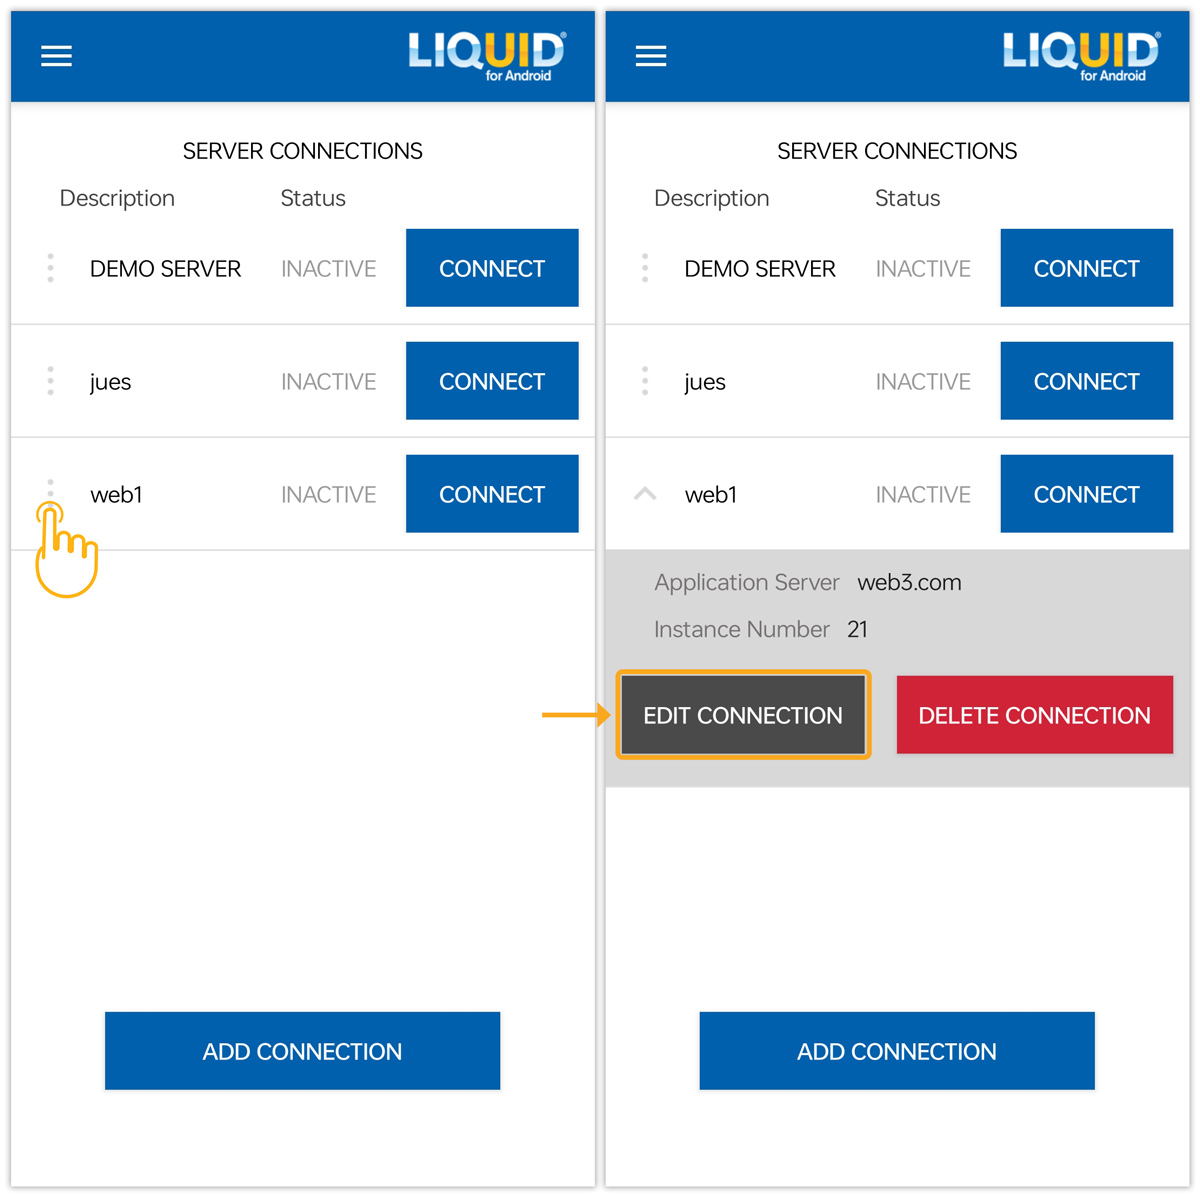
- To view the specifics of the newly established connection, choose EDIT CONNECTION, as shown in the image below.
- Now, you will be navigated to the connection details page. Enter the required details to proceed.
- Click on the CONNECT button associated with your desired SAP connection to proceed with log on, as shown below.
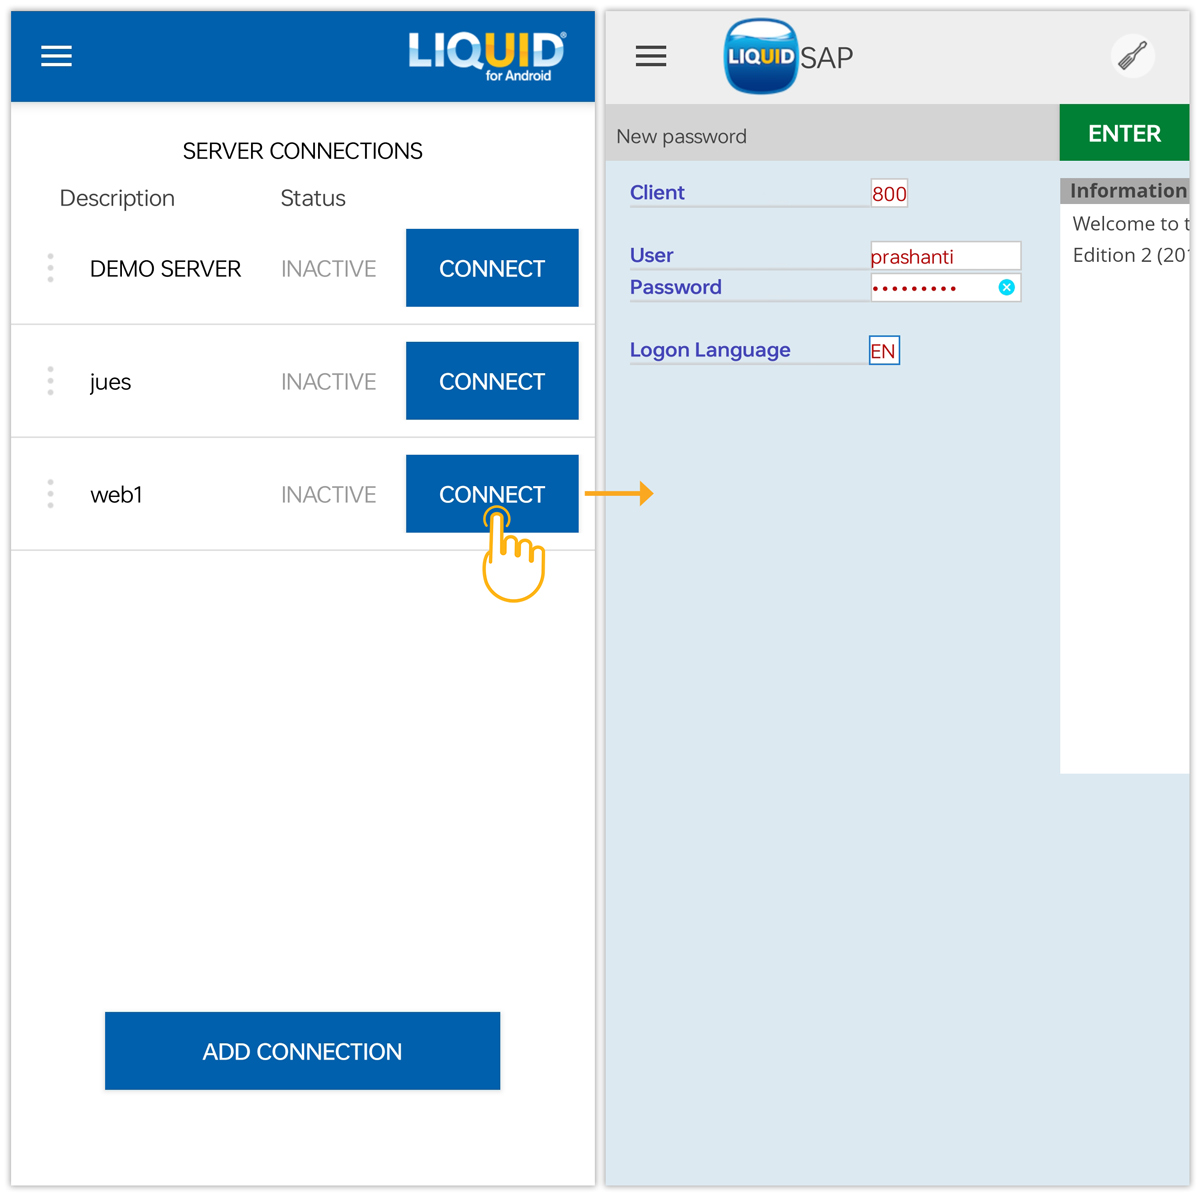
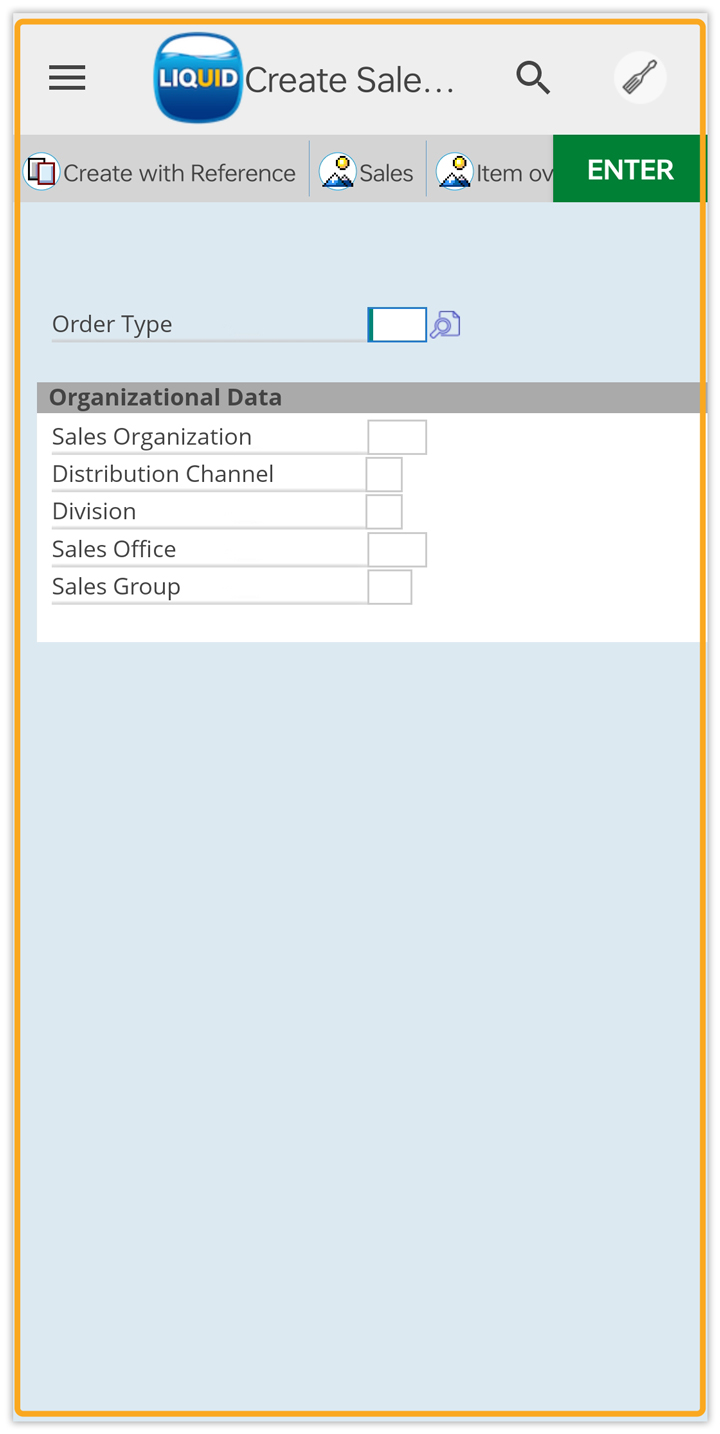
- Every time you log in, you will be navigated to the specified start transaction screen, as shown in the following image. Enter the required details to proceed with the execution.
