Prerequisites
- Products: Liquid UI WS, Liquid UI Server or Local DLL, Client Software
- Commands: box(), title(), pushbutton()
Purpose
This document guides how to modify the current directory utilizing push buttons. This implies that Liquid UI searches for an alternative script location upon button activation. This functionality is useful for testing and implementing scenarios where the user needs to maintain distinct scripts based on specific conditions. The demonstration is conducted using the SAP Easy Access screen and involves the following steps:
- Delete the image container on the SAP Easy Access screen
- Add push buttons to alter the directory
Example:1 Adding push buttons
In this scenario, we add push buttons, to alter the current directory
User Interface
//Create the file SAPLSMTR_NAVIGATION.E0100.sjs inside your scripts folder for customizing the SAP Easy Access screen
//Now, let's add the Liquid UI script to the above file and save it.
Customization
- Delete the image container on the SAP Easy Access screen using the del command.
//Deletes the image container on the SAP screen
del("X[IMAGE_CONTAINER]");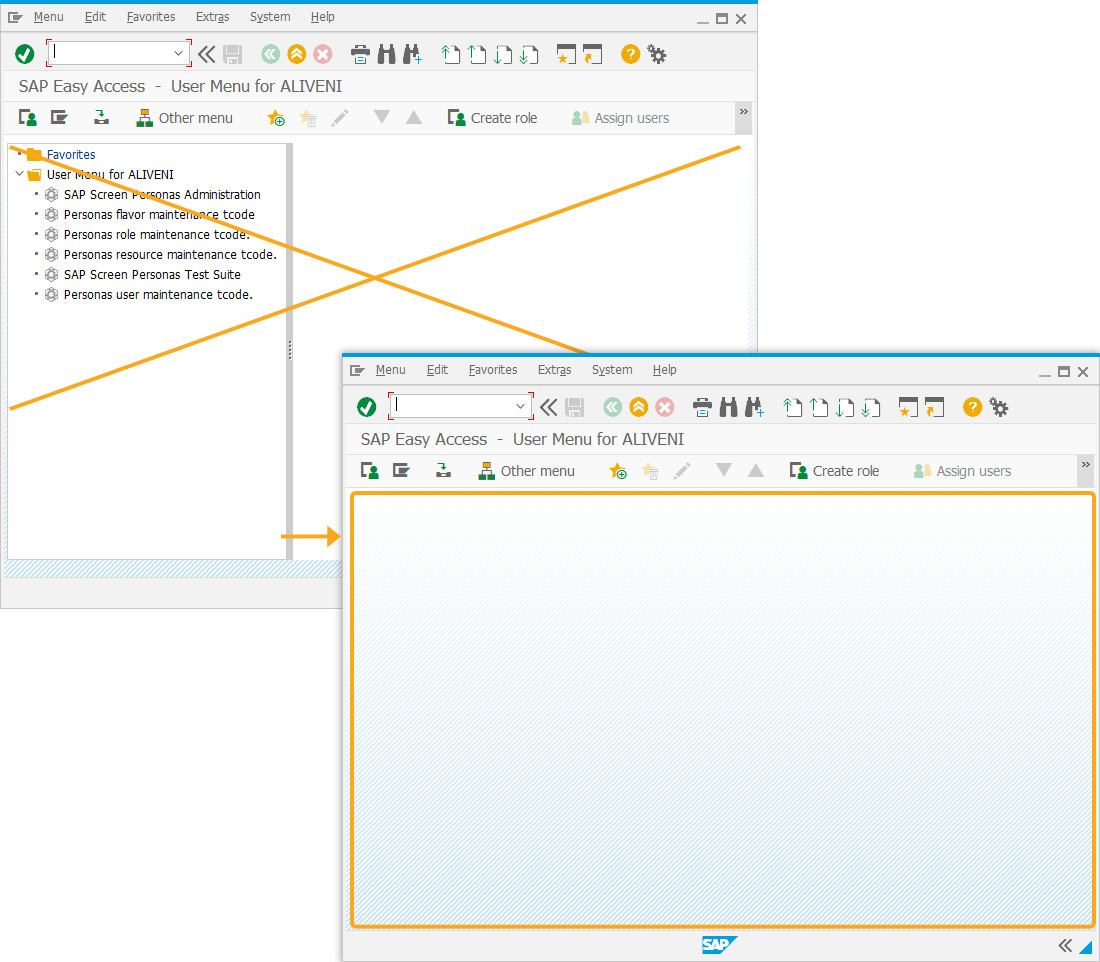
- Add three push buttons labeled Sales Orders, Notifications, and Material Management within a box.
//Creates a box and pushbuttons that alters the current directory on click
pushbutton([1,1],'@2V@Sales Orders','/nsession_manager/d1='+dirSalesOrders,{'size':[2,33]});
pushbutton([1,38],'@2Q@Notifications','/nsession_manager/d1='+dirNotifications,{'size':[2,33]});
pushbutton([1,76],'@2Z@Material Management','/nsession_manager/d1='+dirMaterials,{'size':[2,33]});
box([0,0],[4,109],"");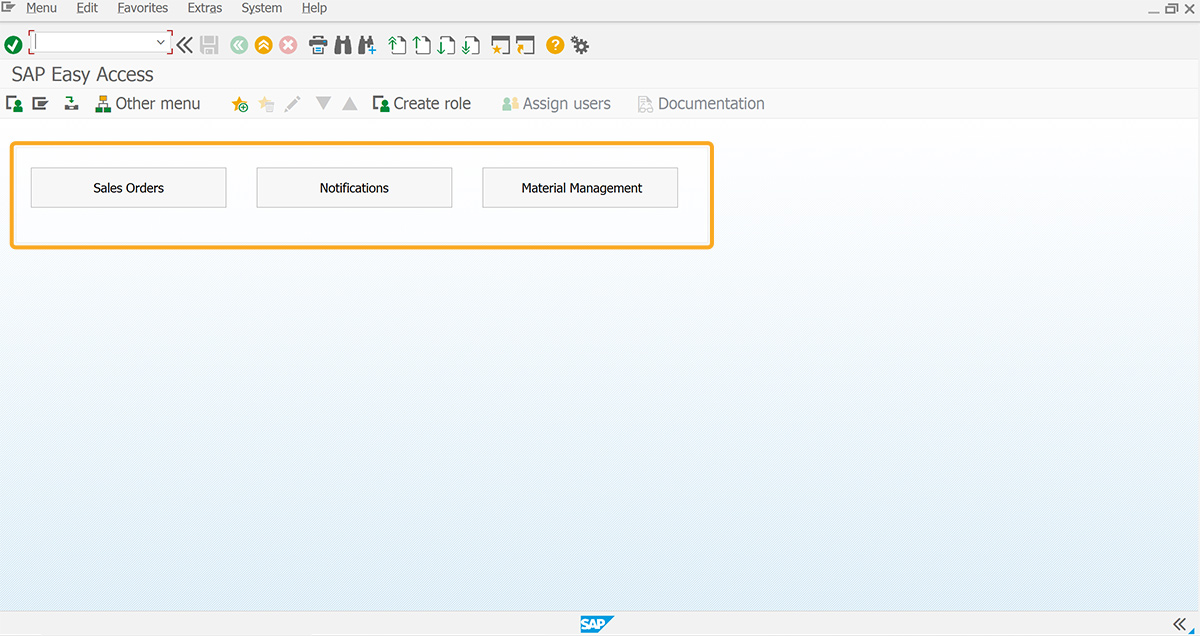
Assiging directories to the Sales Order push button:
We’ll create a dedicated screen for Sales Orders with intuitive navigation buttons to related transaction screens and appropriate directory assignments. To explain this process, we’ll guide you through the following:
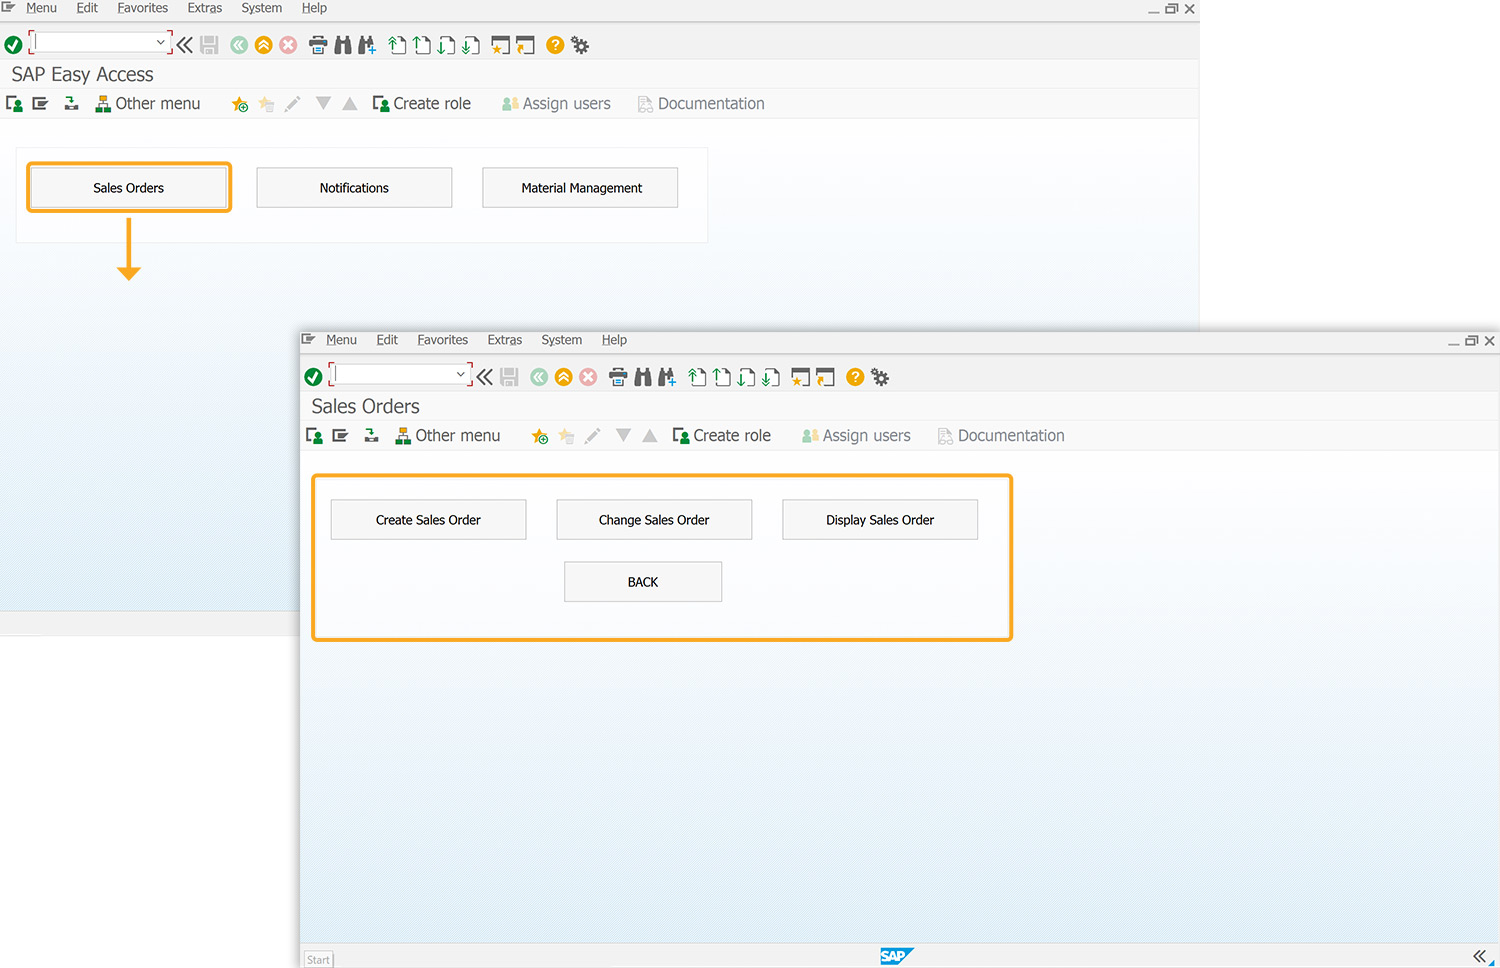
- Add a function and change the screen title to Sales Orders, as shown in the image below.
//Adds a function and title
if(z_view_layout == 'PM'){
title("Sales Orders");
}

- Add four push buttons labeled Create Sales Order, Change Sales Order, Display Sales Order, and BACK within a box.
//Creates a box and four push buttons
box([0,0],[5,109],"");
pushbutton([1,1],'Create Sales Order','/nva01',{'size':[2,33]});
pushbutton([1,38],'Change Sales Order','/nva02',{'size':[2,33]});
pushbutton([1,76],'Display Sales Order','/nva03',{'size':[2,33]});
pushbutton([4,38],'BACK','/nsession_manager/d1='+dirMain,{'size':[1,33]});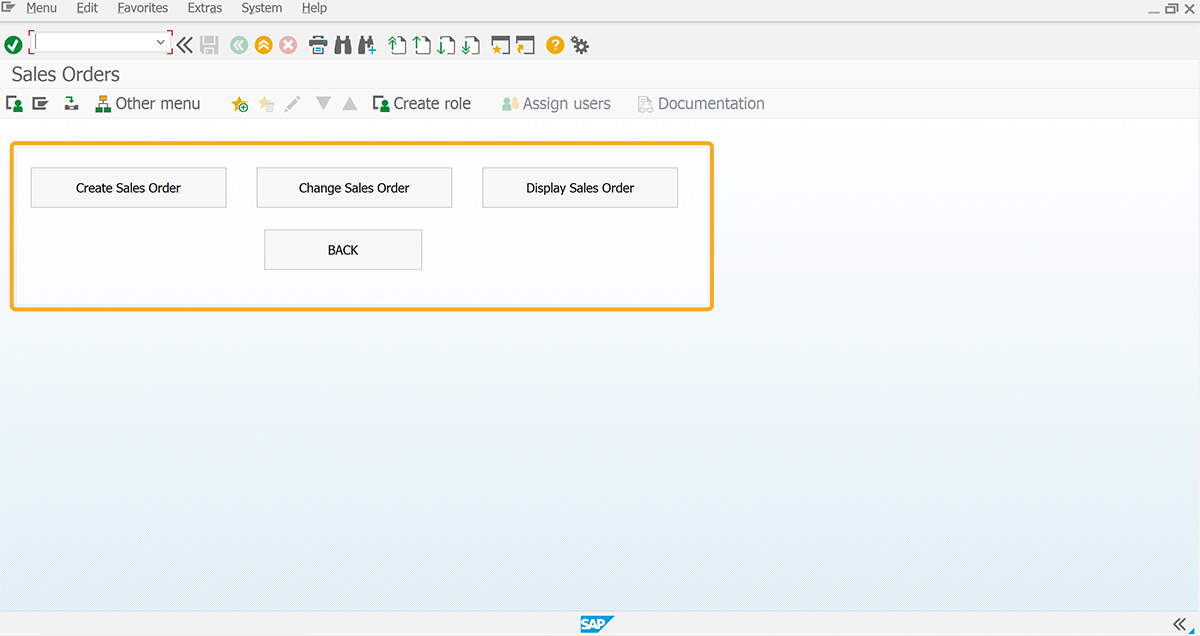
Assigning directories to the Notifications push button
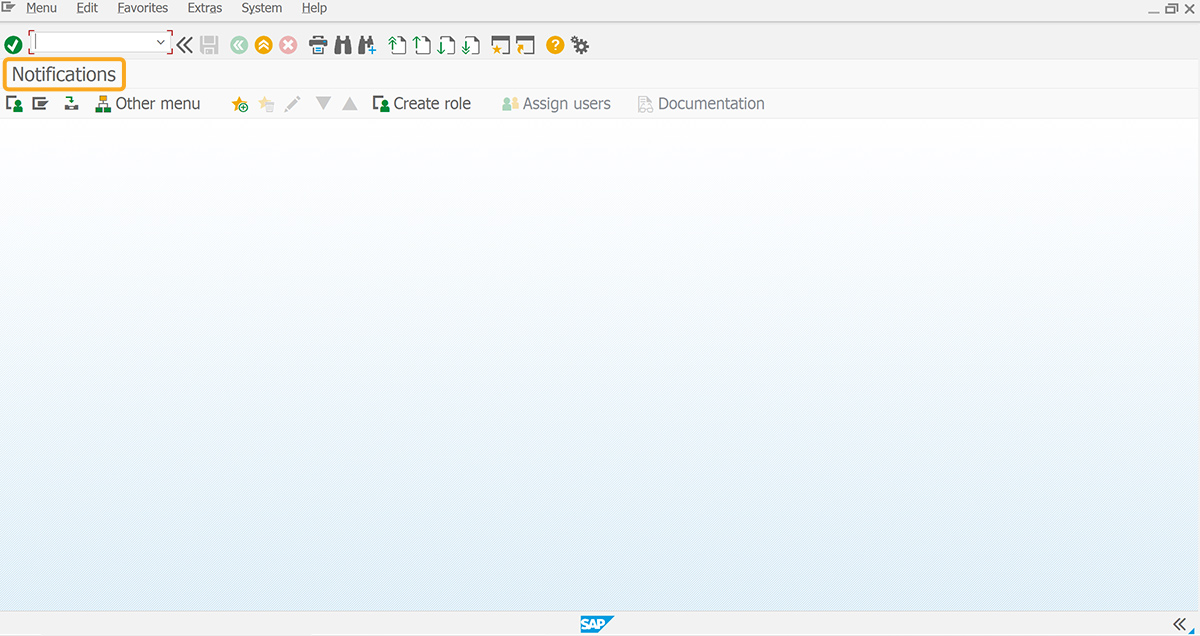
We'll create a dedicated screen for Notifications with intuitive navigation buttons to related transaction screens and appropriate directory assignments.
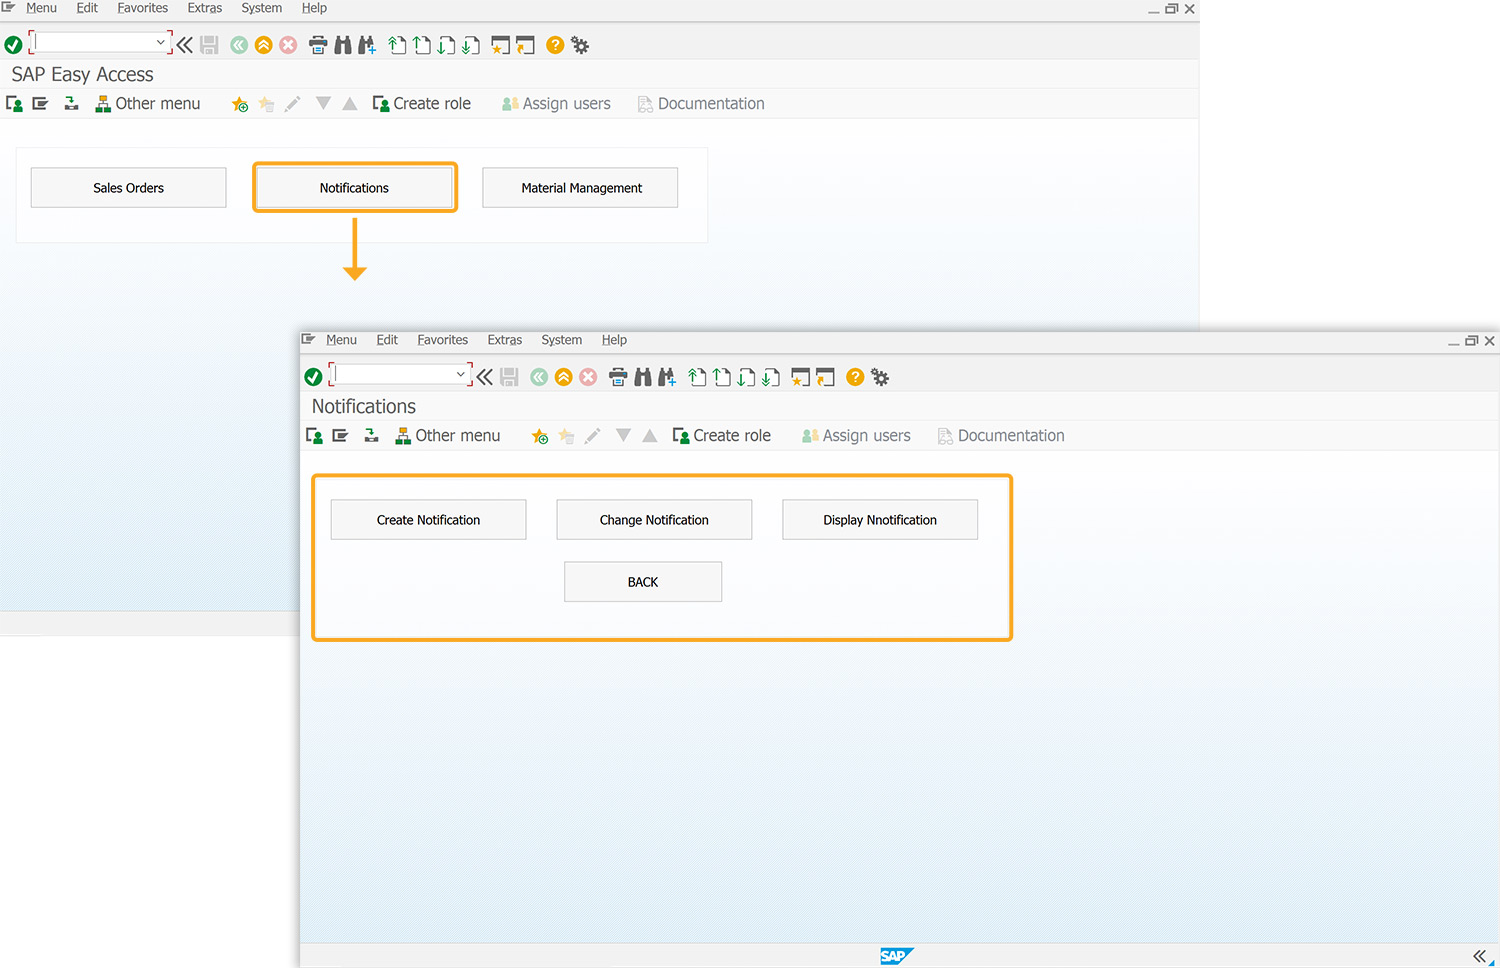
- Add a function and change the screen title to Notifications, as shown below.
//Adds a function and title
if(z_view_layout == 'PM'){
title("Notificaitons");
- Add four push buttons labeled Create Notification, Change Notification, Display Notification, and BACK, within a box.
//Creates a box and four push buttons
box([0,0],[5,109],"");
pushbutton([1,1],'Create Notification','/niw21',{'size':[2,33]});
pushbutton([1,38],'Change Notification','/niw22',{'size':[2,33]});
pushbutton([1,76],'Display Notification','/niw23',{'size':[2,33]});
pushbutton([4,38],'BACK','/nsession_manager/d1='+dirMain,{'size':[1,33]});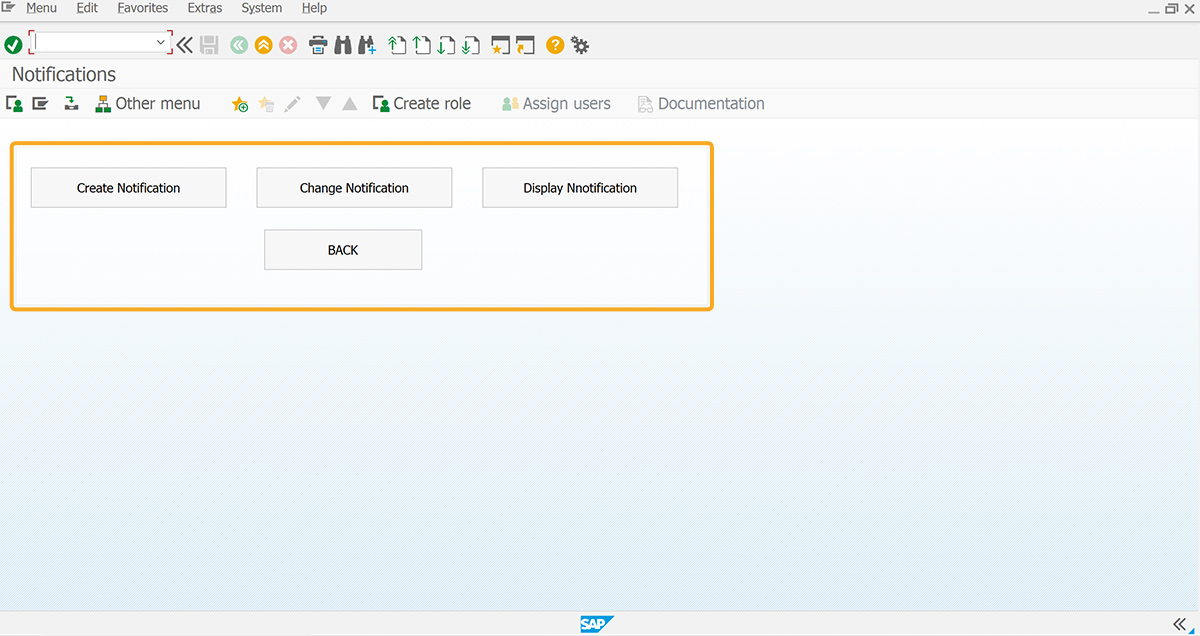
Assigning directories to the Material Management push button:
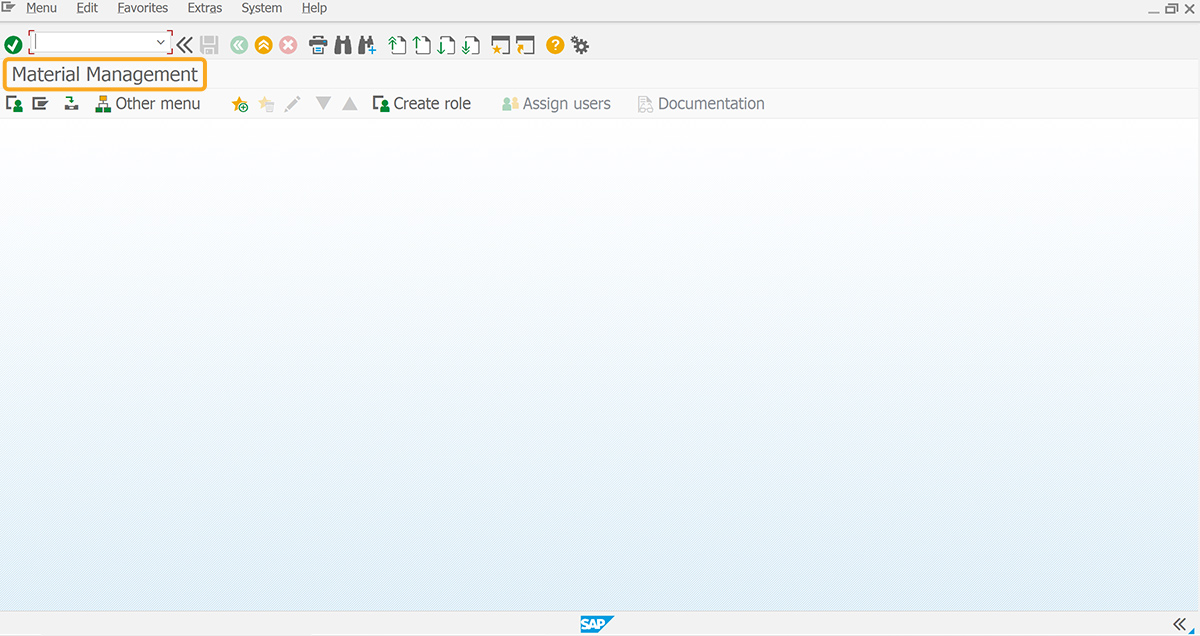
We'll create a dedicated screen for Material Management with intuitive navigation buttons to related transaction screens and appropriate directory assignments.
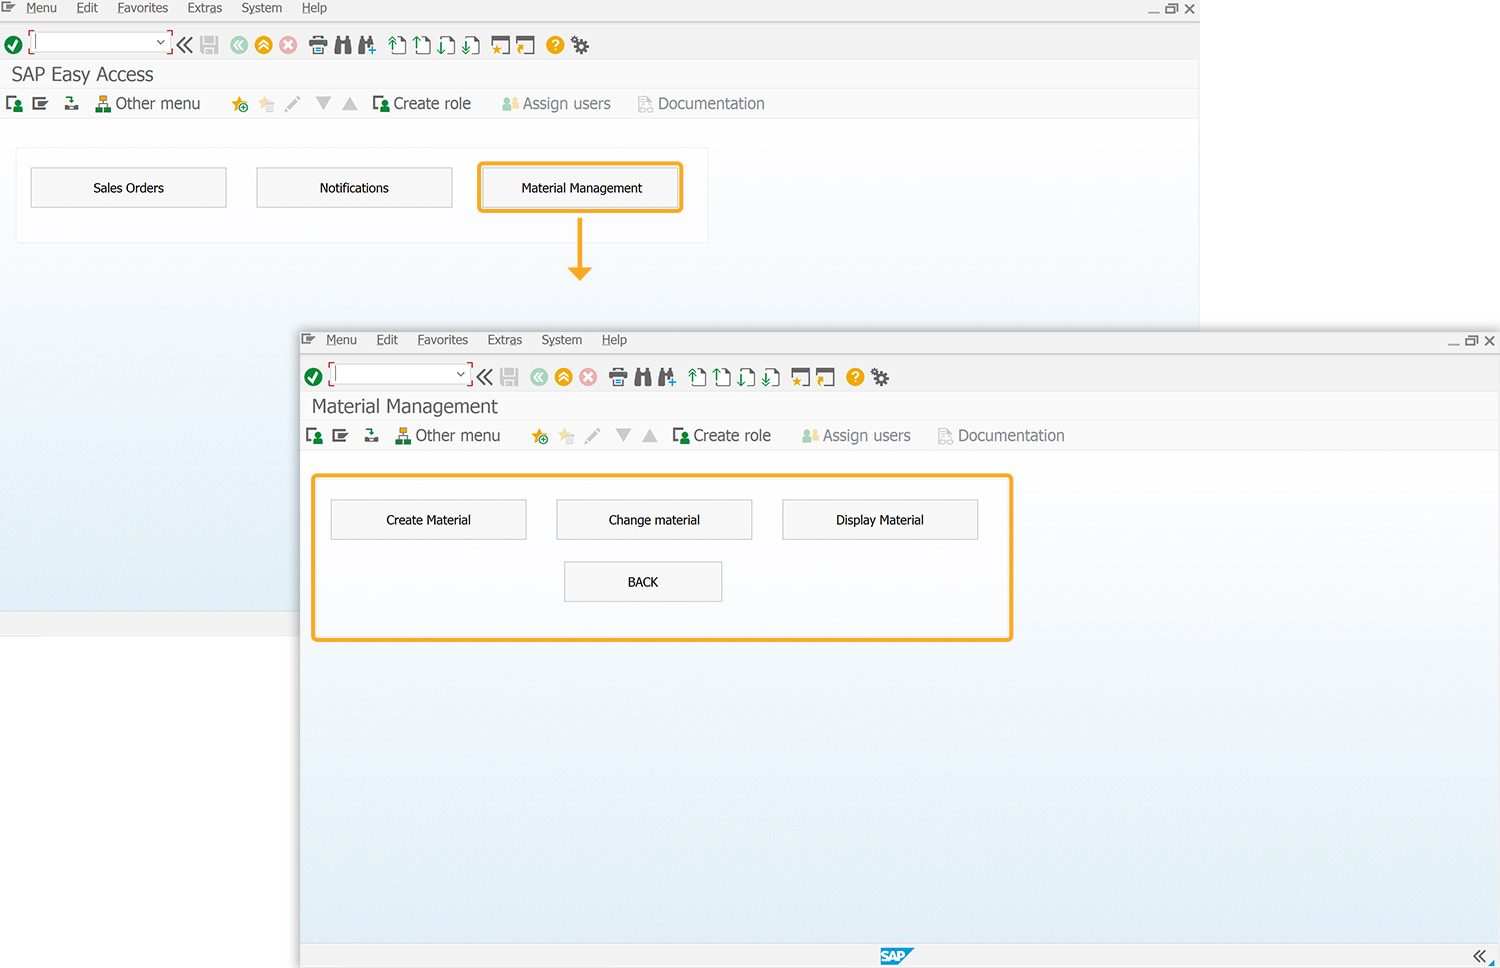
- Add a title labeled Material Management, as shown below.
//Adds a function and title
if(z_view_layout == 'MM'){
title("Material Management");
- Add four push buttons labeled Create Material, Change Material, Display Material, and BACK, within a box.
//Creates a box and four push buttons
box([0,0],[5,109],"");
pushbutton([1,1],'Create Material','/nmm01',{'size':[2,33]});
pushbutton([1,38],'Change Material','/nmm02',{'size':[2,33]});
pushbutton([1,76],'Display Material','/nmm03',{'size':[2,33]});
pushbutton([4,38],'BACK','/nsession_manager/d1='+dirMain,{'size':[1,33]});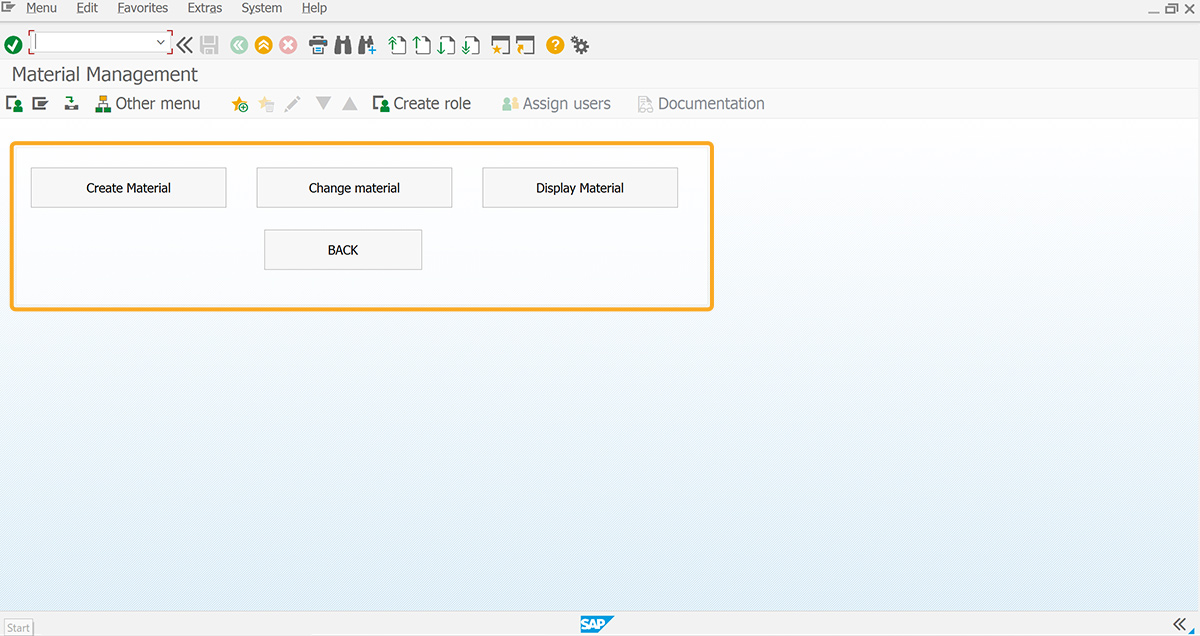
SAP Process
- Refresh the SAP screen and click on the Sales Orders push button. You will be navigated to the Sales Orders screen with dedicated push buttons for creating, changing, and displaying sales orders along with the Back button.
- Click on Notifications to navigate to the screen related to the notifications.
- Similarly, clicking on the Material Management will navigate to the Material Management screen, where you can see the particular transaction push buttons, as shown below.
Example2: Change script directory at runtime
Purpose
You can execute a particular transaction script file with different scripts saved in different script directories at run time. To implement the script file, specify the directory path in the SAP command field (transaction field). This avoids changing the script directory path manually in the guixt.sjs (configuration) file. This is widely helpful in cases where there are huge script files. To demonstrate this process, we are considering the Create Sales Order: Initial screen as an example and we’ll guide you through the following steps:
- Create a new folder in your Liquid UI folder
- Enter the syntax in the Tcode field
Syntax
The following syntax is used in the SAP command field.
/n[tcode]/dx=c:\\directoryname.
The script directory is specified by ‘dx’ where ‘x’ takes [1-4] values.
SAP Process
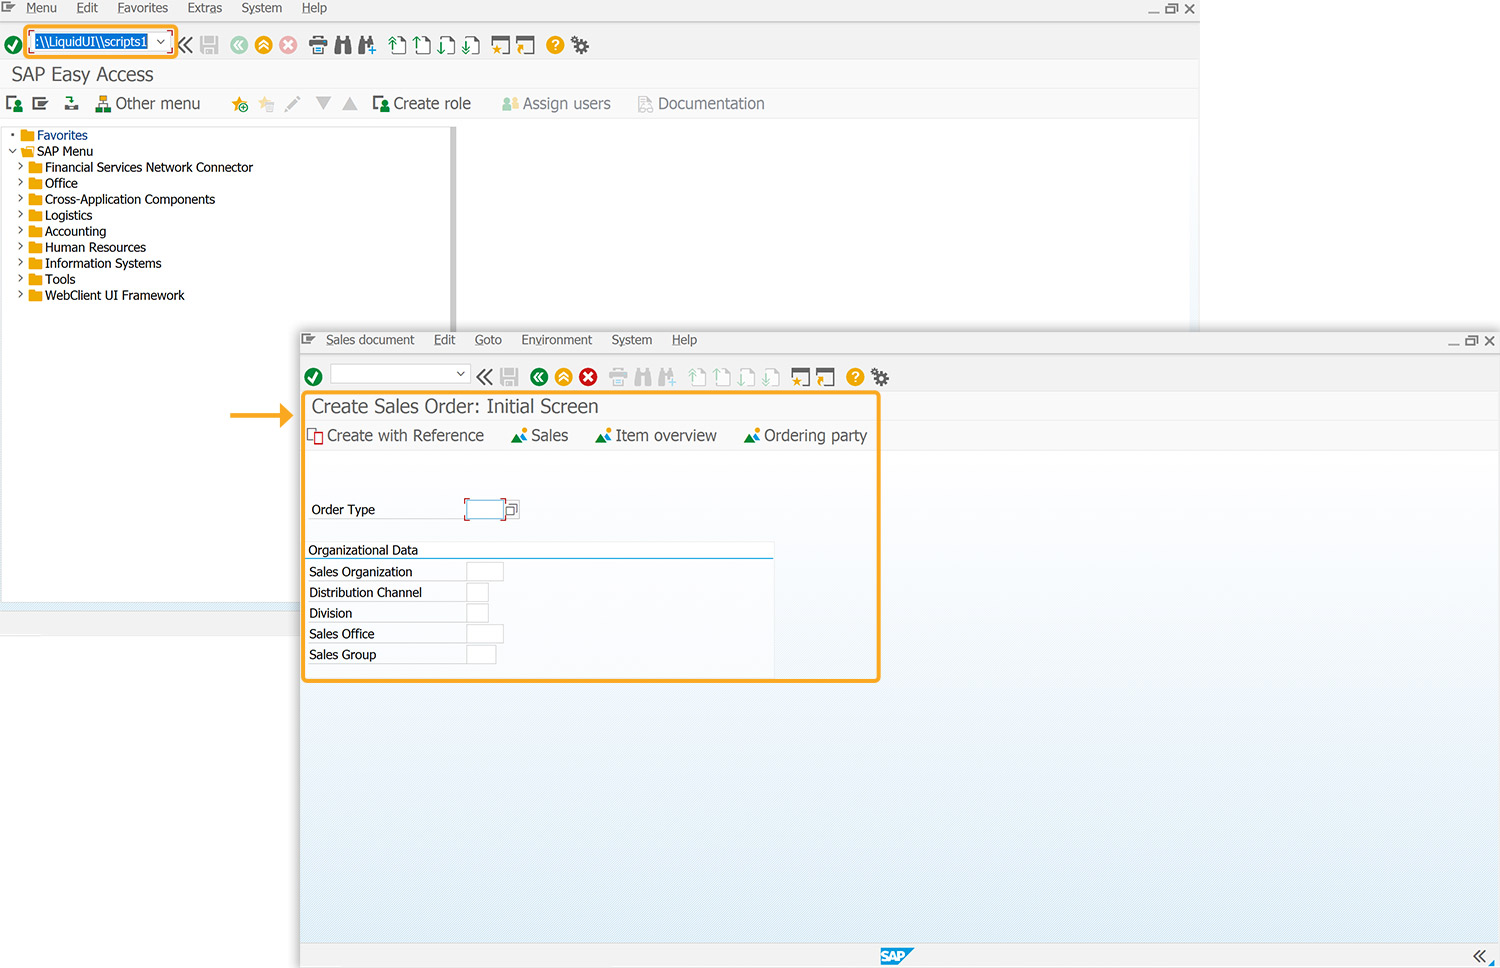
- Enter the following code in the SAP command field (Transaction field) and hit Enter. This executes the VA01 script file from the specified directory (c:\\LiquidUI\\scripts1) and navigates to Create Sales Order: Initial Screen.
/nva01/d1=c:\\liquidui\\scripts1
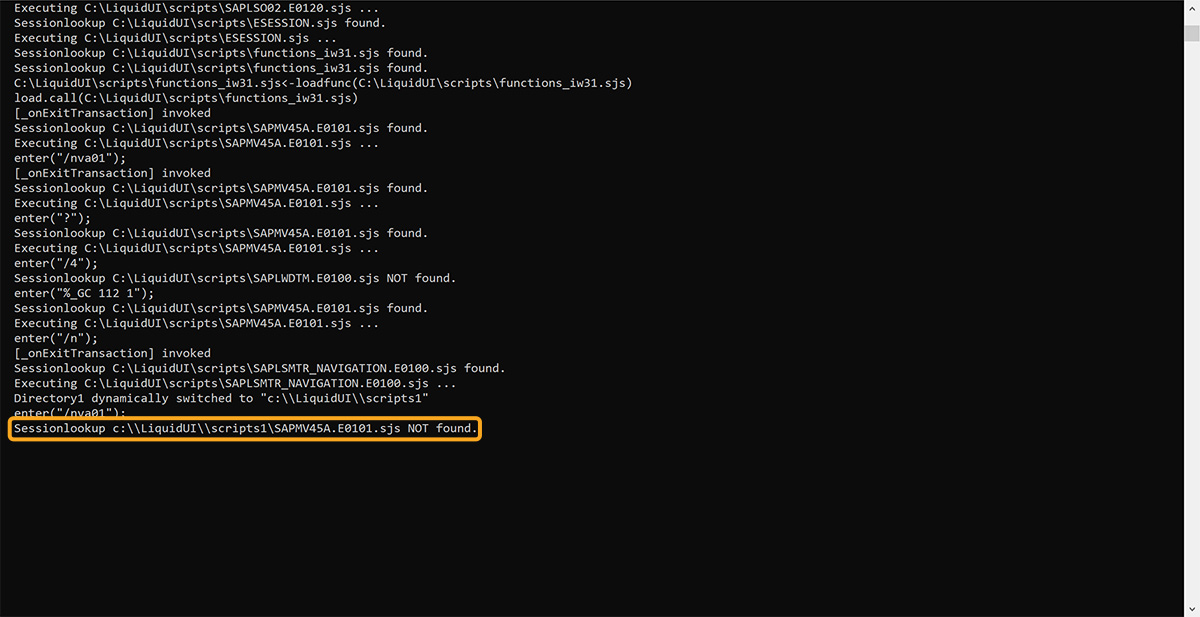
- An error message is displayed when the script file is not found in the specified folder.
/nva01/d1=c:\\liquidui\\scripts2
